
If your wired headphones are not being detected by Windows 11, don’t panic — you’re definitely not alone. This is a common issue faced by many users, and luckily, there are several proven solutions to resolve it.
In this guide, we’ll walk you through effective troubleshooting steps to help you fix the problem and get your headphones working again. Whether you’re dealing with no sound output, hardware recognition errors, or incorrect audio settings, we’ve got you covered.
Many Windows 11 users encounter problems where their wired headphones aren’t recognized after plugging them in. Below, we’ll explore some of the most reliable ways to get your headphones detected and functioning properly.
Let’s dive into the best methods to fix Windows 11 not recognizing wired headphones and restore your audio in no time.
Why Is Windows 11 Not Recognizing My Wired Headphones?
If your wired headphones are not recognized by Windows 11, the issue could stem from a combination of hardware and software-related problems. Here are some of the most common reasons this happens:
- A damaged or faulty headphone cable that disrupts a stable connection
- A malfunctioning or loose audio jack
- Outdated, missing, or corrupted audio drivers
- Incorrect audio output settings or default device configurations
Before jumping into solutions, it’s important to identify whether Windows 11 is failing to detect your headphones or if another underlying issue is at play. A systematic approach will help pinpoint the cause and lead to a quicker fix.
How to Check if Windows 11 Detects Your Headphones
To determine if Windows 11 recognizes your wired headphones, follow these simple steps:
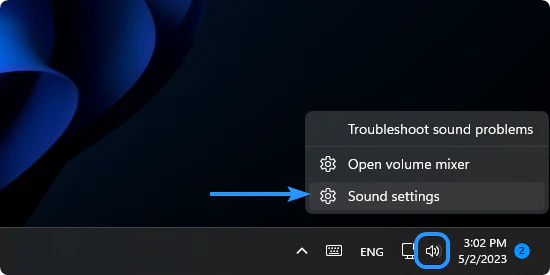
- Right-click the sound icon in the system tray and select “Sound settings.”
- Under the Output section, look for your headphones in the list of available audio devices.
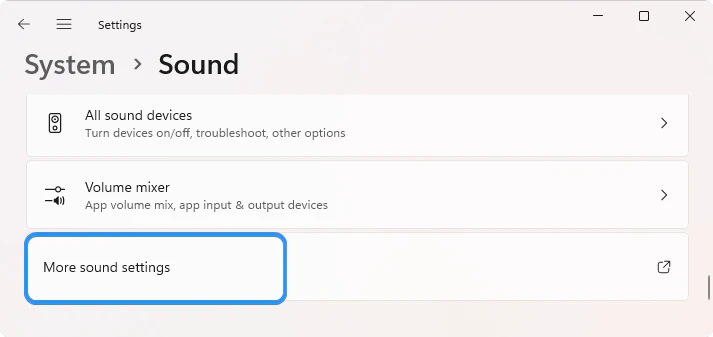
- If they’re not listed, scroll down and click on “More sound settings.”
- In the Playback tab, check if your headphones appear there.
If your headphones do not appear in the list, it means that Windows 11 hasn’t detected them, which could point to a hardware issue or a system misconfiguration.
In that case, move on to the troubleshooting methods listed below to resolve the issue and get your headphones working properly again.
How to Fix Windows 11 Not Detecting or Recognizing Wired Headphones
If Windows 11 is not detecting your wired headphones, don’t worry — there are several troubleshooting methods you can try to get your audio working again. Below are some of the most effective solutions to resolve this issue.
1. Restart Your Computer
Sometimes, a simple restart can resolve a surprising number of issues — including when Windows 11 doesn’t recognize your wired headphones. Restarting helps reset background processes and services that may be interfering with audio device detection.
Here’s how to do it:
- Click the Start menu in your taskbar (or press the Windows key on your keyboard).
- Select the Power icon.
- Click Restart from the menu.

- If prompted to close any apps, either select “Restart anyway” or close them manually after saving your work.
🔄 After your system reboots, plug in your headphones and check if they’re now recognized.
If you’re still facing the same problem, don’t worry — continue with the next solution below.
2. Check for Hardware Issues
If your wired headphones are still not recognized by Windows 11, the issue might be hardware-related. A loose cable, damaged headphone jack, or dirty port can easily prevent proper detection by your system.
Here’s what you can do:
- Inspect your headphone jack for any signs of dust, lint, or debris. Use a small brush or cotton swab to gently clean the port.
- Check for visible damage to the headphone plug or the laptop/PC’s audio port. A bent connector or a loose jack might be interfering with the connection.
- Try connecting your headphones to another device (like a phone or tablet) to verify if they work properly.
🔧 If your headphones don’t work on another device, the problem may lie with the headphones themselves. But if they do work elsewhere, it’s more likely that Windows 11 is causing the detection issue.
Addressing hardware issues early can save you time and help avoid unnecessary software troubleshooting.
3. Run the Playing Audio Troubleshooter in Windows 11
If your wired headphones are not working in Windows 11, using the built-in Playing Audio Troubleshooter can help detect and resolve common audio issues automatically.
Here’s how to run the troubleshooter:
- Open the Settings app by clicking the Start menu and selecting the gear icon, or press Windows + I on your keyboard.
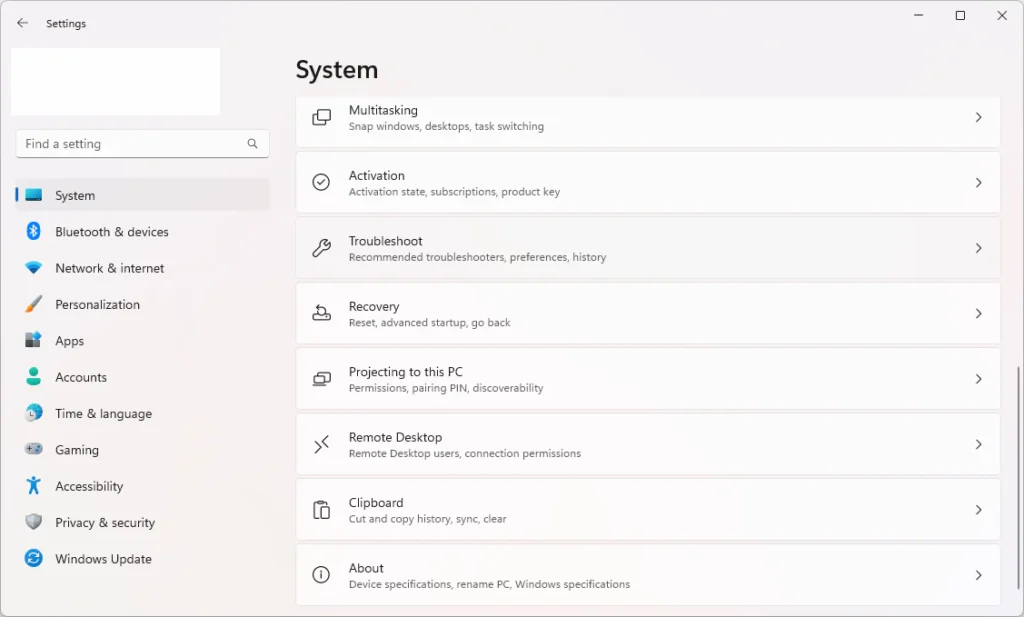
- Click on System in the left-hand panel.
- Select Troubleshoot from the list of options.
- Click on Other troubleshooters.

- Scroll down and find the “Playing Audio” troubleshooter, then click the Run button.

🛠️ The Playing Audio Troubleshooter will scan your system for any audio playback issues, including problems with the Volume Mixer, device drivers, and headphone recognition.
Follow the on-screen instructions to apply any recommended fixes.
Once complete, restart your computer to ensure all changes are fully applied. After rebooting, plug in your headphones again and check if the issue is resolved.
4. Set Your Wired Headphones as the Default Playback Device in Windows 11
If Windows 11 is not recognizing your wired headphones, it might be because they’re not set as the default playback device. You can manually configure this through the Sound settings to ensure that your system routes audio correctly.
Follow these steps to set your headphones as the default audio device:
- Right-click the Volume icon in the taskbar (located in the bottom-right corner near the clock).
- Select Sound settings from the context menu.
- Scroll down and click on More sound settings. This opens the classic Sound Control Panel.
- In the Playback tab, locate your wired headphones in the list of available audio devices.
- Click on them once to highlight, then click the “Set Default” button (or use the downward arrow next to it and choose Default Device).
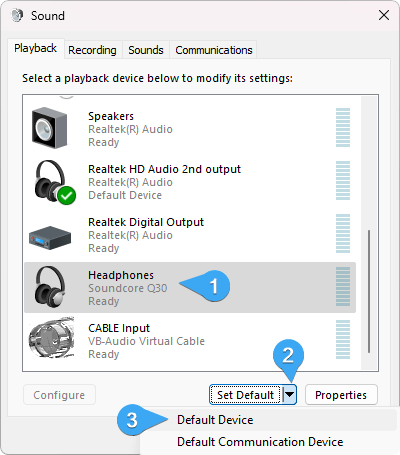
- Click OK to apply the changes and close the window.
🎧 Once your headphones are set as the default output device, try playing some audio to see if they’re now recognized and working.
This simple setting often resolves cases where Windows 11 outputs sound to the wrong device, especially when multiple playback devices are connected.
5. Update Your Audio Drivers in Windows 11
One of the most common reasons Windows 11 doesn’t recognize wired headphones is due to outdated, missing, or corrupted audio drivers. Keeping your audio drivers updated ensures compatibility with your operating system and fixes known bugs that might be causing issues.
Follow these steps to update your sound drivers:
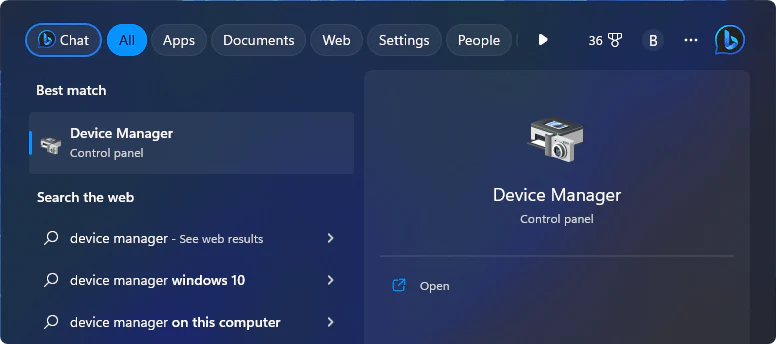
- Click the search icon in the taskbar and type “Device Manager”. Select the first result that appears.
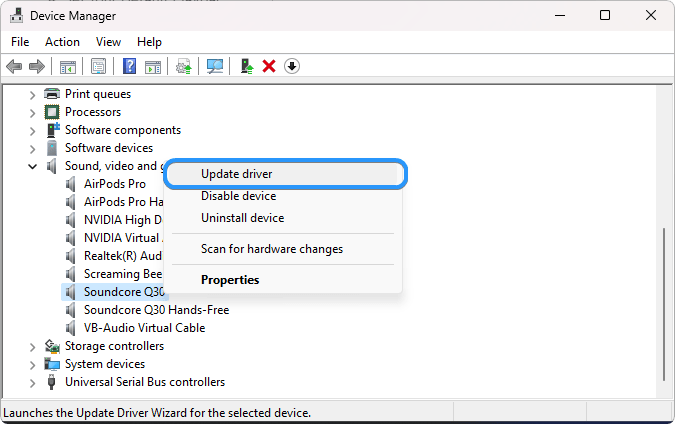
- In the Device Manager window, locate the category “Sound, video and game controllers” and click the arrow to expand it.
- Find your primary audio device (e.g., Realtek, Intel, or other), then right-click on it.
- Choose “Update driver” from the context menu.
- In the update window, select “Search automatically for drivers.” Windows will now search for and install the latest driver available.
💡 After updating, restart your PC to apply the changes and check if your wired headphones are now recognized by Windows 11.
If Windows doesn’t find a new driver, you can also visit the manufacturer’s website (like Realtek, Dell, HP, etc.) to manually download the latest driver compatible with your device.
6. Reinstall Audio Drivers in Windows 11
If your wired headphones are still not recognized by Windows 11, you may be dealing with corrupted or improperly installed audio drivers. In this case, reinstalling your audio drivers can often resolve the issue.
Here’s how to safely reinstall audio drivers:
- Open Device Manager by typing it into the search bar on the taskbar and selecting the top result.
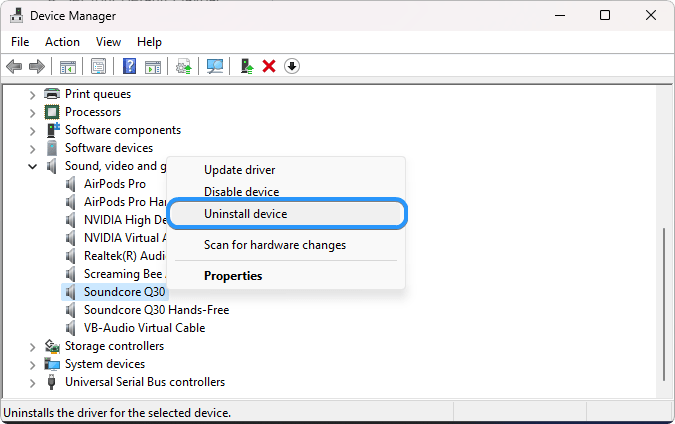
- Expand the “Sound, video and game controllers” section.
- Right-click on your audio driver (e.g., Realtek, Intel, or other) and choose “Uninstall device.”
- Confirm the uninstallation and follow any on-screen prompts to remove the driver completely.
🛠️ Once uninstalled, do one of the following:
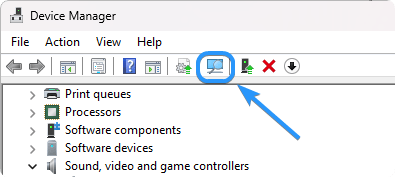
- In Device Manager, click on the “Action” menu at the top and select “Scan for hardware changes.” This prompts Windows to automatically reinstall the missing audio driver.
- Alternatively, download the latest audio driver manually from your PC or motherboard manufacturer’s website (like Realtek, HP, Dell, etc.) and install it.
After reinstalling, restart your computer and reconnect your headphones to check if they are now detected.
Reinstallation is especially helpful when driver files are damaged or misconfigured, ensuring that Windows 11 has a clean and updated audio setup.
7. Run the System File Checker (SFC) in Windows 11
If your wired headphones are still not recognized by Windows 11, it could be due to corrupted or missing system files affecting audio functionality. Fortunately, Windows includes a built-in utility called the System File Checker (SFC) that can scan and repair critical system files.
Follow these steps to run the SFC scan:
- Open the search bar by clicking the magnifying glass icon on your taskbar, or press Windows + S as a shortcut.
- Type “Command Prompt” into the search field.
- Right-click on Command Prompt and select “Run as Administrator.”
- When prompted by User Account Control (UAC), click Yes to allow administrative access.
- In the Command Prompt window, type the following command and press Enter:
sfc /scannow

🧰 Windows will now begin scanning your system for corrupted or altered files. This process may take several minutes.
Once the scan is complete:
- If issues are found, the System File Checker will attempt to fix them automatically.
- After the scan finishes, restart your computer to apply any repairs.
Running this tool can be especially helpful if system-level errors are interfering with how Windows 11 detects external audio devices like headphones.
8. Update Windows 11 to Fix Headphone Detection Issues
Keeping your Windows 11 operating system up to date is essential — especially when dealing with compatibility problems, such as wired headphones not being recognized. Microsoft frequently releases updates that fix bugs, enhance device compatibility, and improve system stability.
Follow these steps to check for and install the latest Windows 11 updates:
- Click the Windows icon in the lower-left corner of your screen or press Windows + I to open the Settings app.
- In the left-hand menu, select Windows Update.
- Click the “Check for updates” button.
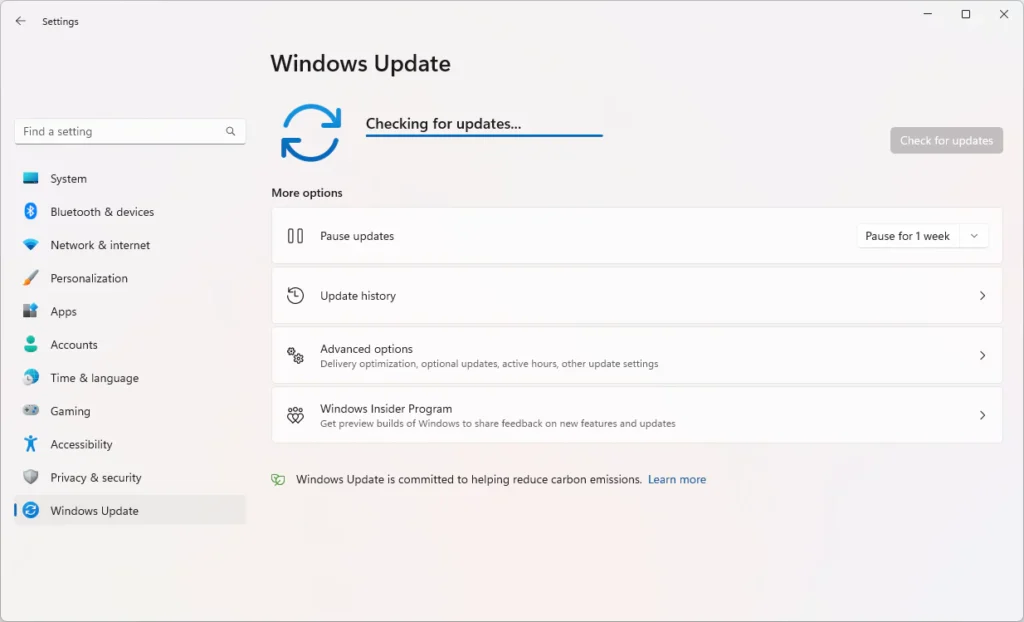
- If updates are found, Windows will begin downloading them automatically.
- Once complete, follow the prompts to restart your PC and apply the updates.
🆕 Installing the latest Windows 11 updates can resolve audio driver conflicts, system bugs, and software compatibility issues that might be preventing your system from detecting your headphones.
Regularly updating your system ensures that you’re using the most stable and secure version of Windows — and that your hardware accessories like headphones work seamlessly.
9. Update Your BIOS to Fix Headphone Detection Issues
In some cases, your BIOS (Basic Input/Output System) may need to be updated to ensure full compatibility with Windows 11 and resolve issues with hardware detection, including your wired headphones. An outdated BIOS can sometimes interfere with how your system recognizes devices connected to your PC.
Follow these steps to check your current BIOS version and update it if necessary:
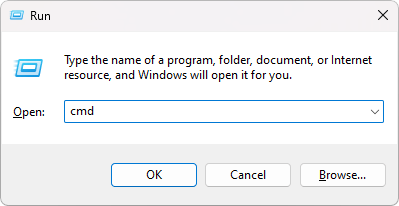
- Press the Windows + R keys on your keyboard to open the Run utility.
- Type “cmd” (without quotation marks) and press Enter to open Command Prompt.
- In the Command Prompt window, enter the following commands one by one, pressing Enter after each:
systeminfo | findstr /I /c:bioswmic bios get manufacturer, smbiosbiosversion
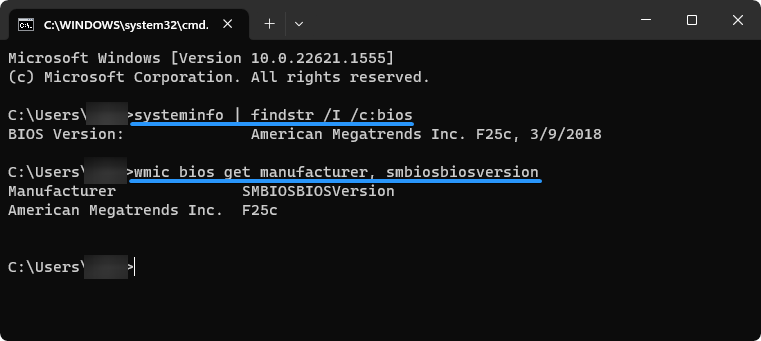
- These commands will display your current BIOS version and manufacturer details.
🖥️ With this information, visit your PC or motherboard manufacturer’s website to check for any available BIOS updates. If a newer version is available, follow the manufacturer’s instructions to safely update your BIOS.
Important: Updating your BIOS can be risky if done incorrectly. Be sure to carefully follow the instructions provided by the manufacturer to avoid potential damage.
Conclusion
It can be frustrating when Windows 11 doesn’t recognize your wired headphones, but fortunately, there are several effective solutions to help you fix this issue. By following the troubleshooting steps outlined in this article, you can diagnose and resolve the problem, ensuring your headphones are recognized and functional again.
We hope these tips have been helpful in getting your headphones working with Windows 11. If you encounter any further issues or have additional questions, feel free to contact us for assistance. We’re here to help!
Good luck with your Windows 11 troubleshooting, and enjoy your listening experience!
One more thing
If you’re in search of a software company that embodies integrity and upholds honest business practices, your quest ends here at Ecomkeys.com. As a Microsoft Certified Partner, we prioritize the trust and satisfaction of our customers. Our commitment to delivering reliable software products is unwavering, and our dedication to your experience extends far beyond the point of sale. At Ecomkeys.com, we provide a comprehensive 360-degree support system that accompanies you throughout your software journey. Your trust is our foundation, and we’re here to ensure that every interaction with us is a positive and trustworthy one.