
System crashes should never be ignored. If you’ve recently encountered the MEMORY_MANAGEMENT stop code on a Blue Screen of Death (BSoD), you’re in the right place to understand what it is and how to prevent it. This is a common Windows 10 BSoD error that many users have reported encountering.
The MEMORY_MANAGEMENT stop code is a BSoD error that relates to issues with your system’s memory management. It points to where the error occurred in your system’s memory. Fortunately, troubleshooting this issue is simple. In this guide, you’ll learn why memory management is crucial and how to fix the MEMORY_MANAGEMENT stop code BSoD error in Windows 10.
What Is Memory Management in Windows 10?
Memory management plays a crucial role in your Windows 10 operating system. It controls and coordinates your computer memory, ensuring RAM usage remains stable. It allocates memory blocks to various running applications as needed by each program.
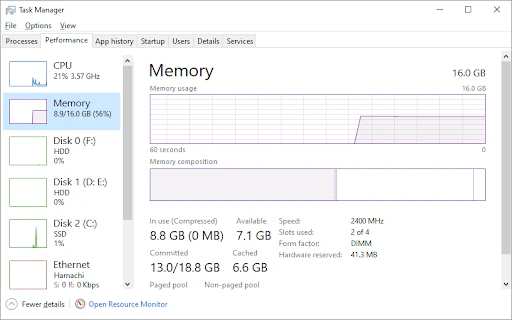
In simple terms, memory management optimizes your computer’s memory usage, enhancing overall system performance. You can view memory usage through Task Manager > Memory.
What Happens When Memory Management Fails?
When the memory management process fails, rogue processes can consume all of your computer’s available memory, leaving no reserved RAM for other operations. This can lead to serious system problems, including service failures and crashes, ultimately resulting in a Blue Screen of Death (BSoD).
If this occurs, your screen will display the MEMORY_MANAGEMENT stop code, indicating a memory issue with your system.
What Causes the Stop Code MEMORY_MANAGEMENT BSoD Error?
The MEMORY_MANAGEMENT error points to a significant issue with your PC’s system memory. This is usually related to hardware problems, but can also stem from software issues. In rare cases, it may indicate problems with your firmware.
So, your computer has a memory issue. It could be a one-time occurrence or a more serious, ongoing memory management problem. Here are some common causes for the MEMORY_MANAGEMENT stop code BSoD error:
- A one-time memory error
- Software issues (e.g., corrupted files in the system directory)
- Software or hardware conflicts
- RAM errors or faulty physical memory sticks
- Issues with new hardware (e.g., a graphics card)
- Outdated hardware or hardware failure
- Faulty drivers, including missing or outdated drivers
- Disk errors
- Firmware issues, or virus/malware infections
- Outdated Windows 10 OS
These are some known causes of the memory management BSoD error, but other factors could also be at play in your unique case. Even if your situation seems different, the troubleshooting methods in this guide will help you restore your system.
How to Fix the MEMORY_MANAGEMENT Stop Code in Windows 10
Encountering the MEMORY_MANAGEMENT error for the first time can be alarming, especially if you think you’ve lost data or project progress. The good news is, there’s no need to panic — this issue can be fixed.
Start by restarting your system and check if the error persists. If it doesn’t return after the restart, it might have just been a one-time glitch. However, even in this case, it’s wise to investigate the error further and follow the solutions below to prevent it from recurring. In this guide, we’ll help you fully resolve the MEMORY_MANAGEMENT stop code with 9 practical solutions.
Method 1: Scan Your PC for Possible Virus or Malware Infection
One of the common causes of system errors, including the MEMORY_MANAGEMENT stop code, is malware. Malicious programs can wreak havoc on your system, leading to errors like this. Although rare, a virus infection might be behind the memory management error.
Scan your system with a quality antivirus program. If you don’t have a third-party antivirus program installed on your PC, use the built-in Windows Defender.
How to Scan for Viruses and Malware
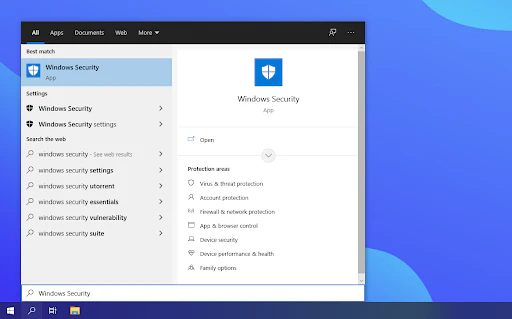
1️⃣ Open Windows Security:
- Click the search bar on your taskbar (or press Windows + S), then type in “Windows Security” and open it from the search results.
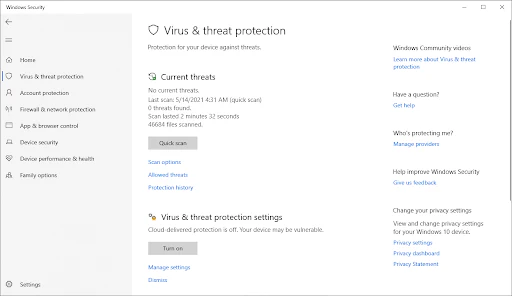
2️⃣ Go to Virus & Threat Protection:
- Switch to the Virus & Threat Protection tab from the home screen or the left-side menu.
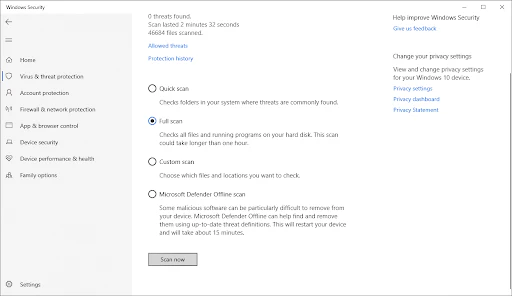
3️⃣ Perform a Full Scan:
- Click on the Scan Options link, then select Full scan. This will scan every file on all your drives to detect potential threats. Keep in mind that this scan could take 1-2 hours, depending on how many files are on your system.
4️⃣ Start the Scan:
- Click on the Scan now button to begin the process. If Windows Defender detects any threats, it will either quarantine or remove them automatically.
5️⃣ Review the Results:
- After the scan, check the results to see which files were found to be infected and removed.
By performing this scan, you can ensure that no malware is causing the MEMORY_MANAGEMENT error. If the error persists after the scan, move on to the next method to troubleshoot further.
Method 2: Run Windows Memory Diagnostic Tool
The Windows Memory Diagnostic tool is a built-in feature in Windows 10 designed to identify and resolve memory-related issues. It will specifically test your RAM to determine if any problems are affecting its functionality, helping you pinpoint potential causes of the MEMORY_MANAGEMENT stop code.
How to Run Windows Memory Diagnostic Tool
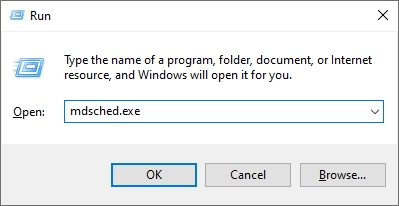
1️⃣ Open the Run utility:
- Press Windows + R on your keyboard to open the Run dialog.
2️⃣ Launch the Memory Diagnostic Tool:
- Type in “mdsched.exe” and click OK.
3️⃣ Start the Memory Scan:
- Choose “Restart now and check for problems (recommended)” to begin a memory scan immediately. Make sure to save all files and close applications before proceeding.
Alternatively, you can choose “Check for problems the next time I start my computer” to schedule the scan for later.

4️⃣ Let the Tool Scan Your Memory:
- The Windows Memory Diagnostics Tool will automatically start testing your system’s memory. The process may take a few minutes, so be patient and let it complete the test.
5️⃣ Review the Results:
- If the diagnostic tool doesn’t find any errors either during the test or the next time you log in, it’s likely that your PC’s memory is functioning correctly. If no issues are detected, continue troubleshooting with the next methods in this guide to resolve the MEMORY_MANAGEMENT error.
By running the Windows Memory Diagnostic Tool, you can rule out RAM issues as the cause of your MEMORY_MANAGEMENT stop code error.
Method 3: Update Your Drivers
Outdated or faulty hardware drivers are a common cause of the MEMORY_MANAGEMENT stop code error. If a specific driver is causing the issue, updating your drivers can resolve the error. You can either manually update individual drivers or update all your hardware drivers at once.
How to Check for Driver Updates
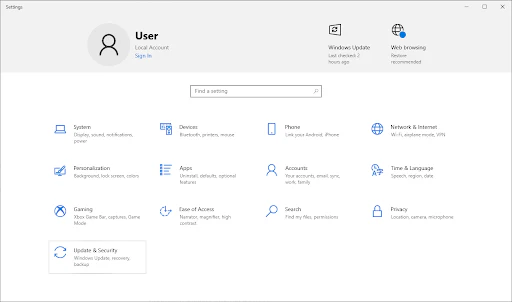
1️⃣ Open the Start menu:
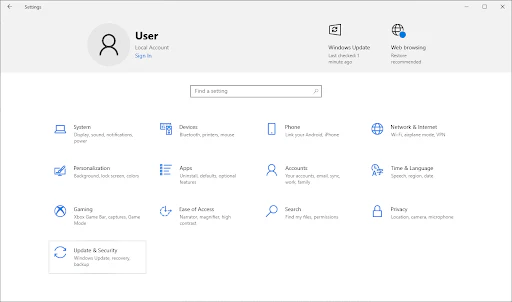
- Click on the Windows icon in the bottom left corner of your screen, or press Windows + I to open the Settings menu.

2️⃣ Go to Update & Security:
- Click on the Update & Security tile in the Settings menu.
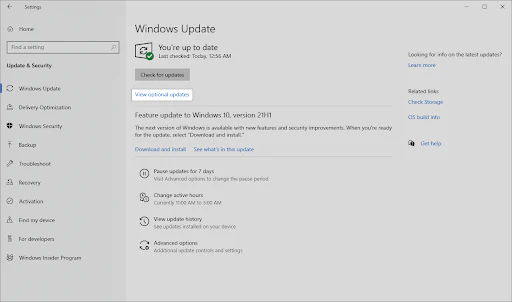
3️⃣ Check for Updates:
- In the Windows Update section, click on View optional updates if available.
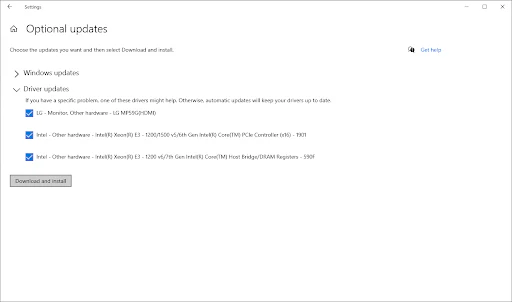
4️⃣ Update Drivers:
- Expand the Driver updates section and review which drivers need updating. Place a checkmark next to the drivers you want to update, then click the Download and install button.
5️⃣ Allow Windows to Update:
- Let Windows 10 download and install the necessary driver updates. After the update is complete, restart your computer to apply the changes.
How to Update Specific Drivers
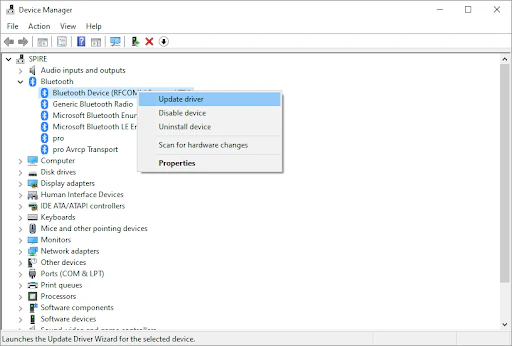
If you know which drivers are causing the MEMORY_MANAGEMENT stop code, you can update them individually. Focus on updating video card drivers and the PCI Memory Controller driver first. If you’re unsure which drivers are causing the issue, look for devices with a yellow exclamation mark next to them in Device Manager.
1️⃣ Open Device Manager:
- Press Windows + X on your keyboard and select Device Manager from the WinX menu.

2️⃣ Update a Specific Driver:
- Right-click on any device driver you want to update, then select Update driver from the context menu.
3️⃣ Choose Update Method:
- You can either let Windows 10 search for a driver automatically or manually browse for a driver file on your computer.
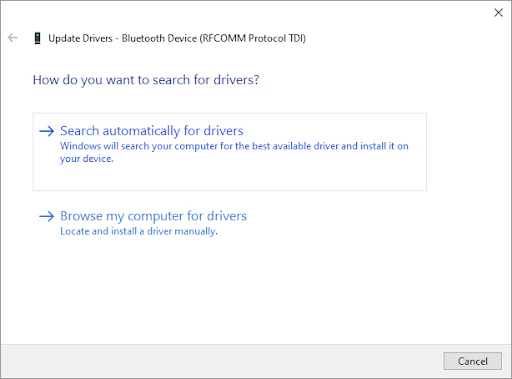
4️⃣ Complete the Installation:
- Wait for the driver update to complete, then repeat the process for any other drivers you want to update. After updating the drivers, check if the MEMORY_MANAGEMENT error is resolved.
By updating your drivers, you can potentially eliminate driver-related issues that are causing the MEMORY_MANAGEMENT stop code.
Method 4: Scan and Repair Disk Errors
Disk errors, such as bad disk sectors or NTFS volume corruption, can lead to the MEMORY_MANAGEMENT blue screen error. The Check Disk (chkdsk) tool can scan your system for these errors and repair them, potentially resolving the Blue Screen of Death (BSoD) caused by disk-related issues.
How to Scan and Repair Disk Errors Using chkdsk
1️⃣ Open the Search Bar:
- Click on the magnifying glass icon in your taskbar or press Windows + S to open the Search bar.
2️⃣ Launch Command Prompt as Administrator:
- Type Command Prompt in the search box, then right-click on it in the search results and select Run as Administrator.
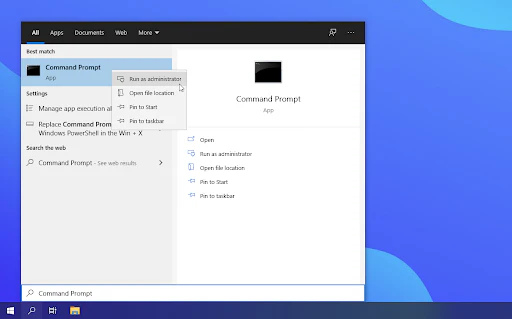
3️⃣ Allow Administrative Permissions:
- When prompted by User Account Control (UAC), click Yes to grant administrative privileges.
4️⃣ Run the chkdsk Command:
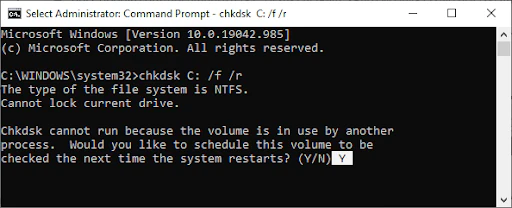
- In the Command Prompt window, type the following command:
chkdsk C: /f /rThis will scan and repair errors on your C: drive. If you need to scan other drives, simply replace C: with the appropriate drive letter.
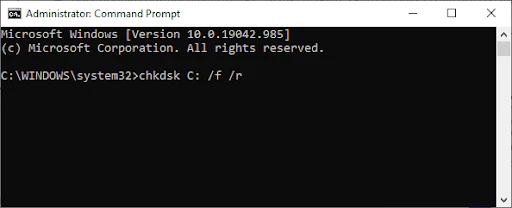
5️⃣ Handle the “Chkdsk Cannot Run” Error (if applicable):
- You may encounter the “Chkdsk cannot run because another process uses the drive” error. If so, press Y, then Enter. Chkdsk will run automatically and attempt to fix any errors the next time you restart your computer.
6️⃣ Restart Your Computer:
- After pressing Y, restart your device to allow chkdsk to scan and repair disk issues during the boot process.
7️⃣ Let chkdsk Finish the Process:
- Wait for chkdsk to complete the analysis and repair any errors. This may take some time depending on your disk’s size and the errors detected.
By running the Check Disk (chkdsk) tool, you can address disk-related issues that might be triggering the MEMORY_MANAGEMENT stop code error and resolve potential BSoD problems.
Method 5: Repair Corrupted System Files
Corrupted system files can lead to issues with Memory Management, which often causes the MEMORY_MANAGEMENT BSOD error. Fortunately, the System File Checker (SFC) is a built-in tool in Windows 10 that can automatically detect and repair corrupted system files, helping to resolve these errors and potentially fix the BSoD.
How to Repair Corrupted System Files Using SFC Scan
1️⃣ Open Elevated Command Prompt:
- Follow the steps in Method 4: Scan and Repair Disk Errors above to open Command Prompt as an administrator.
2️⃣ Run the SFC Scan:
- In the Command Prompt window, type the following command and press Enter to begin the scan:
sfc /scannow
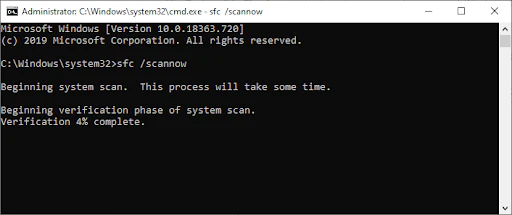
3️⃣ Wait for the Scan to Complete:
- The SFC scan will begin checking your system for corrupted or missing system files. This process may take several minutes, so be patient and allow it to complete.
4️⃣ Repair Corrupted Files:
- If the scan detects any corrupted files, it will automatically repair them. This may include fixing files that are causing Memory Management issues, ultimately resolving the MEMORY_MANAGEMENT stop code error.
5️⃣ Restart Your Computer:
- Once the SFC scan completes and repairs any issues, restart your PC to apply the changes and check if the BSoD error is fixed.
Running the SFC scan is an effective way to address corrupted system files that could be causing Memory Management errors and prevent the MEMORY_MANAGEMENT BSOD from reappearing.
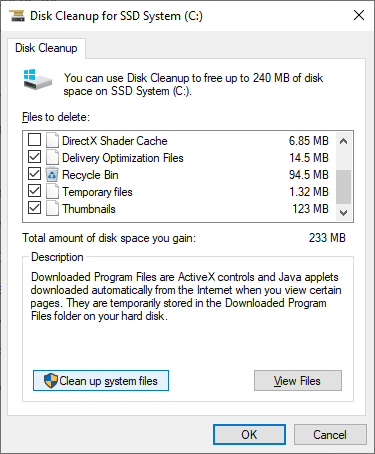
Method 6: Clear Temporary Files and Folders
Accumulating temporary files and folders can significantly slow down your Windows 10 system and may even contribute to Memory Management errors, including the MEMORY_MANAGEMENT BSOD. Cleaning up these files using the Disk Cleanup utility can help improve your PC’s performance and fix memory issues.
How to Clear Temporary Files and Folders in Windows 10
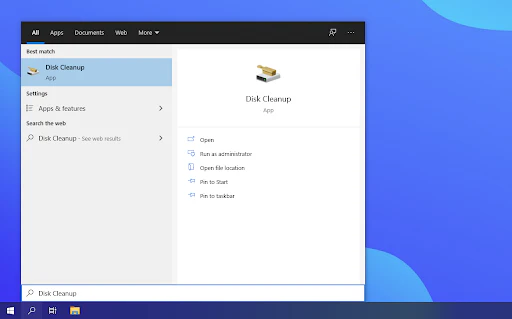
1️⃣ Open the Disk Cleanup Tool:
- Click on the search bar in your taskbar (magnifying glass icon) or press Windows + S to bring it up.
- Type Disk Cleanup and click the first result to open the tool.
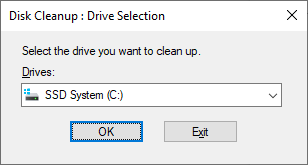
2️⃣ Select the System Drive:
- In the Disk Cleanup window, choose your system drive (usually C:) and click OK.
3️⃣ Choose Files to Delete:
- The tool will scan your drive for temporary files. In the new window, select the file categories you want to delete. Make sure to check the Temporary Internet Files and Temporary Files options.
- You can also delete other unnecessary files like Thumbnails and DirectX Shader Cache to free up more space.
4️⃣ Confirm and Delete Files:
- After selecting the files to remove, click OK.
- In the confirmation dialog, click Delete Files to begin the cleanup process.
5️⃣ Confirm Deletion:
- When prompted, confirm that you want to permanently delete the selected files by clicking Yes.
By clearing temporary files and freeing up space on your PC, you can help resolve Memory Management errors and improve system performance, potentially fixing the MEMORY_MANAGEMENT BSOD.
Method 7: Check Newly Installed Applications
Newly installed software can sometimes cause compatibility issues with your Windows 10 system or conflict with other programs. This could be the culprit behind the MEMORY_MANAGEMENT BSOD error. If you suspect a recently installed application is causing the problem, uninstalling it may resolve the issue.
How to Uninstall Newly Installed Applications
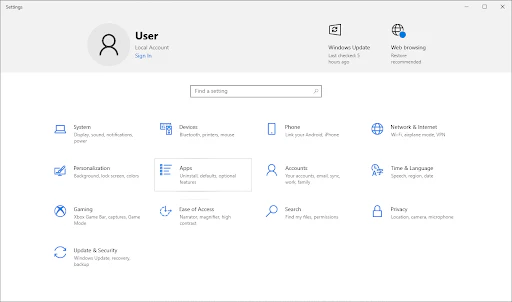
1️⃣ Open the Settings Menu:
- Click on the Windows icon in the bottom left of your screen to open the Start menu.
- Choose Settings or press Windows + I to access the settings directly.

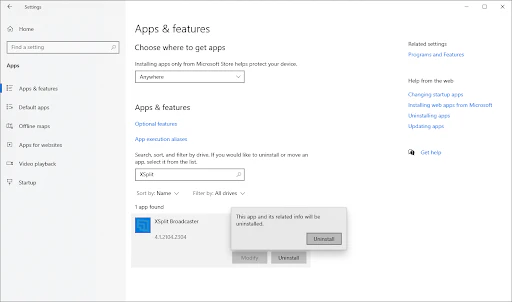
2️⃣ Access the Apps Section:
- In the Settings window, click on the Apps tile to view a list of all installed applications.
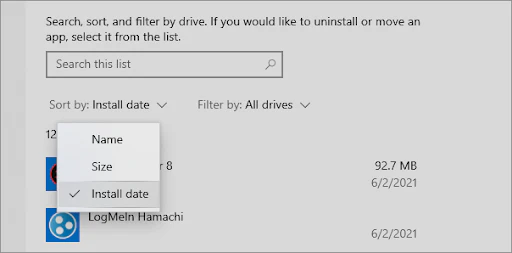
3️⃣ Sort by Install Date:
- Sort the applications by Install date to find the most recently installed programs.
4️⃣ Uninstall Problematic Apps:
- Select a newly installed app from the list, then click the Uninstall button.
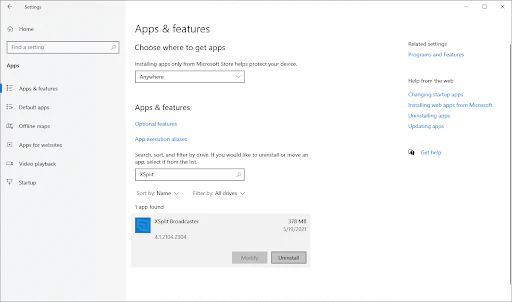
- Click Uninstall again to confirm your choice, and follow any on-screen instructions to completely remove the software.
5️⃣ Repeat for Other New Applications:
- Repeat the uninstallation process for any other suspicious or recently installed apps.
6️⃣ Restart Your Computer:
- After uninstalling the problematic applications, restart your system and check if the Blue Screen of Death error has been resolved.
By removing incompatible or conflicting software, you can eliminate one potential cause of the MEMORY_MANAGEMENT error and improve system stability.
Method 8: Install Pending Windows Updates
Sometimes, pending Windows 10 updates can contribute to the MEMORY_MANAGEMENT BSOD error. Installing the latest updates may resolve the issue and improve your system’s performance. Here’s how to check and install any pending updates:
How to Install Pending Windows Updates
1️⃣ Open the Start Menu:
- Click on the Windows icon in the bottom left corner of your screen.
- Choose Settings, or use the Windows + I shortcut to open the Settings window.

2️⃣ Access Update & Security Settings:
- Click on the Update & Security tile in the Settings window. This is where you’ll find most of your Windows Update settings.
3️⃣ Check for Pending Updates:
- Look for any pending updates that need to be installed. If updates are available, click the Install Updates button to begin the installation.
- If no updates are found, click on the Check for updates option, and let Windows 10 search for any available updates.
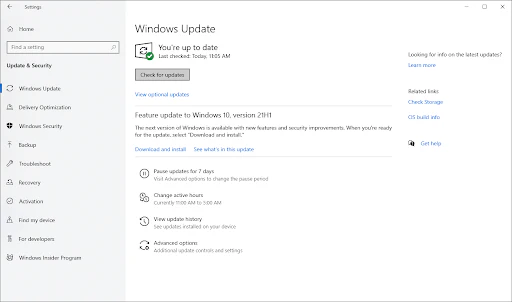
4️⃣ Download and Install Updates:
- If any new updates are found, click the Download button and allow Windows 10 to download and install the updates.

5️⃣ Regularly Check for Updates:
- It’s a good practice to have Windows 10 automatically check for updates regularly. Keeping your system updated ensures bug fixes, security patches, and the latest features are installed.
After updating your system, restart your device to see if the MEMORY_MANAGEMENT error is resolved.
Final Thoughts
If you continue to encounter issues or need further assistance, our Help Center offers a wide range of guides to help you resolve your problems. Feel free to revisit our site for more informative articles, or reach out to our experts for immediate support. We’re here to help you get your system running smoothly!
One more thing
If you’re in search of a software company that embodies integrity and upholds honest business practices, your quest ends here at Ecomkeys.com. As a Microsoft Certified Partner, we prioritize the trust and satisfaction of our customers. Our commitment to delivering reliable software products is unwavering, and our dedication to your experience extends far beyond the point of sale. At Ecomkeys.com, we provide a comprehensive 360-degree support system that accompanies you throughout your software journey. Your trust is our foundation, and we’re here to ensure that every interaction with us is a positive and trustworthy one.