Are you experiencing the “Windows can’t connect to this network” error on your Windows 10 computer? This issue can be extremely frustrating, especially if you need internet access for work or school. In this guide, we’ll walk you through 10 proven solutions to resolve this problem.
It’s incredibly annoying when Windows won’t connect to a network, even when your Wi-Fi signal is strong. You might repeatedly see the “Windows can’t connect to this network” error message, but don’t worry—there are multiple fixes available. This article covers 10 troubleshooting steps to restore your internet connection.
Many Windows users have faced this issue over the years, but you can find effective solutions right here. Some fixes are quick and easy, while others may require a bit of technical know-how. But don’t stress—we’ve got you covered!
Keep reading to discover the best ways to fix Windows network connection issues and get back online quickly.
What Causes the “Windows Can’t Connect to This Network” Error?
Windows errors typically stem from multiple factors, and the “Windows can’t connect to this network” issue is no exception. The cause of this error can vary from one computer to another, but some common culprits are more likely to be responsible.
Here are some frequent reasons why Windows 10 might fail to connect to a network:
- Incorrect Wi-Fi credentials (wrong password, SSID, etc.)
- Unplugged or loose wired connection
- Device is out of Wi-Fi range
- Wi-Fi interference or issues with your internet provider
- Outdated, missing, or corrupted network adapter drivers
- Faulty router, damaged Ethernet cable, or other hardware failures
- Other hardware malfunctions
Additionally, incorrect Windows settings, overcrowded networks, and conflicting apps can contribute to Wi-Fi connectivity problems. Since there are multiple potential causes, troubleshooting will require a step-by-step approach to identify and fix the issue.
Solved: Windows Can’t Connect to This Network
If you’re experiencing the “Windows can’t connect to this network” error, try these proven solutions to restore your internet connection. These steps are based on Windows 10, but they also apply to Windows 11 and Windows 8.
Method 1: Forget and Reconnect to the Wi-Fi Network
One of the simplest ways to fix this issue is to remove the network from your device and reconnect to it.
Follow these steps:
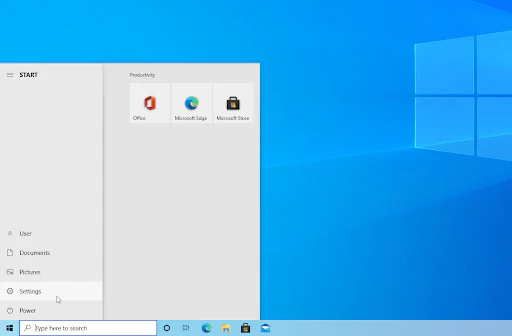
- Click the Windows icon in the bottom-left corner to open the Start menu.
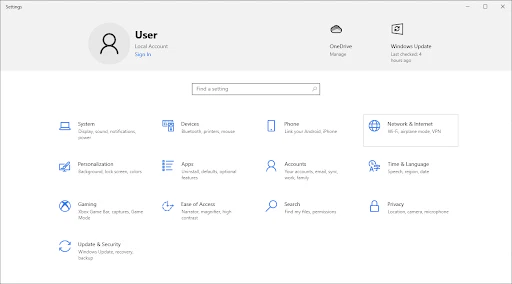
- Select Settings (or press Windows + I on your keyboard).

- Click on the Network & Internet tile.
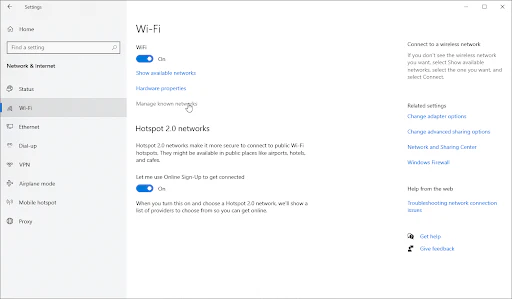
- Switch to the Wi-Fi tab and click Manage known networks.
- Find the Wi-Fi network you’re having trouble with and click Forget. This removes the saved network profile.
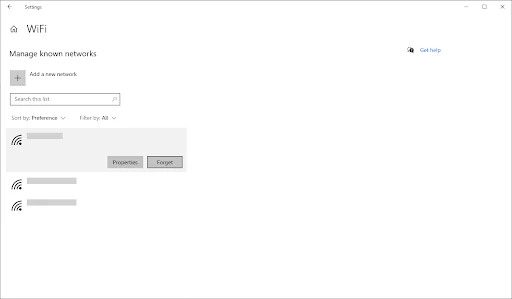
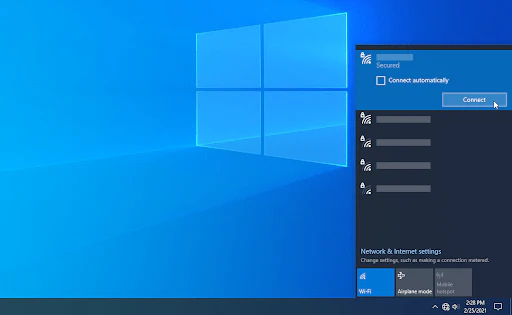
- Click the Wi-Fi icon in your system tray and select the same network.
- Click Connect and enter your Wi-Fi password if prompted.
After completing these steps, check if you can successfully connect to the network. If the issue persists, proceed to the next troubleshooting method.
Method 2: Toggle Airplane Mode On and Off
Some users have reported that simply turning Airplane mode on and off can resolve the “Windows can’t connect to this network” error. If your device supports Airplane mode (such as a laptop), this quick fix may help restore your internet connection.
Follow these steps:
- Click on the Network icon in your taskbar.
- If Airplane mode is enabled, the icon may appear as an airplane symbol.
- If you don’t see the icon, click the arrow (^) to view hidden tray icons.

- Check if the Airplane mode tile is turned on.
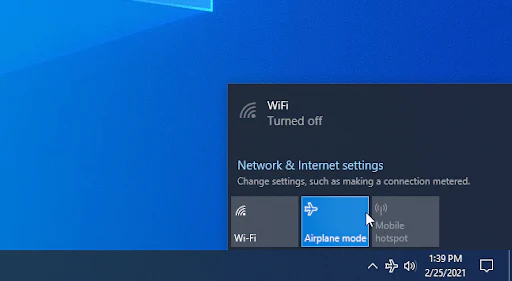
- If it’s enabled, click the tile to turn Airplane mode off.
- Wait a few seconds, then check if your Wi-Fi networks reappear.
- Try reconnecting to your network to see if the issue is resolved.
If this method doesn’t work, proceed to the next troubleshooting step.
Method 3: Update Your Drivers
Outdated or missing network drivers are a common cause of the “Windows can’t connect to this network” error. Keeping your drivers up to date ensures that your system can properly communicate with your network hardware.
You can update your drivers automatically or manually—choose the method that works best for you.
How to Automatically Update Drivers on Windows
Windows Update includes a feature that allows you to automatically update outdated drivers. Here’s how to do it:
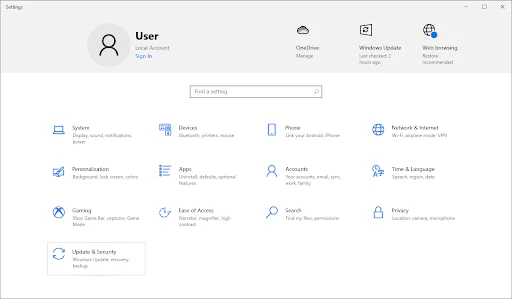
- Open the Start menu by clicking the Windows icon in the lower-left corner.
- Select Settings (or press Windows + I on your keyboard).
- Click on Update & Security to access Windows Update settings.

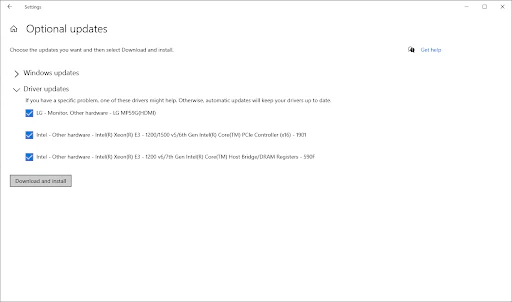
- Navigate to the Windows Update section and click on View optional updates (if available).
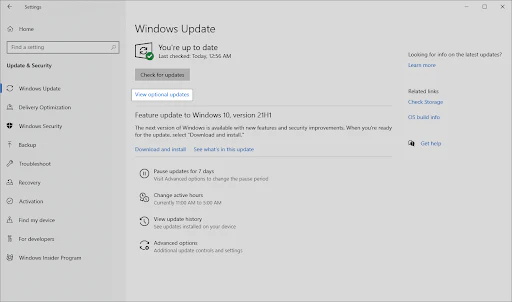
- Expand the Driver Updates section to check for available updates.
- Select the drivers you want to update and click Download and Install.
- Wait for Windows to update your drivers and then restart your computer.
How to Manually Update Drivers on Windows
If you prefer to manually update your drivers, follow these steps:
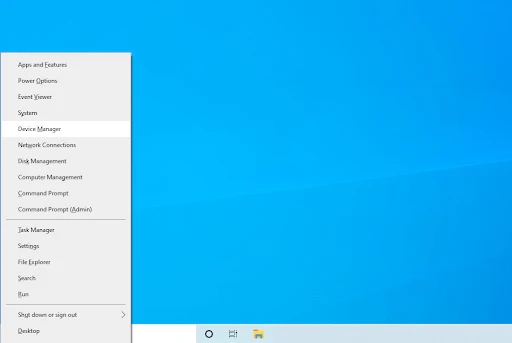
- Press Windows + X on your keyboard and select Device Manager from the menu.
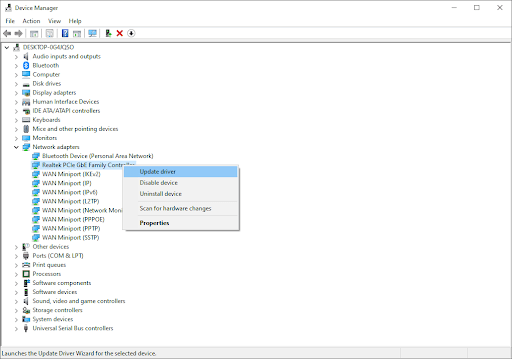
- Expand the Network adapters category.
- Right-click on your current network adapter and select Update driver.
- Choose an update method:
- Search automatically for drivers – Windows will find and install the latest driver.
- Browse my computer for drivers – Manually install a driver file you’ve downloaded from a trusted source.
After updating the driver, restart your computer and check if your network connection is restored. If not, try the next troubleshooting method.
Method 4: Reinstall Your Network Adapter Driver
If updating your network adapter driver didn’t resolve the “Windows can’t connect to this network” error, try reinstalling it. This process removes any corrupted driver files and allows Windows to install a fresh, working version automatically.
Follow these steps to reinstall your network adapter driver:
- Press Windows + X on your keyboard and select Device Manager from the menu.
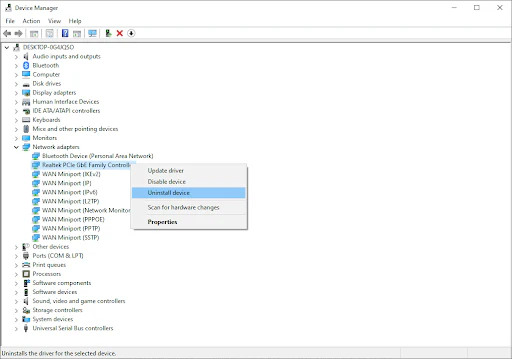
- Expand the Network adapters category.
- Right-click on the adapter you’re currently using and select Uninstall device from the context menu.
- Restart your computer.
- After rebooting, Windows will automatically detect and reinstall the default network driver.
Once the driver is reinstalled, try connecting to your network again to check if the issue is resolved. If not, proceed to the next troubleshooting method.
Method 5: Run the Network Troubleshooter
Windows includes built-in troubleshooters to help diagnose and fix connectivity problems. Running the Network Troubleshooter can automatically detect and resolve the “Windows can’t connect to this network” error.
Follow these steps to run the Network Troubleshooter:
- Click the Windows icon in the bottom-left corner to open the Start menu.
- Select Settings (or press Windows + I on your keyboard).
- Click on Update & Security to access troubleshooting options.
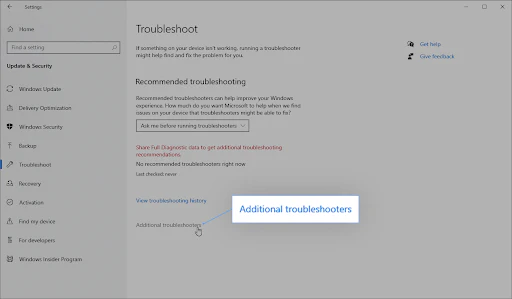
- Switch to the Troubleshoot tab from the left-side menu.
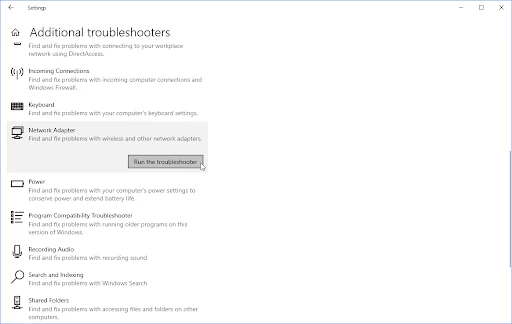
- Locate the Network Adapter troubleshooter.
- If you don’t see it, click Additional troubleshooters and find Network Adapter there.
- Click Run the troubleshooter and wait for it to scan your device.
Once the troubleshooting process is complete, check if it resolves the network connection issue. If no problems are found, proceed to the next troubleshooting method.
Method 6: Perform a Winsock Reset
Resetting the Winsock library restores the default Windows Sockets API settings, which can help fix network-related issues, including the “Windows can’t connect to this network” error.
Follow these steps to reset Winsock:
- Click the magnifying glass icon in your taskbar to open Windows Search (or press Windows + S).
- Type Command Prompt in the search box.
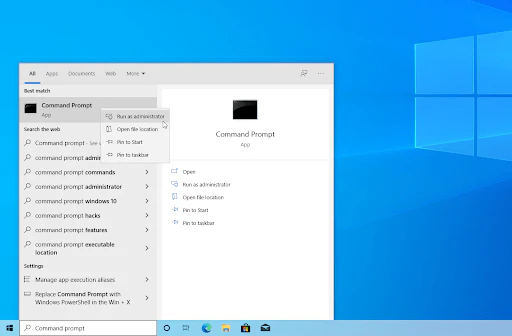
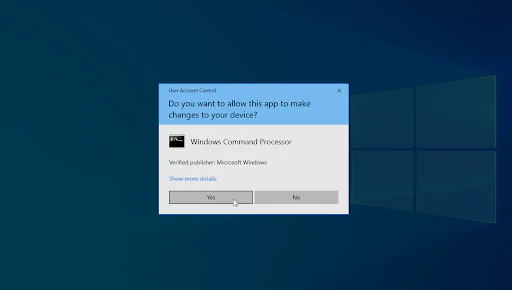
- Right-click on Command Prompt and select Run as Administrator.
- If prompted by User Account Control (UAC), click Yes to grant permissions.
- In the Command Prompt window, type the following commands one by one, pressing Enter after each:
netsh winsock resetnetsh int ip reset
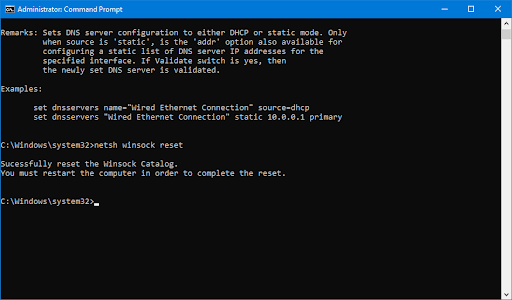
- After the commands execute, close Command Prompt.
- Restart your computer and check if your network connection is restored.
If you’re still facing issues, move on to the next troubleshooting method.
Method 7: Flush Your DNS
Flushing your DNS cache can resolve network-related issues by removing outdated or corrupted DNS records. This process is quick and can help fix the “Windows can’t connect to this network” error.
Follow these steps to flush your DNS:
- Click the magnifying glass icon in your taskbar to open Windows Search (or press Windows + S).
- Type Command Prompt in the search box.
- Right-click on Command Prompt and select Run as Administrator.
- If prompted by User Account Control (UAC), click Yes to grant permissions.
- Enter the following commands one by one, pressing Enter after each:
ipconfig /flushdnsipconfig /registerdnsipconfig /renewipconfig /release
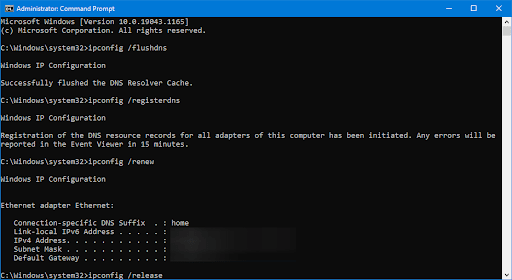
- Once all commands have been executed, close the Command Prompt.
- Restart your computer and try connecting to the network again.
If the issue persists, proceed to the next troubleshooting method.
Method 8: Reset Your Network Settings
If none of the previous methods worked, performing a network reset can help resolve network connection issues. This will remove all saved network profiles and restore your network settings to their factory defaults. Keep in mind that you’ll need to reconnect to your Wi-Fi networks afterward.
Follow these steps to reset your network settings:
- Click the Windows icon in the bottom-left corner to open the Start menu.
- Select Settings (or press Windows + I on your keyboard).
- Click on Network & Internet.

- Stay on the Status tab, then scroll down and click the Network reset link.
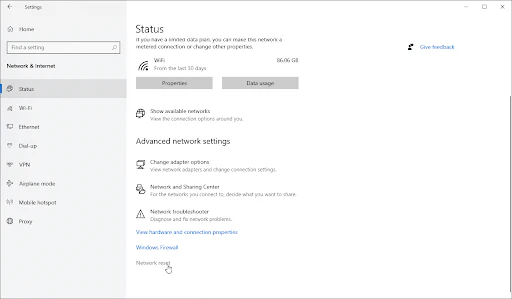
- Read the warning about what will be reset, then click Reset now.
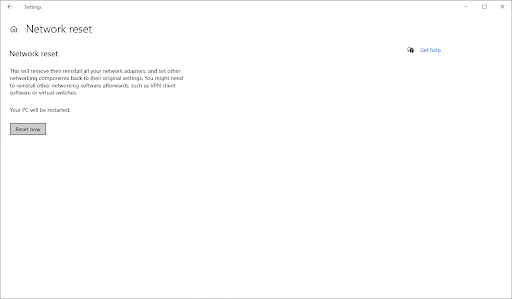
- Confirm by clicking Yes.
Once your network settings have been reset, restart your computer and check if you can reconnect to the internet. You’ll need to re-enter your Wi-Fi credentials to reconnect to your networks.
Method 9: Disable IPv6
Sometimes, IPv6 may cause connectivity issues, preventing you from connecting to a network. If turning off IPv6 doesn’t affect your device’s functionality, follow the steps below to disable the protocol and potentially resolve the “Windows can’t connect to this network” error.
Follow these steps to disable IPv6:
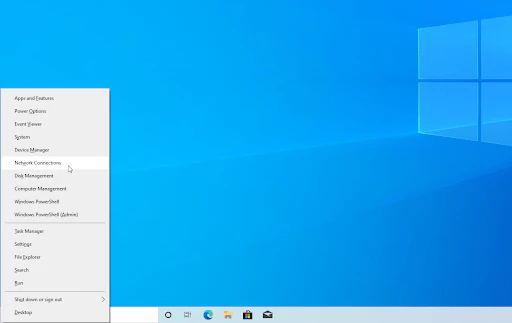
- Press Windows + X on your keyboard to open the WinX menu and click on Network Connections.
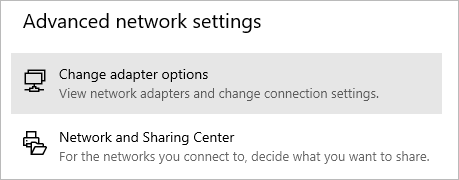
- In the left pane, select your current connection type (e.g., Ethernet or Wi-Fi), then click on Change adapter options.
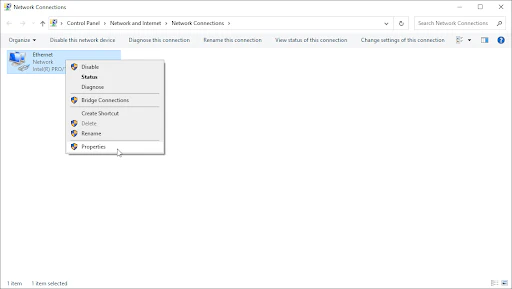
- Right-click on the network adapter you’re having issues with and select Properties from the context menu.
- Scroll down and find the Internet Protocol Version 6 (TCP/IPv6) option.
- If there’s a checkmark next to it, click the box to uncheck and disable it.
- If the box is already unchecked, IPv6 is not enabled, and you can try another troubleshooting method.
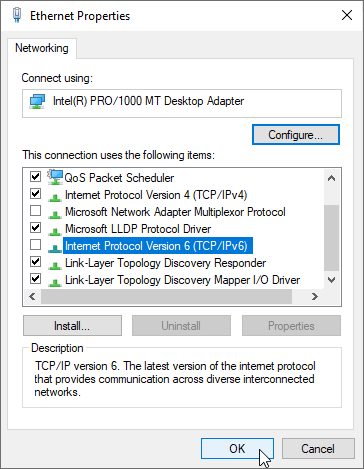
- Click OK to save your changes.
This solution is particularly useful if IPv6 is causing the issue with your network. If disabling it doesn’t help, proceed to the next troubleshooting method.
Method 10: Enable 802.11d for Your Network Adapter
Enabling the 802.11d feature for your network adapter can help resolve network issues. This feature is designed to enhance wireless network compatibility, and enabling it may fix the “Windows can’t connect to this network” error.
Follow these steps to enable 802.11d for your network adapter:
- Press Windows + X on your keyboard to open the WinX menu and select Network Connections.
- In the left pane, select your current connection type (e.g., Ethernet or Wi-Fi) and click on Change adapter options in the right pane.
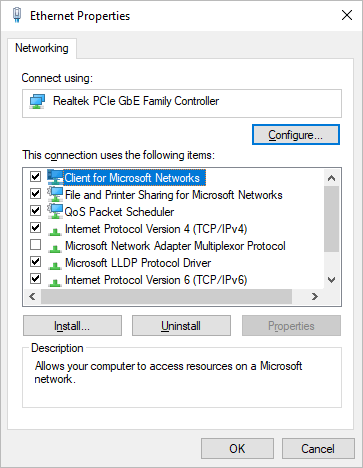
- Right-click on the network adapter you’re having issues with and select Properties from the context menu.
- Click the Configure button.
- Switch to the Advanced tab in the menu bar at the top of the window.
- In the Property section, find and select 802.11d (if available).
- Set the value to Enabled.
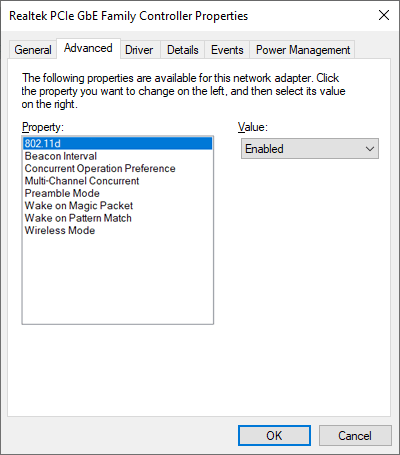
- Click OK to save your settings.
After making this change, check if you can now connect to your network. If the issue persists, continue troubleshooting with the next method.
Final Thoughts
We hope the solutions in this article helped you resolve the “Windows can’t connect to this network” issue on your Windows PC. If you’re still facing difficulties, feel free to contact us and let us know how we can assist you. Our team of experts is always available to provide support.
If you have any further questions or if there’s a problem we haven’t addressed, don’t hesitate to reach out. We’re here to help! In the meantime, stay updated with the latest tech tips and troubleshooting articles by checking back regularly and following us on social media.
One more thing
If you’re in search of a software company that embodies integrity and upholds honest business practices, your quest ends here at Ecomkeys.com. As a Microsoft Certified Partner, we prioritize the trust and satisfaction of our customers. Our commitment to delivering reliable software products is unwavering, and our dedication to your experience extends far beyond the point of sale. At Ecomkeys.com, we provide a comprehensive 360-degree support system that accompanies you throughout your software journey. Your trust is our foundation, and we’re here to ensure that every interaction with us is a positive and trustworthy one.