If you’re struggling with the Print Screen not working on Windows 11 (also known as Prt Sc not working), it can be incredibly frustrating. However, don’t worry! There are several solutions to fix this issue and get your screen capture functionality back up and running.
The Print Screen (Prt Sc key) is an essential tool for many Windows users, enabling them to quickly capture screenshots of their screen.
If you’re one of the users facing this issue on Windows 11, this article will explore common causes for this problem and offer practical solutions to help you resolve it.
What Causes Print Screen Not to Work on Windows 11?
Why Print Screen is Not Working on Windows 11: Common Causes
Several factors can cause the Print Screen function to stop working on Windows 11. Some of the most common reasons include:
- Keyboard Settings: Changes in your keyboard settings can interfere with the Print Screen functionality.
- Outdated or Missing Drivers: An outdated or missing keyboard driver can prevent the Print Screen feature from working properly.
- Windows Updates: Sometimes, Windows updates can unintentionally disrupt the Print Screen function.
- Software Conflicts: Other software running on your computer may conflict with the Print Screen feature, causing it to malfunction.
9 Effective Fixes for Print Screen Not Working on Windows 11
If the Print Screen feature is not working on your Windows 11 PC, try these effective solutions to resolve the issue:
- Update Your Keyboard Driver
- Check Your Keyboard Settings (Ensure that the Print Screen key is enabled)
- Try Different Keyboard Shortcuts:
- Windows Key + Print Screen
- FN Key + Print Screen
- Windows Key + Shift + S (to open Snipping Tool)
- Windows Key + G
- Disable Background Running Programs
- Run the Keyboard Troubleshooter
- Use the Snipping Tool as an Alternative
- Check for Third-Party Screenshot Software Conflicts
- Restart Your Computer
- Update Your Windows Operating System
How to Resolve Print Screen Not Working on Windows 11
#1. Update Your Keyboard and Device Drivers to Fix Print Screen Issue
Outdated or missing keyboard drivers can prevent the print screen function from working correctly. Updating these drivers is one of the most effective ways to resolve the issue.
To update your drivers:
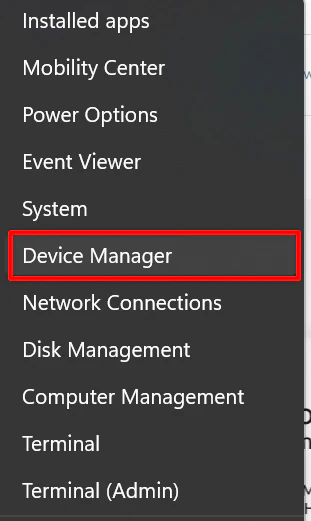
- Press Windows + X to open the Windows Quick Menu.
- Select Device Manager from the list.
- In Device Manager, locate your keyboard, then click the arrow to expand the list.
- Right-click on Standard PS/2 Keyboard and select Update Driver.
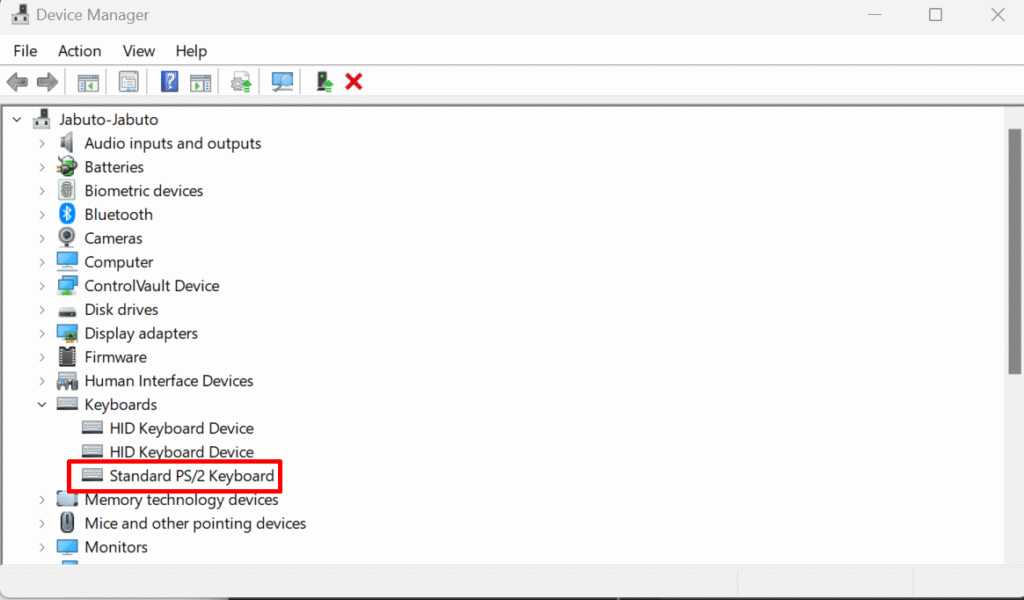
- Choose “Search automatically for updated driver software” to let Windows 11 search for the latest driver either online or on your computer.
- If an update is found, follow the on-screen instructions to install it.
After updating, verify if the Print Screen key now works by checking for a new screenshot in the “C:\Users\user\Pictures\Screenshots” folder.
#2. Ensure the Print Screen Key is Enabled (Enable Prt Sc Key)
Before using the Print Screen function, make sure the Prt Sc key is enabled and not assigned to another task or function. Sometimes, the key may be disabled or remapped, preventing it from working.
To check your keyboard settings:
- Open the Control Panel by pressing Windows + R, typing control, and hitting Enter.
- Click on the Ease of Access option.
- Select the Keyboard option (or Change how your keyboard works).
- Navigate to the Keyboard settings.
- Ensure that the Print Screen key is neither disabled nor mapped to a different function.
Additionally, if your keyboard has an F Mode key or an F Lock key, press it and then check if the Print Screen key starts working. If it doesn’t, the F Mode key might be preventing the Print Screen function.
#3. Try Alternative Keyboard Shortcuts for Screenshots
If your Prt Sc or Print Screen key isn’t working on Windows 11, there are other keyboard shortcuts you can try to capture screenshots. Don’t worry, these alternatives might solve the issue:
- Press Windows Key + PrtScn to take a screenshot and save it to a file automatically.
- Use Alt + PrtScn to capture a screenshot of the active window.
- Try Fn + PrtScn to take a screenshot (or use a third-party tool like Lightshot).
- Press Windows Key + Shift + S to open the Snipping Tool for more screenshot options.

These shortcuts will automatically save the screenshot to your Pictures folder.
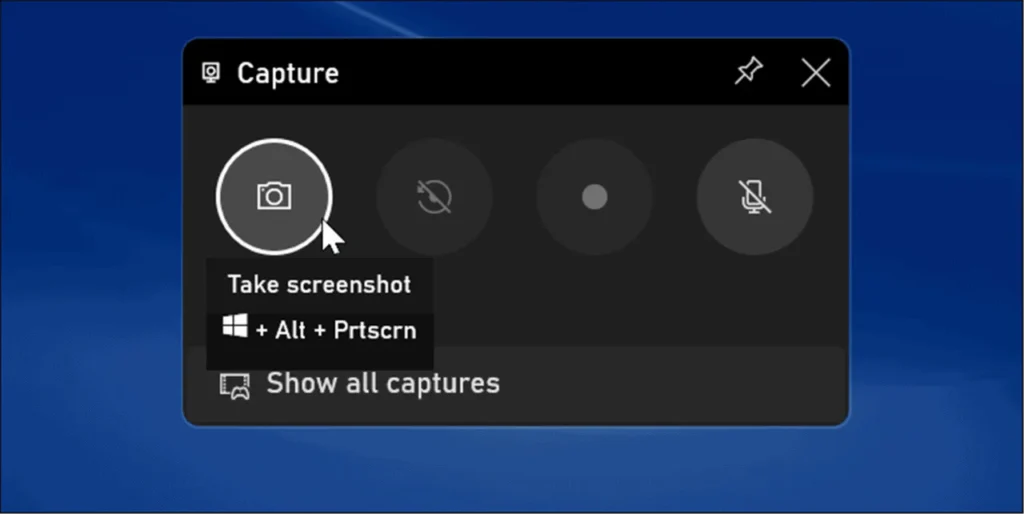
If none of these shortcuts work and the Prt Sc key still isn’t functional, another workaround is to use the Xbox Game Bar:
- Press Windows Key + G to launch the Xbox Game Bar.
- Once open, click the Widgets button > Capture, then click the camera icon to take your screenshot.
Give these methods a try and see if they resolve the issue!
#4. Disable Background Running Programs to Fix Print Screen Issue
If other software on your computer is interfering with the Print Screen function, you may need to stop them temporarily. Follow these steps to disable background programs:
- Right-click on the Windows Start button.
- Open the Task Manager.
- Locate the software that may be interfering with the Print Screen function.
- Right-click on the software and select “End Task” to close it.
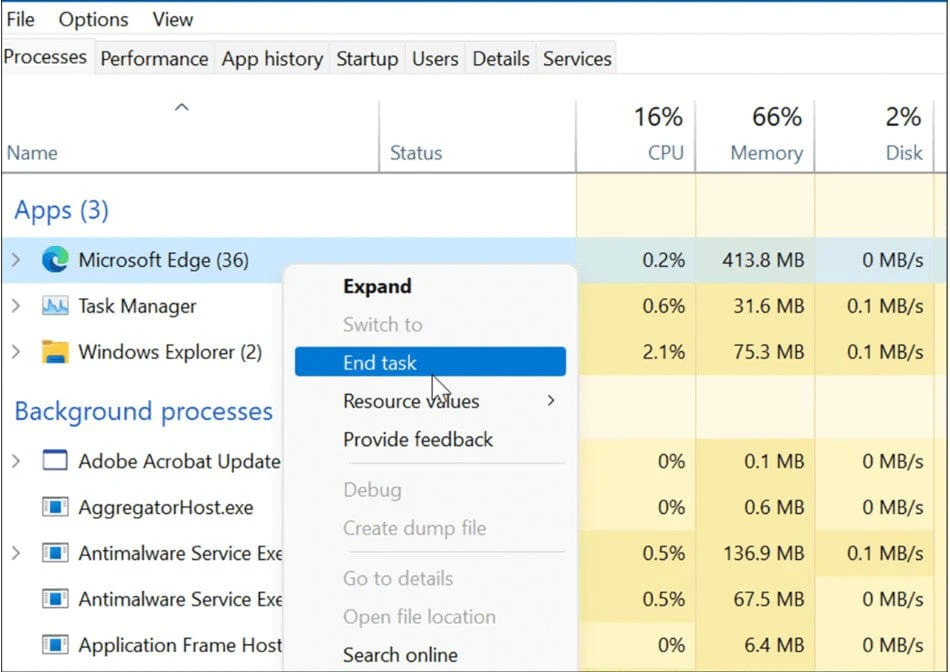
Some applications, such as OneDrive, Dropbox, and Snipping Tool, can take control of the Print Screen key. Disable all running programs and then try using the Print Screen function again to check if it resolves the issue.
#5. Run Keyboard Troubleshooter to Fix Print Screen Issues
If the Print Screen function isn’t working and you’re unsure whether the keyboard is the issue, you can run the keyboard troubleshooter on Windows 11. This tool will test your keyboard and identify any problems. If it detects an issue, the troubleshooter will attempt to fix it.
To run the keyboard troubleshooter on Windows 11, follow these steps:
- Click the Start button to open Settings (or press Windows key + I).
- In Windows Settings, go to System > Troubleshoot.
- Open Other troubleshooters.
- Scroll down to find Keyboard, then click the Run button.
- The troubleshooter will start and attempt to detect and resolve any issues. Follow the on-screen instructions if a problem is found.
#6. Use the Snipping Tool for Screenshots
If the Print Screen function isn’t working, you can use the Snipping Tool to take screenshots on Windows 11. The Snipping Tool is a built-in utility that allows you to capture specific areas of your screen.
To use the Snipping Tool:
- Press the Windows button and type Snipping Tool.
- Open the Snipping Tool app.
- Click on the New button.
- Select the area of the screen you want to capture.
- Save the screenshot to your desired location.
#7. Check Third-Party Screenshot Software
If your Print Screen key isn’t working, a third-party screenshot software may be interfering with it. Programs like Screenpresso, Lightshot, and Snagit can sometimes block or override the Print Screen function.
To resolve this, check the software settings or preferences. Look for the hotkeys assigned to take a screenshot. If the Print Screen key is set as the default, you can change it to a different key.
#8. Restart Your Computer
If none of the previous solutions have worked, a simple restart may help. Rebooting your computer will reset all functions, including the keyboard. After restarting, check if the Print Screen key works again.
#9. Update Your Operating System
An outdated operating system can sometimes cause issues with the Print Screen function. Ensure your system is up-to-date to avoid any functionality problems.
To check for Windows updates:
- Press Windows + I to open Settings.
- Scroll down to Windows Update on the left pane and click on it.
- If your system is up-to-date, it will say, “You’re up to date.”
- If not, click Check for Updates to update your system.
Conclusion
If the Print Screen function isn’t working on Windows 11, these solutions should help resolve the issue. Whether it’s checking your keyboard settings, updating drivers, using the Snipping Tool, or disabling conflicting software, there are multiple ways to fix it.
Thanks for reading! Don’t forget to share this article with your friends and followers—someone else may benefit from these tips!
One more thing
If you’re in search of a software company that embodies integrity and upholds honest business practices, your quest ends here at Ecomkeys.com. As a Microsoft Certified Partner, we prioritize the trust and satisfaction of our customers. Our commitment to delivering reliable software products is unwavering, and our dedication to your experience extends far beyond the point of sale. At Ecomkeys.com, we provide a comprehensive 360-degree support system that accompanies you throughout your software journey. Your trust is our foundation, and we’re here to ensure that every interaction with us is a positive and trustworthy one.
Thank you for some other great post. The place else
could anyone get that type of info in such an ideal means
of writing? I’ve a presentation next week, and I’m at the look for such info.