
The “Access Denied” error occurs when your browser is using different proxy settings or a VPN instead of the actual network configuration on your Windows 10 PC. When a website detects inconsistencies in your browser cookies or network settings, it may block access—preventing you from opening the site.
Why Am I Getting an “Access Denied” Error?
If you’re a Windows 10 user, you may have encountered this frustrating message:
“Access Denied. You don’t have permission to access this server.”
Several factors can trigger this error, including:
- The server is down or temporarily unavailable.
- The URL has changed or been updated.
- The website detects VPN usage and has restricted access.
How to Fix the “Access Denied” Error on Windows 10
Not being able to access certain websites when you need them most can be annoying. Here are some effective solutions to resolve the issue and regain access effortlessly.
Solved: “Access Denied – You Don’t Have Permission to Access This Server”
Encountering the “Access Denied” error can be frustrating, but there are several ways to fix it. The best solution depends on what caused the issue. For instance, if you’re using Firefox with a VPN, some websites may block access due to concerns over proxy settings or browser cookies.
How to Fix the “Access Denied” Error?
Wondering how to restore access to a website affected by this error? Let’s go through the best troubleshooting steps:
✅ Clear browser cookies and history
✅ Turn off VPN and disable VPN extensions
✅ Disable proxy settings
✅ Switch to a premium VPN service
✅ Reset your browser data
Follow these step-by-step guides to get past whatever is blocking your access!
Method 1: Forget the Website in Firefox
This error is especially common in Mozilla Firefox. Luckily, Firefox provides a quick way to “Forget” a website without clearing all your browsing data.
Steps to Forget a Website in Firefox
- 1️⃣ Open Mozilla Firefox and press Ctrl + H to open your browsing History.
- 2️⃣ Find the website causing the “Access Denied” error in your history.
- 3️⃣ Right-click on the site and select “Forget About This Site” from the menu.
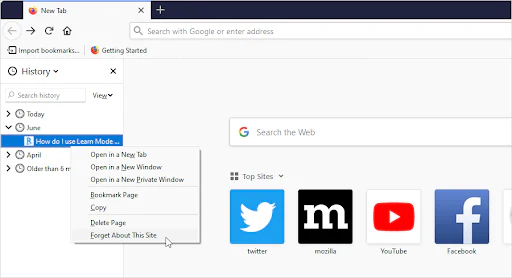
- 4️⃣ Refresh the website or try accessing it again to see if the issue is resolved.
By following these steps, you can regain access to your favorite websites without hassle!
Method 2: Delete Site Data for a Specific Website in Google Chrome
Google Chrome offers a feature similar to Firefox that allows you to delete cookies from a specific website without clearing all your browsing data. If you’re only encountering the “Access Denied” error for one site, this method can be a more efficient way to resolve the issue.
Steps to Delete Site Data in Google Chrome
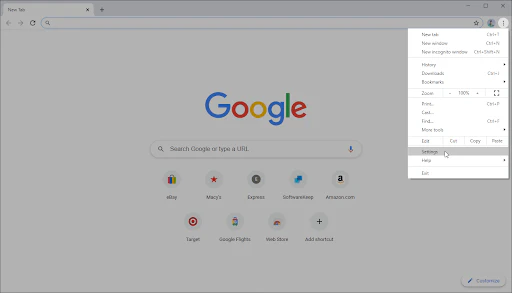
- 1️⃣ Open Google Chrome and click on the More icon (three vertical dots) in the upper-right corner.
- 2️⃣ Select Settings from the dropdown menu.
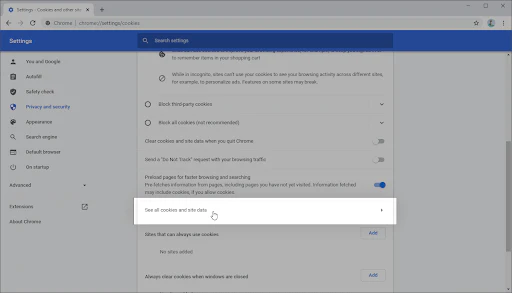
- 3️⃣ On the left, click on Privacy and security, then choose Site settings.

- 4️⃣ Under Site settings, click on Cookies and site data, then select See all cookies and site data.
- 5️⃣ In the search bar, type the domain of the website causing the error.
- 6️⃣ Click Delete next to the cookies for that site.
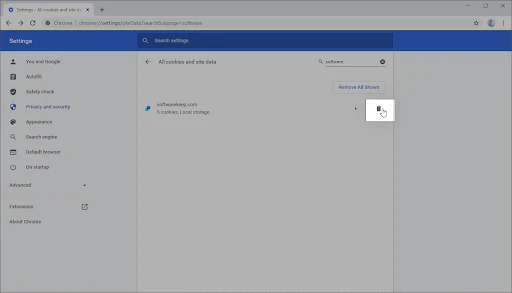
- 7️⃣ Restart your browser and try accessing the site again to see if the error is resolved.
By following these steps, you can easily clear cookies for a specific website and regain access without affecting your other browsing data!
Method 3: Turn Off Your VPN Extension
While VPNs are incredibly useful, they can sometimes cause unexpected issues, such as the “Access Denied” error. Whether you’re using a VPN on your computer or as a VPN extension in your browser, it’s important to ensure that your VPN isn’t causing the problem. If you suspect the VPN is the culprit, try temporarily disabling it.
Disable VPN Extensions in Google Chrome
- 1️⃣ In Google Chrome, click the More icon (three vertical dots) and select More tools → Extensions.
- Alternatively, you can go directly to the Extensions page by typing chrome://extensions into the address bar.
- 2️⃣ Find your VPN extension and toggle it off (bottom-right corner of the extension box).
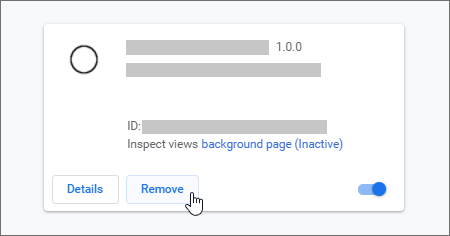
- 3️⃣ If you want to completely uninstall the VPN extension, click the Remove button. You’ll need to reinstall it later to use it again.
Disable VPN Extensions in Mozilla Firefox
- 1️⃣ In Firefox, click the menu button and select Add-ons and Themes.
- 2️⃣ Switch to the Extensions tab, find your VPN extension, and toggle it off.
- 3️⃣ To uninstall the extension, click the More actions button and select Remove.
Disable VPN Extensions in Microsoft Edge
- 1️⃣ In Microsoft Edge, type edge://extensions/ into your address bar.
- 2️⃣ Find your VPN extension and toggle it off so that it’s greyed out.
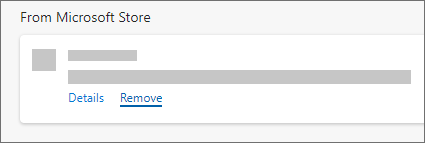
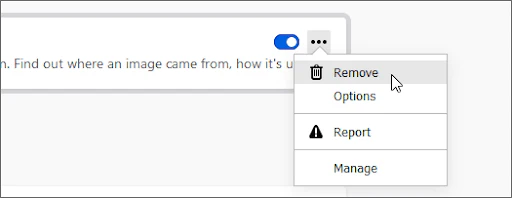
- 3️⃣ If you want to uninstall the extension, click the Remove link underneath the extension’s details.
Disable VPN Extensions in Opera
- 1️⃣ In Opera, click the Main menu in the top-left corner and navigate to Extensions → Extensions.
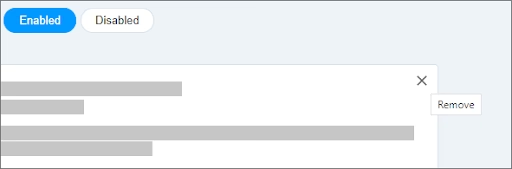
- 2️⃣ Locate your VPN extension and toggle it off.
- 3️⃣ If you want to uninstall the extension, click the X button near the top-right corner.
By disabling VPN extensions in your browser, you can determine if the VPN is causing the “Access Denied” error and regain access to the site.
Method 4: Disable Proxy Server in Windows 10
If you’re using a proxy server for your LAN (Local Area Network), it may be causing the “Access Denied” error. To test if this is the issue, try disabling the proxy server feature.
Steps to Disable Proxy Server in Windows 10
- 1️⃣ Open the search bar by clicking the magnifying glass icon on your taskbar or press Windows + S.
- 2️⃣ Type in Internet Options and click the first search result.
- 3️⃣ In the pop-up window, go to the Connections tab and click on LAN Settings.
- 4️⃣ In the Local Area Network (LAN) Settings window, deselect the Use a proxy server for your LAN option if it’s enabled.
- If this option is already unchecked, the issue is not related to the proxy server.
- 5️⃣ Check if the website now loads. If the error was caused by network traffic filtered by a proxy, you should be able to access the site.
Method 5: Download a Premium VPN
If you’re using a free VPN, you might experience slow speeds and limited features, leading to issues like the “Access Denied” error. A premium VPN can solve these problems with better security and reliable connections. While it requires an investment, upgrading to a premium VPN is worth it for smoother browsing and privacy.
Here are some of the top premium VPNs we recommend:
After purchasing and installing your premium VPN, try accessing the website again to see if the error is resolved. Premium VPN services offer benefits like unlimited bandwidth and enhanced security—perfect for safe browsing on public Wi-Fi or during video calls!
Method 6: Clear Your Browser Data
Before diving into more complex solutions, try clearing your browser data. This allows you to keep custom settings intact while removing cookies and browsing history, which can resolve issues like the “Access Denied” error.
Clear Browser Data in Google Chrome
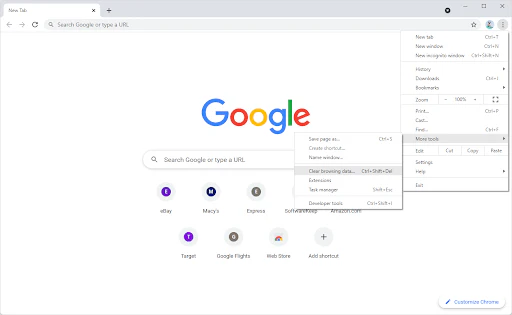
- 1️⃣ Open Google Chrome and click the More icon (three vertical dots) in the top-right corner.
- 2️⃣ Hover over More Tools, then select Clear browsing data.
- 3️⃣ In the Time range dropdown, select All time.
- 4️⃣ Check the boxes for Browsing history, Cookies and other site data, and Cached images and files.
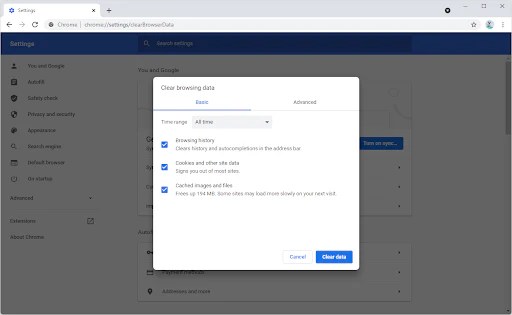
- 5️⃣ Click Clear data.
- 6️⃣ Once the process is complete, restart Google Chrome and check if the error is resolved.
Clear Browser Data in Mozilla Firefox
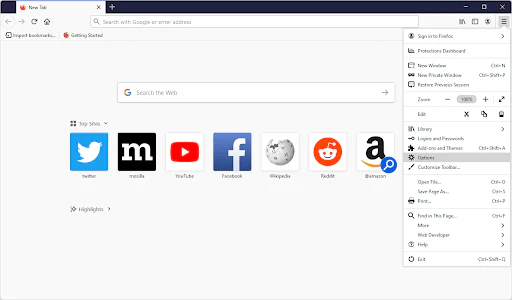
- 1️⃣ Open Mozilla Firefox. Click the menu button in the top-right corner and select Options, or type about:preferences into the address bar.
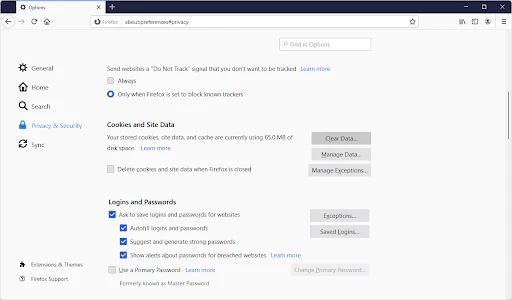
- 2️⃣ Switch to the Privacy & Security tab.
- 3️⃣ Scroll down to the Cookies and Site Data section and click Clear Data….
- 4️⃣ Select Cookies and Site Data (optional: you can also delete the cache).
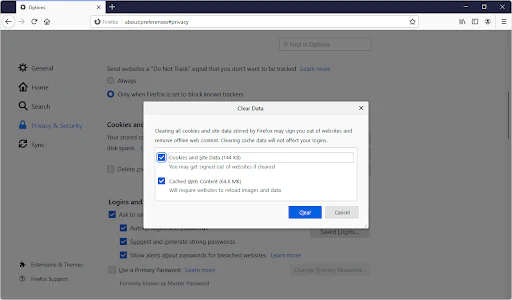
- 5️⃣ Click Clear.
- 6️⃣ After the process completes, try accessing the website again to see if the “Access Denied” error is fixed.
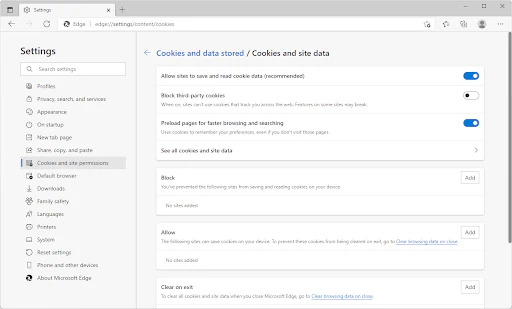
Clear Browser Data in Microsoft Edge
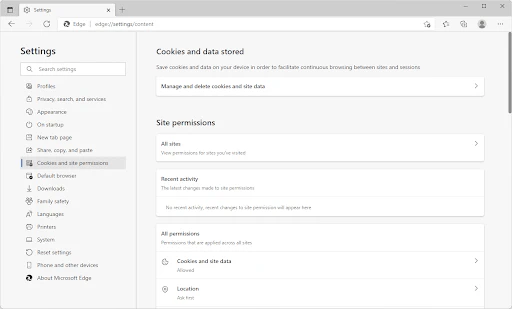
- 1️⃣ Open Microsoft Edge and click the menu icon in the top-right corner, then select Settings.
- 2️⃣ Alternatively, type edge://settings in the address bar and press Enter.

- 3️⃣ Switch to the Cookies and site permissions tab.
- 4️⃣ Click on Manage and delete cookies and site data, then click on See all cookies and site data.
- 5️⃣ Click Remove all, read the warning, and confirm by clicking Clear.
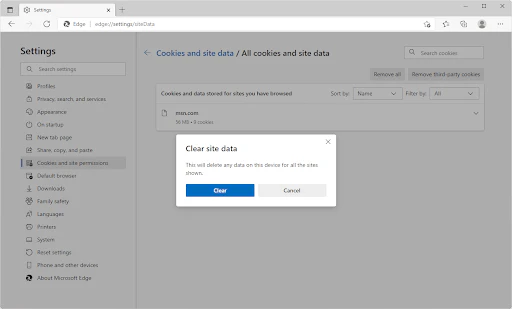
- 6️⃣ After the data is cleared, check if you can now access the site without seeing the error.
Method 7: Reset the Browser
If none of the previous methods worked, resetting your browser to its default settings may help fix the “Access Denied” error.
How to Reset Google Chrome
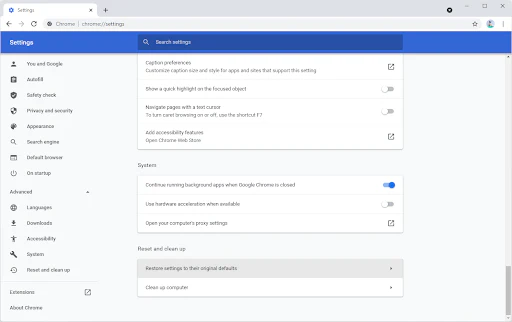
- 1️⃣ Open Google Chrome and click the More icon (three vertical dots) in the top-right corner.
- 2️⃣ Click on Settings.
- 3️⃣ Scroll down to the bottom and expand the Advanced settings.
- 4️⃣ Scroll to the very bottom again, and click Restore settings to their original defaults.
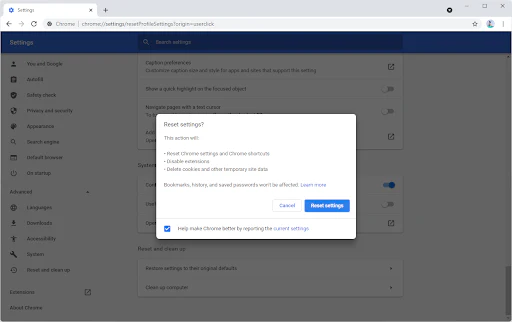
- 5️⃣ Read the warning, then click the Reset settings button if you agree to restore your browser to its default configuration.
- 6️⃣ Check if the website now loads without the Access Denied error.
How to Reset Mozilla Firefox
- 1️⃣ Open the Firefox menu by clicking the icon in the top-right corner, and select Help.
- 2️⃣ Click on More Troubleshoot Information or type about:support in the address bar and press Enter.
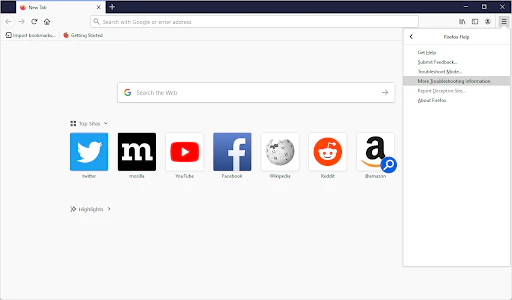
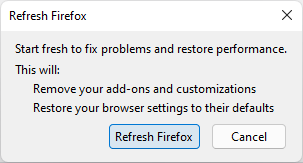
- 3️⃣ Click the Refresh Firefox button.
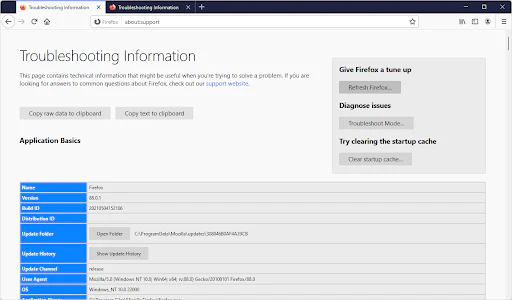
- 4️⃣ Read the pop-up warning, then click Refresh Firefox again to proceed.
- 5️⃣ Once completed, try accessing the website again to see if the error is resolved.
How to Reset Microsoft Edge
- 1️⃣ Open Microsoft Edge and click the three dots in the top-right corner to open the menu.
- 2️⃣ Select Settings from the available options.
- 3️⃣ Switch to the Reset Settings tab and click the Restore settings to their default values button.
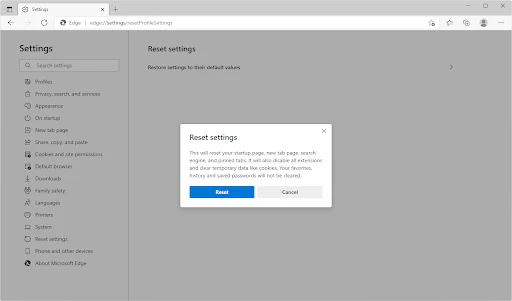
- 4️⃣ Confirm your choice in the pop-up window.
- 5️⃣ Wait for Microsoft Edge to reset, then navigate to the website to check if the Access Denied error has been fixed.
One more thing
If you’re in search of a software company that embodies integrity and upholds honest business practices, your quest ends here at Ecomkeys.com. As a Microsoft Certified Partner, we prioritize the trust and satisfaction of our customers. Our commitment to delivering reliable software products is unwavering, and our dedication to your experience extends far beyond the point of sale. At Ecomkeys.com, we provide a comprehensive 360-degree support system that accompanies you throughout your software journey. Your trust is our foundation, and we’re here to ensure that every interaction with us is a positive and trustworthy one.