Many Windows 10 users encounter the frustrating Automatic Repair loop issue, where Windows system files become corrupted, preventing the OS from booting properly. As a result, the computer gets stuck in a continuous cycle of rebooting and attempting repairs without success.
In this guide, we’ll explore the causes of this issue and provide step-by-step solutions to fix it. Additionally, we’ll discuss what to do if your computer fails to boot into Windows entirely. Let’s get started!
What Causes the “Preparing Automatic Repair” Loop on Windows 10?
The “Preparing Automatic Repair Windows 10 Stuck” screen typically appears when an error causes your system to shut down unexpectedly. For instance, if your system crashes due to an error, Windows 10 will attempt to repair the damaged files during the next boot. However, sometimes this repair fails, leaving your computer stuck on the “Preparing Automatic Repair” screen with no progress.
Even after restarting your computer, the system never gets past this screen, preventing the automatic repair process from completing. This error is not exclusive to Windows 10; it can also affect Windows 11, Windows 8.1, Windows 8, and even Windows 7.
Common causes of the “Preparing Automatic Repair” loop include:
- Windows Registry issues (incorrect or missing keys)
- File corruption in the Windows Boot Manager (BOOTMGR)
- Missing or corrupted system files, often caused by malware
- Outdated or missing hardware drivers
- Unknown system errors
No matter the cause, you can find solutions to this issue by following our detailed guides below. Let’s dive into each step to help you fix this error effectively.
Fix: Windows 10 Stuck in “Preparing Automatic Repair” Loop
How to Fix Windows 10 Stuck in the “Preparing Automatic Repair” Loop
Here are several methods to resolve the Windows 10 Automatic Repair loop:
Method 1: Perform a Hard Reboot
Before diving into more advanced troubleshooting, try forcing your computer to shut down and perform a power cycle. Follow these steps:
- Turn off your computer by pressing the Power button. Wait until the screen is completely black and the fans stop spinning.
- Unplug all peripherals, such as USB drives, external hard drives, or headphones, and remove the power adapter.
- If you’re using a laptop with a removable battery, take it out.
- Press and hold the Power button for about 30 seconds to drain any remaining charge.
- Reinsert the battery (if applicable) and reconnect the power cable, but do not plug in any USB devices yet.
- Press the Power button again to start your computer. Check if the Windows 10 “Preparing Automatic Repair” loop has been fixed.
If the issue persists, try the following methods.
Method 2: Boot in Safe Mode
If the Automatic Repair loop continues to happen, starting in Safe Mode might help diagnose the issue. Here’s how:
- Reboot your computer and hold the F8 key to access the Windows Recovery Environment (WinRE). On some devices, you may need to hold the Fn key as well.
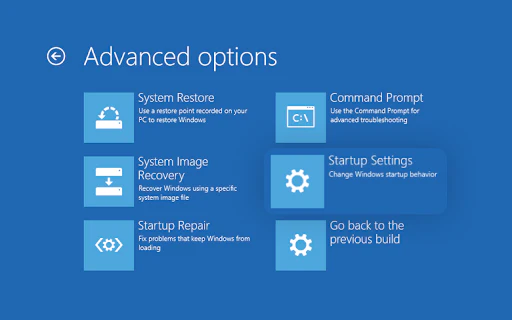
- Navigate to See advanced repair options > Troubleshoot > Advanced options > Startup Settings > Restart.
- Once your computer restarts, press F5 to boot into Safe Mode with Networking.
- If Safe Mode successfully boots without encountering the “Preparing Automatic Repair” screen, you can proceed to troubleshoot further, such as scanning for malware with Windows Defender.
Method 3: Rebuild BCD via Command Prompt
If boot files are missing or damaged, it can cause the “Preparing Automatic Repair” loop. Rebuilding the Boot Configuration Data (BCD) might resolve the issue.
- Reboot your computer and press the F8 key to access WinRE.
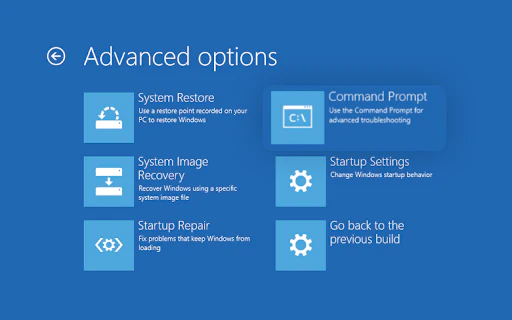
- Select Repair your computer > Troubleshoot > Advanced options > Command Prompt.
- In the Command Prompt window, type the following commands one by one, pressing Enter after each:
bootrec /fixmbr bootrec /fixboot bootrec /scanos bootrec /rebuildbcd
- Once the process is complete, type exit and press Enter to close the Command Prompt.
- Restart your computer and check if the Automatic Repair loop is resolved.
These methods should help you fix the Windows 10 Automatic Repair loop effectively.
Method 4: Disable Automatic Repair at Boot
If you believe your Windows 10 system is functioning properly beneath the startup repair screen, you can try disabling the Automatic Startup Repair feature. This method can help you bypass the repair loop and boot directly into Windows without going through the repair cycle.
Note: This method will only work if your system is still operational beneath the repair screen. If there is an underlying system error, this method will not work for troubleshooting.
- Reboot your computer and press the F8 key to enter the Windows Recovery Environment (WinRE). On certain devices, you may need to hold the Fn key as well.
- Select Repair your computer and then go to Troubleshoot.
- From the options shown, choose Command Prompt.
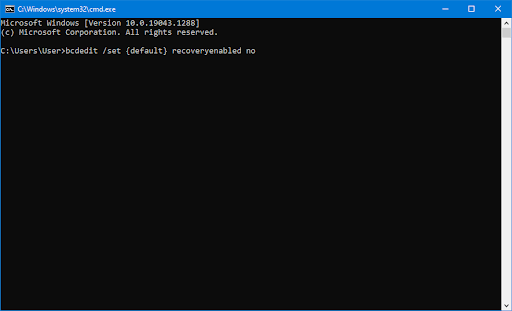
- In the Command Prompt window, type the following command and press Enter:
bcdedit /set {default} recoveryenabled noIf this command doesn’t execute successfully, try:bcdedit /set {current} recoveryenabled no
- Restart your PC and check if the boot loop is resolved after this adjustment.

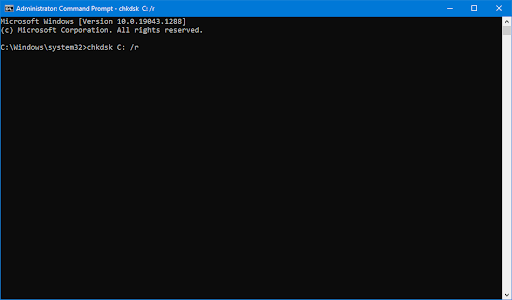
Method 5: Run the Fixboot and Chkdsk Commands
To resolve the boot loop issue, you can use the fixboot and chkdsk commands. The fixboot command attempts to repair startup issues, and the chkdsk command checks your disk for errors that may be causing the issue.
- Reboot your computer and press the F8 key to enter WinRE.
- Navigate to Troubleshoot > Advanced options > Command Prompt.
- In the Command Prompt window, type the following command and press Enter to execute it:
chkdsk C: /r
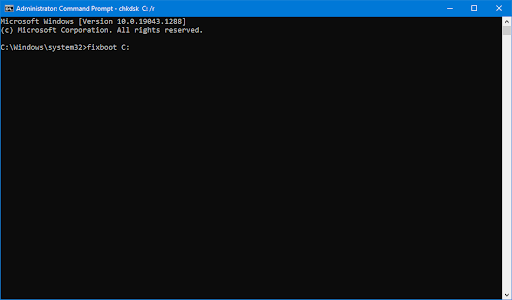
- Wait for the scan to complete. If it encounters an error or cannot run, try using this alternative command:
fixboot C:
Method 6: Repair Corrupted System Files
Corrupted system files can cause boot loops and other significant issues. The System File Checker (SFC) tool in Windows 10 helps repair these corrupted files.
- Reboot your computer and press the F8 key to access WinRE.
- Navigate to Troubleshoot > Advanced options > Command Prompt.
- In the Command Prompt window, type the following command and press Enter:
sfc /scannow
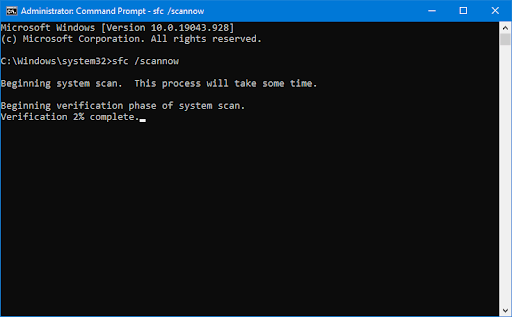
- Wait for the System File Checker to finish scanning and repairing your computer. If discrepancies are found, the tool will restore system files and fix any errors.
- After the scan is complete, restart your computer to check if the repair loop is resolved.
By following these methods, you should be able to resolve the Windows 10 stuck in the “Preparing Automatic Repair” loop effectively.
Method 7: Restore the Windows Registry
The Windows Registry can become corrupted, often due to malware infections or disk issues, which can lead to severe system errors like a boot loop or blue screen problems. Fortunately, you can restore the Windows Registry from the Windows Recovery Environment (WinRE), allowing you to rebuild the Registry and fix any missing, misconfigured, or corrupted registry keys.
Restoring the Windows Registry essentially resets it to its default state. This means any modifications made to the registry, whether by you or a third-party application, will be undone.
- Reboot your computer and press the F8 key to enter the Windows Recovery Environment (WinRE). On some devices, you may need to hold down the Fn (function) key.
- Navigate to Troubleshoot > Advanced options > Command Prompt.
- In the Command Prompt, type the following command and press Enter:
C:\Windows\System32\config\regback* C:\Windows\System32\config\ - When prompted, type “All” and press Enter to restore all registry entries to their default state.
- Once the process is complete, restart your computer and check if the boot loop caused by Automatic Repair is resolved.
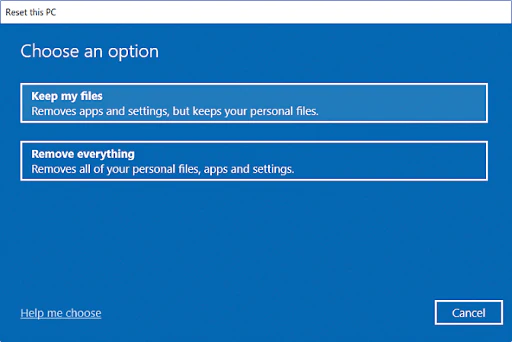
Method 8: Reset or Refresh Windows 10
If none of the previous methods work, resetting Windows 10 is your final option for getting rid of the Automatic Repair boot loop. When resetting, you can choose to keep your personal files or completely wipe your system. It’s important to backup your data if you opt for a clean reset.
- Reboot your computer and press the F8 key to enter WinRE.
- Navigate to Troubleshoot > Reset this PC.
- Choose either to keep your personal files or perform a full reset. Follow the on-screen instructions to complete the process.
- After the reset or refresh, restart your computer, and you should be able to boot into Windows 10 without the boot loop.
Final Thoughts
The Windows Automatic Repair loop can be a frustrating issue, but with the methods outlined above, you can resolve it. We’ve covered the common causes of the problem and offered step-by-step guides on how to fix the Windows 10 boot loop. Whether it’s restoring the registry, running a reset, or other methods, these solutions will help you get your Windows 10 system back to normal.
One more thing
If you’re in search of a software company that embodies integrity and upholds honest business practices, your quest ends here at Ecomkeys.com. As a Microsoft Certified Partner, we prioritize the trust and satisfaction of our customers. Our commitment to delivering reliable software products is unwavering, and our dedication to your experience extends far beyond the point of sale. At Ecomkeys.com, we provide a comprehensive 360-degree support system that accompanies you throughout your software journey. Your trust is our foundation, and we’re here to ensure that every interaction with us is a positive and trustworthy one.