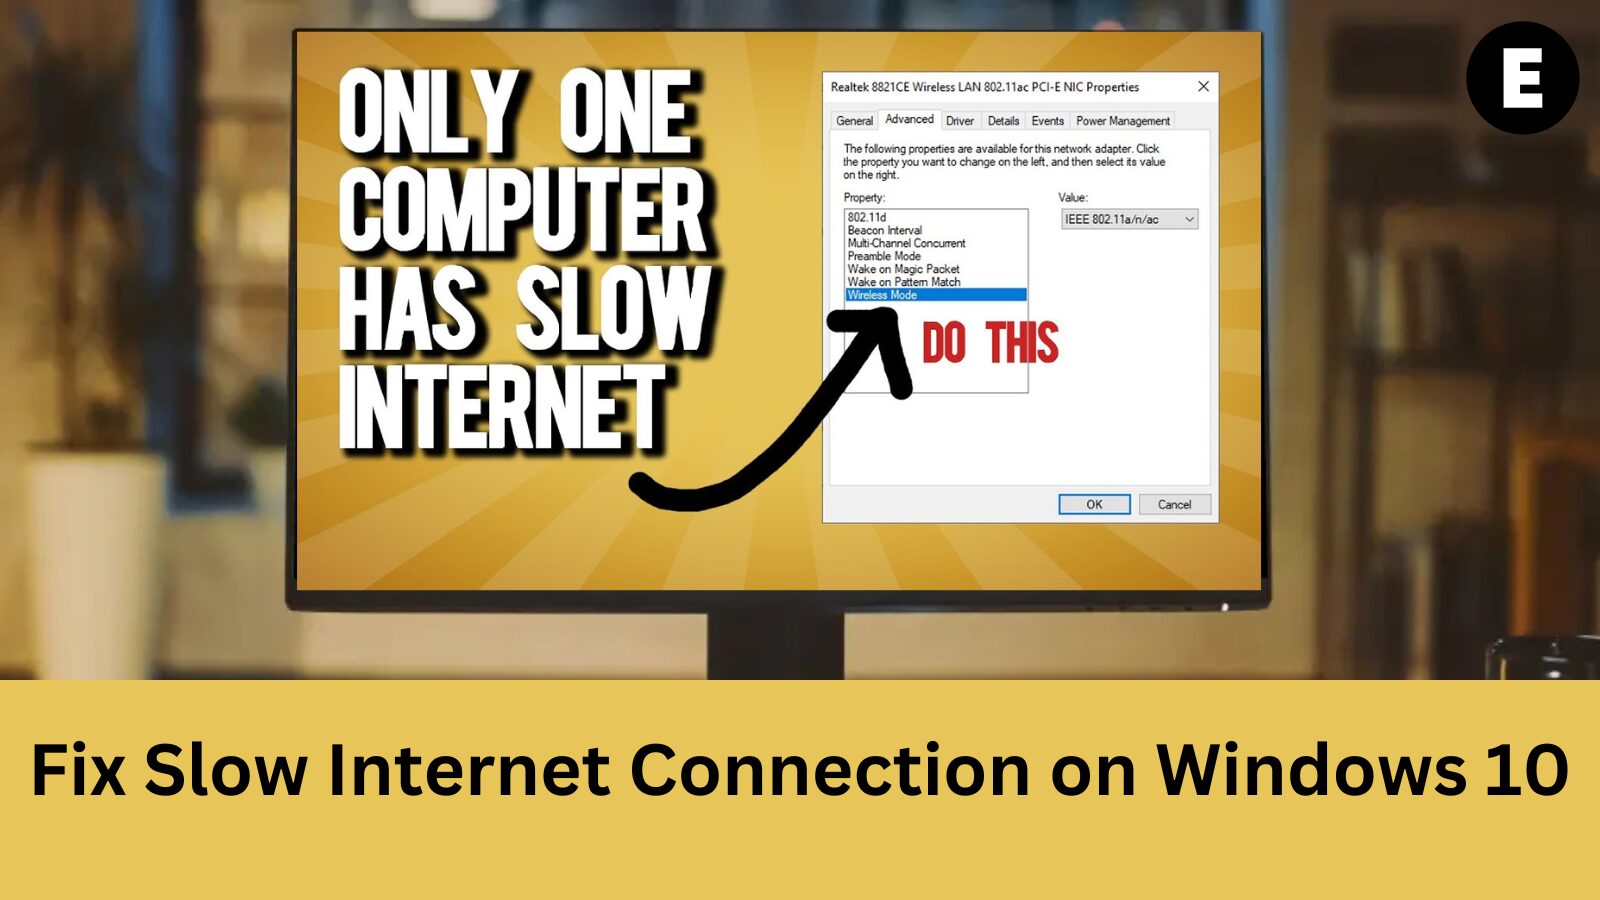
Are you dealing with a slow internet connection on Windows 10? Don’t worry, we’ve got you covered! In this guide, we’ll share 9 proven solutions to help speed up your internet on Windows 10—whether you’re using a desktop or laptop device.
By improving your network performance and internet speed, you can solve one of the most frustrating issues faced by many users. Whether you’re connected via Ethernet or Wi-Fi, these methods will help you restore fast, reliable internet on your Windows 10 device.
Tip: If you’re new to the Windows 10 interface, we recommend checking out our guide on How to Get Started with Windows 10 before diving into these troubleshooting steps.
Fixed: Slow Internet on Windows 10
Method 1: Disable the Peer-to-Peer (P2P) Update Feature
Slow internet speeds on Windows 10 are often caused by misconfigured system settings. One of the main culprits is the Peer-to-Peer (P2P) Update feature, which can consume a significant amount of bandwidth, leading to sluggish internet connections.
The P2P update feature is designed to make updating your system easier by allowing your computer to download updates from other devices. However, it often slows down your internet. Fortunately, you can disable this feature to regain faster speeds.
How to Disable Peer-to-Peer Update on Windows 10
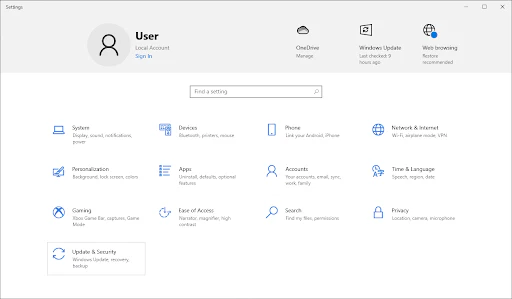
- Click on the Windows icon in the bottom-left corner of your screen to open the Start menu.
- Select Settings or use the Windows + I shortcut.

- Click on the Update & Security tile to access your Windows Update settings.
- Switch to the Delivery Optimization tab.
- Turn off Allow downloads from other PCs to prevent your system from using bandwidth to send and receive updates from other computers.

By disabling this feature, you should notice a significant improvement in your internet speed while using Windows 10.
Method 2: Exit Background Apps Using Bandwidth
Certain applications continue to use network bandwidth even when you’re not actively using them, which can negatively impact your internet speed. These background apps can cause a significant slowdown in your Windows 10 internet performance. Here’s how you can completely close these apps to improve your network speed.
How to Exit Background Apps on Windows 10
- Right-click on your taskbar and select Task Manager from the context menu.
- If Task Manager opens in compact view, click the More details button to expand it.
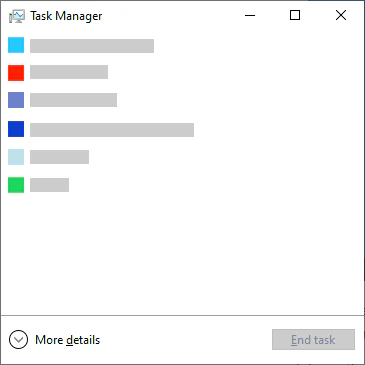
- Stay on the Processes tab, and click on the Network heading to sort applications by their network usage.
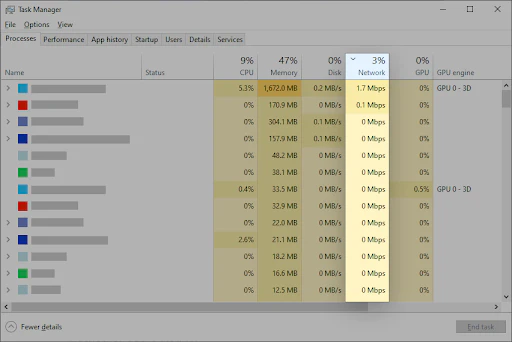
- Identify which applications are consuming your bandwidth and exit those that are not necessary.
- Switch to the Startup tab to check for any startup applications that have a high impact on your system’s performance. Disable them if needed.

After closing unnecessary apps, restart your computer and check if your internet speed has improved. This method helps to ensure that your network performance isn’t hindered by unwanted background processes.
Method 3: Use CCleaner to Optimize Internet Speed
CCleaner is a versatile tool that can help optimize your computer’s performance by cleaning up temporary files, browser data, and even organizing your Registry keys. By using CCleaner, you can potentially boost your internet speed by clearing out unnecessary junk files and fixing issues that may be slowing down your system.
How to Use CCleaner for Internet Speed Optimization
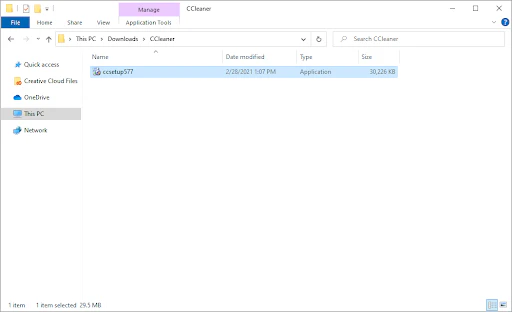
- Download CCleaner from the official website to ensure you’re getting the latest and safest version. Avoid unauthorized sources to prevent malware or outdated versions.
- Double-click the setup file you just downloaded to launch the installation wizard. Follow the on-screen instructions to install CCleaner on your device.
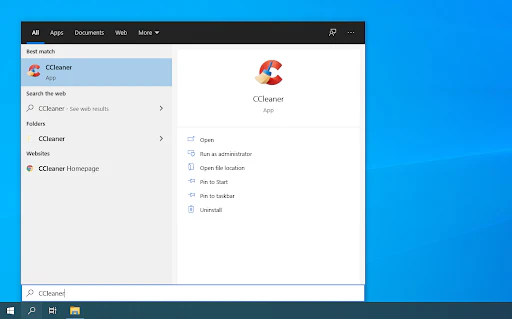
- Open CCleaner via the shortcut or by searching for it in the Start menu.
- Select Custom Clean from the left-side panel. You can uncheck any options you don’t want to delete before starting the cleaning process.
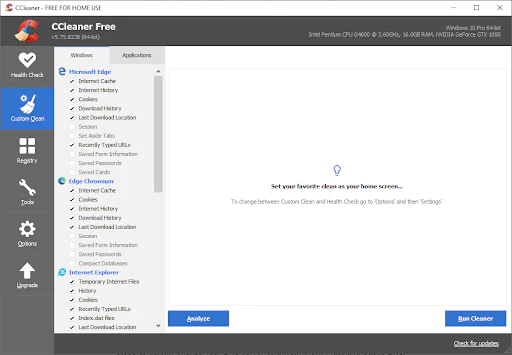
- Click on Run Cleaner and wait for the process to complete.
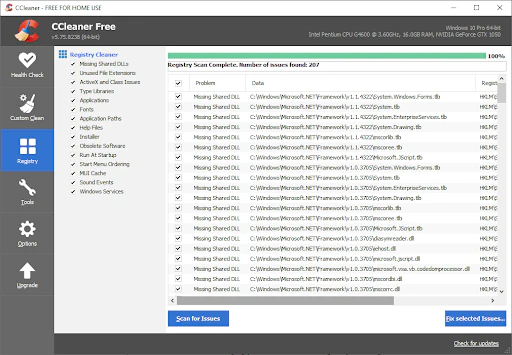
- Switch to the Registry tab, click on Scan for Issues, and let CCleaner find any errors. If any issues are detected, click Fix selected issues….
- Once the process is finished, restart your computer to finalize the changes.
After using CCleaner to clean up your system and fix Registry errors, you should notice an improvement in your internet speed if it was impacted by junk files or system issues.
Method 4: Change Your DNS Server for Faster Internet
One quick solution to improve internet speed is by changing your DNS server. This method can bypass limitations imposed by your current DNS provider and may even result in faster internet speeds on your device. Here’s how to quickly switch to a well-known, fast, and public DNS server.
How to Change Your DNS Server on Windows 10
- Press Windows + R to open the Run utility.
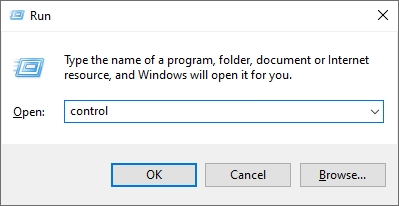
- Type in “control” and press Enter to launch the Control Panel.
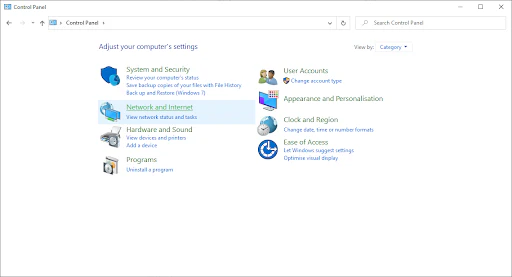
- Click on Network and Internet, then choose Network and Sharing Center.
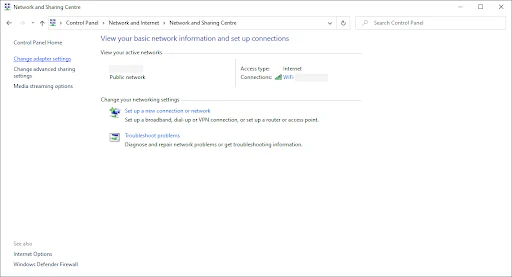
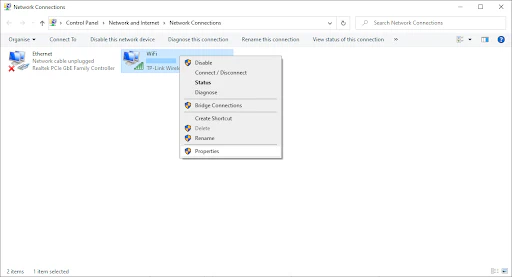
- From the left menu, click on Change adapter settings. This will open a new window with your network connections.
- Right-click on your active connection (either Wi-Fi or Ethernet) and select Properties.
- Scroll down and click on Internet Protocol Version 4 (TCP/IPv4), then click the Properties button.
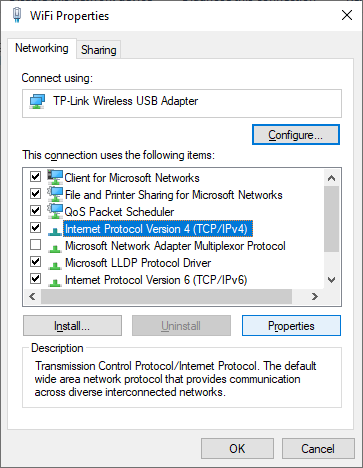
- Select Use the following DNS server addresses.
- Enter 1.1.1.1 in the first field and 1.0.0.1 in the second field. These are the addresses for the popular 1.1.1.1 DNS server by Cloudflare, known for its speed and security.

- Click OK to apply the changes.
After switching to a faster DNS server, check if your internet speeds have improved. This method can often provide a noticeable speed boost, especially if your current DNS server is causing slowdowns.
Method 5: Adjust the Network Bandwidth Settings
Windows 10 reserves up to 20% of your bandwidth by default, which can result in slower internet speeds. Fortunately, you can adjust or completely disable this bandwidth reserve for a better internet experience. Here’s how you can change these settings to boost your internet speed.
How to Adjust Network Bandwidth Settings on Windows 10
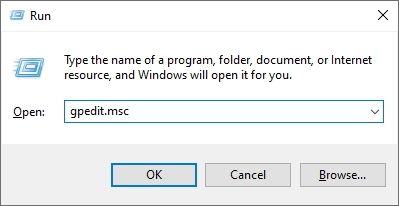
- Press Windows + R to open the Run utility.
- Type in “gpedit.msc” and press Enter to open the Group Policy Editor.
- Navigate to the following location:
Computer Configuration → Administrative Templates → Network → QoS Packet Scheduler.
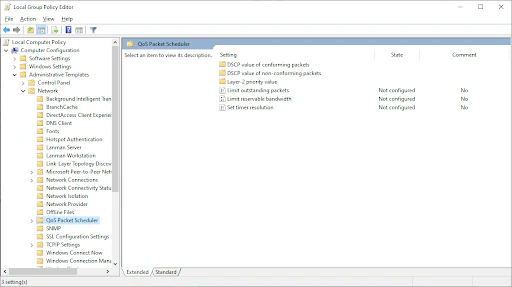
- Double-click on the Limit reservable bandwidth setting.
- Change the setting to Disabled or manually adjust the percentage to a level you’re comfortable with.
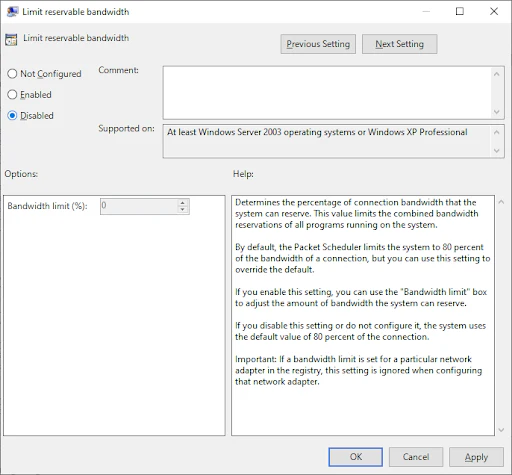
- Click Apply, then restart your computer.
After disabling or adjusting the reserved bandwidth, check if your internet speed has improved. This tweak can help maximize your available bandwidth for faster online performance.
Method 6: Turn Off Large Send Offload (LSO)
Large Send Offload (LSO) was designed to improve internet performance, but it can sometimes have the opposite effect, causing slower speeds or network issues. Disabling LSO can help resolve this issue. Here’s how to turn it off on Windows 10.
How to Disable Large Send Offload (LSO)
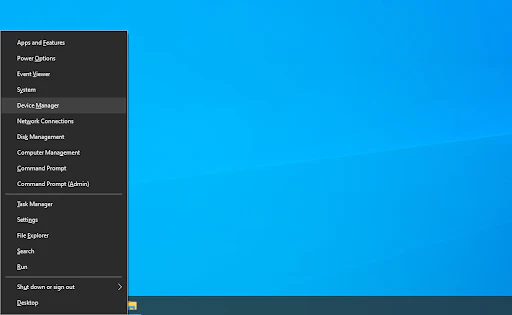
- Press Windows + X on your keyboard and select Device Manager from the context menu.
- Expand the Network adapters section and double-click on the adapter you’re currently using.

- Switch to the Advanced tab.
- Locate and select Large Send Offload V2 (IPv4) from the list.
- Set the value to Disabled.
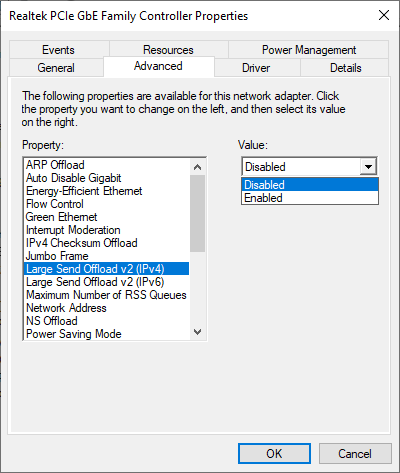
- Click OK, then restart your computer for the changes to take effect.
Disabling LSO can help improve your internet speed and eliminate any conflicts it may have with your network connection.
Method 7: Disable/Enable the Window Auto-Tuning Feature
Window Auto-Tuning is designed to optimize data transfers and improve network performance, but it can sometimes negatively impact internet speed. You can test if enabling or disabling this feature helps improve your internet connection by following the steps below.
How to Enable or Disable Window Auto-Tuning on Windows 10
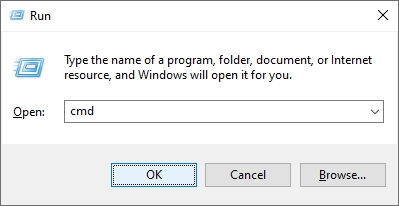
- Press Windows + R to open the Run utility.
- Type in “cmd” and press Enter to launch the Command Prompt.
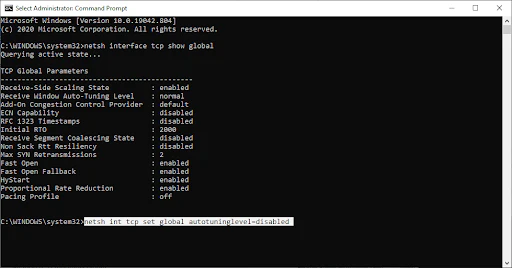
- Type the following command and press Enter to check the current status:
netsh interface tcp show global
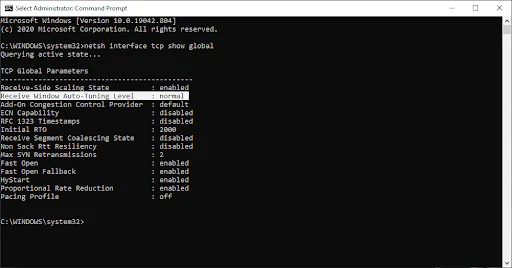
- Look for the “Receive Window Auto-Tuning Level” line.
- If the value is normal, type the following command and press Enter:
netsh int tcp set global autotuninglevel=disabled
- If the value is normal, type the following command and press Enter:
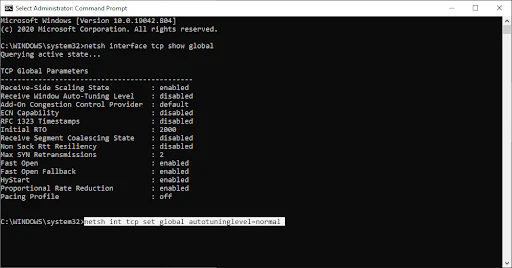
- If the value is disabled, type the following command and press Enter:
netsh int tcp set global autotuninglevel=normal
- After executing the correct command, close the Command Prompt and restart your computer.
Check if your internet speed has improved after enabling or disabling the Window Auto-Tuning feature.
Method 8: Temporarily Disable Your Firewall
Some Windows 10 users have reported that the built-in firewall can interfere with network performance, causing slower internet speeds. While it’s not recommended to keep the firewall disabled, you can try turning it off temporarily to see if it affects your connection.
How to Temporarily Disable Windows Firewall
Warning: Ensure you have active antivirus software before proceeding. Disabling your firewall without protection can leave your device vulnerable to security threats.
- Press Windows + R on your keyboard to open the Run utility.
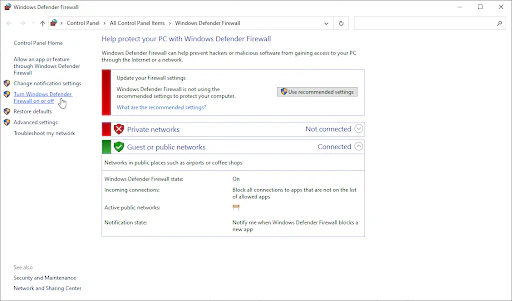
- Type “firewall.cpl” and click OK to open the firewall settings.
- On the left side of the window, click on the Turn Windows Defender Firewall on or off link.
- Select the “Turn off” option for both Private network settings and Public network settings.
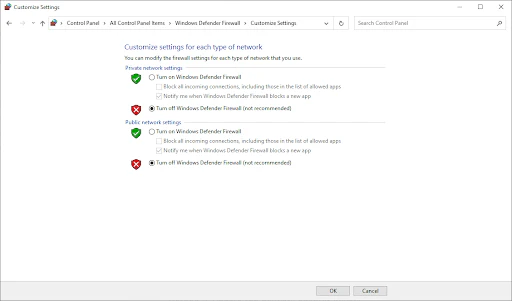
- Click OK and restart your computer.
After restarting, check if your internet speed has improved by disabling the Windows Defender Firewall.
Method 9: Update the Network Adapter Drivers
Updating your network adapter drivers is crucial for maintaining optimal performance. Outdated drivers can cause significant issues with your internet speed. Here’s how to update your drivers using Device Manager in Windows 10.
How to Update Your Network Adapter Drivers
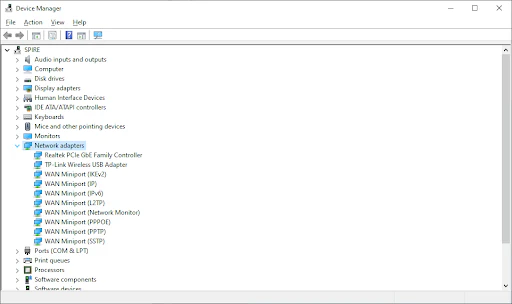
- Press Windows + X on your keyboard and select Device Manager from the context menu.
- Expand the Network adapters section and double-click on the adapter you’re currently using.
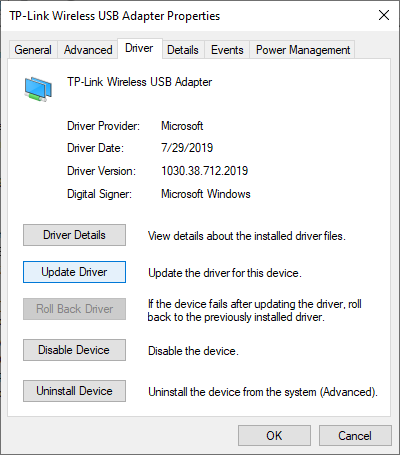
- Go to the Driver tab and click on the Update Driver button.
- Choose whether to automatically search for an updated driver or manually locate a new driver file on your computer.
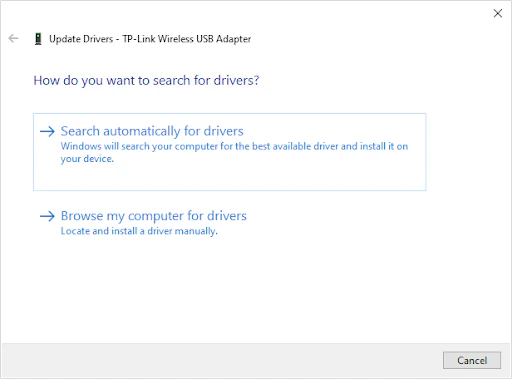
- Wait for the driver installation to finish. Repeat this process for any other network adapters you use.
After updating the drivers, check if your internet speed has improved.
If the issue persists, we recommend contacting your Internet Service Provider (ISP). They may suggest upgrading your plan or replacing your router to ensure a stable and fast internet connection.
One more thing
If you’re in search of a software company that embodies integrity and upholds honest business practices, your quest ends here at Ecomkeys.com. As a Microsoft Certified Partner, we prioritize the trust and satisfaction of our customers. Our commitment to delivering reliable software products is unwavering, and our dedication to your experience extends far beyond the point of sale. At Ecomkeys.com, we provide a comprehensive 360-degree support system that accompanies you throughout your software journey. Your trust is our foundation, and we’re here to ensure that every interaction with us is a positive and trustworthy one.