Zoom, Zoom Meeting, Zoom Video Conference, Zoom Classes—these are terms you’ve likely heard a lot lately as Zoom’s popularity continues to grow. Zoom is a powerful video conference tool that enables people from different locations to connect and interact in real-time using their webcam and microphone.
However, technical issues can sometimes disrupt your experience. It can be incredibly frustrating when you’re about to join an important Zoom meeting or attend Zoom classes, only to find that your camera isn’t working or another device-related problem arises.
In this guide, we’ll walk you through the steps to fix your camera when it’s not working in Zoom—so you can stay connected without any interruptions!
Zoom — Why Is My Camera Not Working?
If your Zoom camera isn’t working, there could be several underlying issues causing the problem. One of the most common reasons is Zoom not detecting your camera. Below are some of the top causes reported by users in the past year:
- Hardware issues with your camera or webcam.
- Your device’s camera is disabled in system settings.
- The camera isn’t selected as the default in Zoom.
- Interference from other apps or devices running in the background.
- Outdated or corrupt camera drivers affecting performance.
There are multiple solutions depending on the specific cause. Before considering costly repairs, try these troubleshooting steps first—we share expert tips that can save you time and money!
Identifying Your Zoom Camera Issue
To fix Zoom camera problems, start by identifying the exact issue. Noting symptoms like “Zoom camera not displaying correctly” or “Zoom camera won’t turn on” can help pinpoint the root cause.
Additionally, check if the issue is device-specific (e.g., Lenovo laptops, iPhones, etc.) or if it affects multiple brands. Sometimes, the problem is system-related, caused by misconfigurations or conflicting apps interfering with Zoom.
By following our step-by-step guide, you’ll be able to troubleshoot and fix your Zoom video conference camera issues quickly!
Solved: Zoom Camera Won’t Turn On or Not Working
If your Zoom camera isn’t turning on, don’t worry! Follow these quick troubleshooting steps to get your Zoom video conference camera working again.
Method 1: Double-Check If Your Camera Is Connected
Before diving into advanced fixes, confirm that your camera is properly connected:
- If you’re using an external webcam for Zoom, inspect the cable for any damage and try plugging it into a different USB port.
- For wireless cameras, ensure your device’s Bluetooth is turned on. A low battery or a disabled Bluetooth connection could cause your camera to disconnect during a Zoom meeting.
- Test your camera on another device—if the issue persists, it could be a hardware problem. In that case, consider a repair or replacement following the manufacturer’s guidelines.
By following these steps, you can quickly identify and resolve your Zoom camera issues, ensuring a seamless experience in your Zoom meetings and Zoom classes!
Method 2: Check Camera Status in Zoom
Before diving deeper into troubleshooting, verify if Zoom is detecting your camera. This can help determine whether the issue is software-related or due to hardware failure. If Zoom recognizes your camera but no video is displayed, the problem is likely not hardware-related.
Check Camera Status in Zoom
The camera status button is easily accessible on the Zoom meeting control bar. You’ll see one of two statuses:
- If video is enabled for the meeting, your camera may start automatically.
- If not, you’ll need to manually enable your video after joining.
Selecting the Correct Zoom Camera
Make sure you’ve chosen the correct camera in Zoom:
- Click on the up arrow next to Start Video in the control bar.
- Select the correct camera device from the list.

By ensuring Zoom is using the right camera, you can quickly resolve display issues and enjoy seamless Zoom meetings and Zoom classes!
Method 3: Check Your Camera Settings and Permissions
Windows has built-in privacy settings to prevent unauthorized access to your camera, but these settings can sometimes block Zoom from using your webcam. If Zoom can’t access your camera, it won’t turn on during your Zoom meeting.
Enable Camera Permissions for Zoom
Follow these steps to ensure Zoom has the necessary permissions:
- Open Settings using the Windows + I shortcut or by clicking the gear icon in the Start menu.
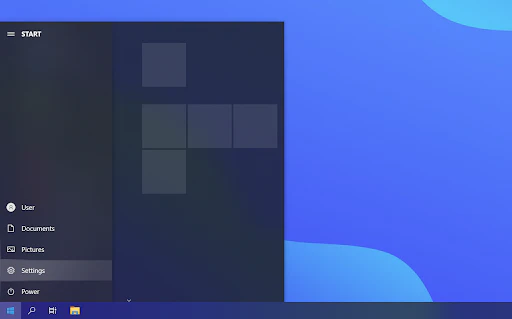
- Click on the Privacy tab.
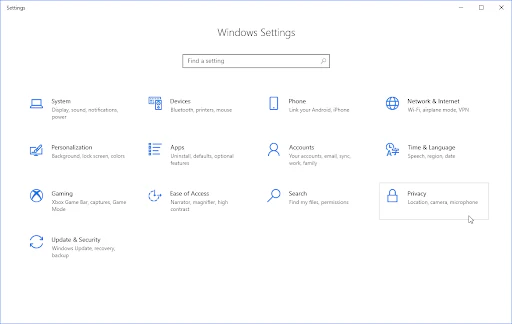
- In the left-side menu, scroll down to App Permissions and select Camera.
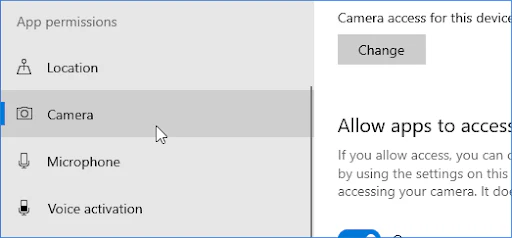
- Under “Allow access to the camera on this device”, ensure it says “Camera access for this device is on.” If it’s off, click Change and toggle it On.
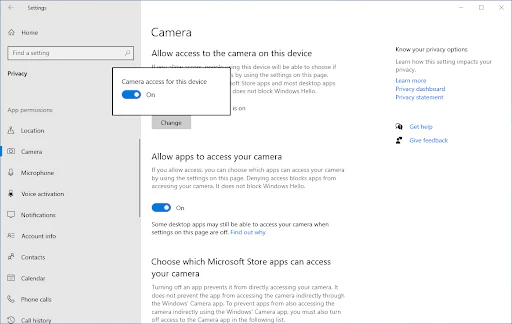
- Also, make sure both “Allow apps to access your camera” and “Allow desktop apps to access your camera” are enabled.

Test Your Zoom Camera
Once these settings are adjusted, restart Zoom and try joining a Zoom video conference to see if your camera is working properly. This should resolve any permission-related camera issues for your Zoom meetings and Zoom classes!
Method 4: Restart Your Computer
One of the simplest yet most effective fixes for Zoom camera issues is restarting your computer. A reboot clears temporary files, refreshes system processes, and allows applications like Zoom to start with a clean slate.
How to Restart Your Computer on Windows 10
- Click the Windows icon in the bottom-left corner of your screen to open the Start menu.
- Click on the Power option.
- Select Restart—this will close all open applications and fully restart your system.
Test Your Zoom Camera
Once your computer has restarted, open Zoom, join a Zoom meeting, and check if your camera is working properly. This simple fix often resolves camera detection issues, ensuring a smooth experience for your Zoom video conference and Zoom classes!
Method 5: Delete Files on macOS 10.7 to Fix Zoom Camera Issues
Some Mac systems running macOS 10.7 experience a specific issue where Zoom denies access to the camera. This can often be resolved by deleting certain files from your computer.
How to Fix Zoom Camera Issues on macOS 10.7
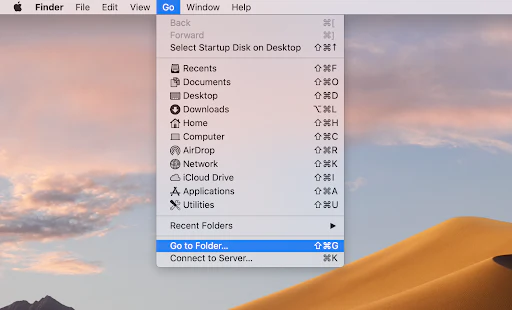
- Open Finder and click Go in the top menu, then select Go to Folder.
- Alternatively, press Shift + Command + G on your keyboard.
- In the Go to Folder window, enter the following path:
/Library/QuickTime/
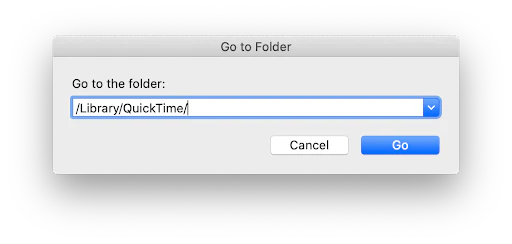
- Click Go, then locate and delete the following components if they exist:
- Video Glide
- Sonix SN9C
- 3ivx Video Codec
- Desktop Video Out
Restart and Test Zoom
Once you’ve deleted these files, try opening Zoom and joining a Zoom meeting to check if your camera works. If the issue persists, restart your Mac and test again before moving on to other solutions.
This method can help restore camera functionality for Zoom video conferences and Zoom classes on older macOS versions.
Method 6: Turn Off Camera Privacy Mode (Lenovo Users)
Some Lenovo computers have built-in privacy settings that can block Zoom from accessing the camera. If your camera isn’t working during a Zoom meeting, disabling Camera Privacy Mode may resolve the issue.
How to Disable Camera Privacy Mode on Lenovo
- Open the Search bar by clicking the magnifying glass icon in the taskbar or pressing Windows + S.
- Type “Lenovo” and select Lenovo Vantage from the search results.
- If you don’t have Lenovo Vantage, download it for free from the Microsoft Store.
- In Lenovo Vantage, go to Hardware Settings > Audio/Visual.
- Scroll down to the Camera Settings section.
- Locate Camera Privacy Mode and toggle it Off.
Check Your Zoom Camera
Once you’ve turned off Camera Privacy Mode, restart Zoom and join a Zoom video conference to check if your camera is working.
⚠️ Privacy Tip: If you want to keep your camera secure, remember to disable it again after your Zoom meetings. Some Lenovo laptops also have a physical camera switch—make sure it’s set to the on position if your camera keeps turning off automatically.
Method 7: Close Other Applications Using Your Camera
If your Zoom camera isn’t working, another application might be using it. Zoom may not be able to access your camera if another app is already using the feed, as only one program can control the camera at a time.
How to Fix Camera Conflicts in Zoom
- Close all applications that might be using your camera (e.g., Skype, Microsoft Teams, Google Meet, Discord, or OBS Studio).
- Restart Zoom and check if your camera is working.
- If the issue persists, restart your computer to ensure no background apps are blocking your camera.
This quick and simple fix often resolves camera access issues, allowing you to use Zoom meetings, Zoom video conferences, and Zoom classes without interruptions!
Method 8: Update Your Webcam Drivers
Outdated or corrupt drivers are a common cause of webcam issues. Drivers are essential software that help your operating system communicate with hardware like cameras. If your drivers are missing, outdated, or damaged, your Zoom camera may malfunction during Zoom meetings.
How to Update Your Webcam Drivers
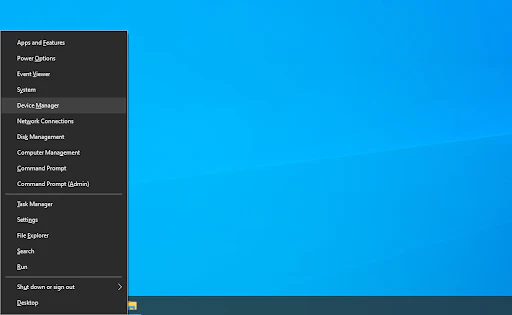
- Press Windows + X on your keyboard and select Device Manager from the menu.
- Expand the Imaging Devices (or Cameras) section by clicking the arrow next to it.
- Right-click on your webcam (e.g., Logitech, Razer, etc.) and select Update Driver.
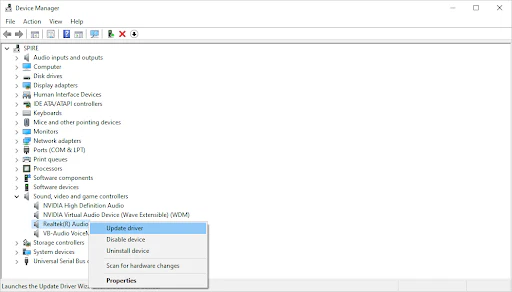
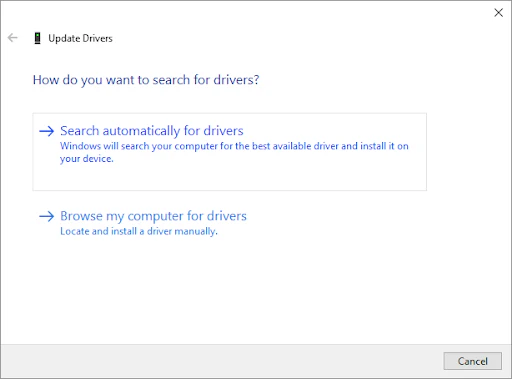
- Choose Search automatically for updated driver software to allow Windows to find and install the latest driver for your device. (Make sure you’re connected to the internet for this step.)
- Once the update is complete, restart your computer and check if the Zoom camera is working.
Updating your drivers can fix many camera-related issues, ensuring a smooth experience in Zoom meetings, Zoom video conferences, and Zoom classes.
Method 9: Reinstall Zoom
If none of the previous methods have worked, it might be time to reinstall Zoom to fix your camera issue. A fresh installation can often resolve any corrupt files or settings that may be interfering with your camera.
How to Reinstall Zoom
- Press Windows + I to open Settings, or click the gear icon in your Start menu.

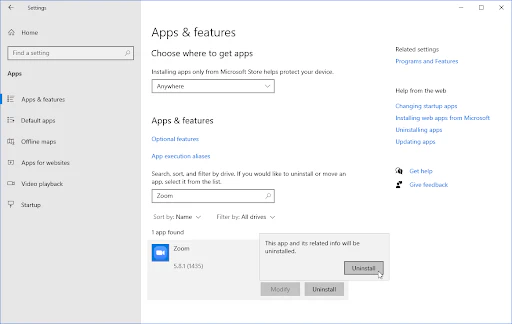
- Go to the Apps tab.
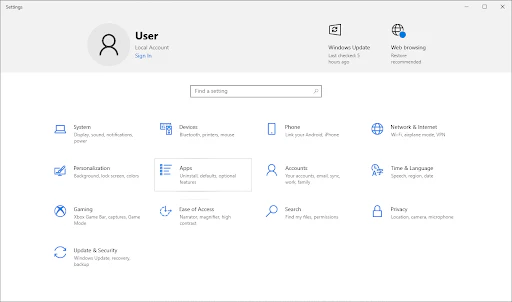
- Find Zoom in the list of installed programs and click Uninstall > Uninstall to remove it from your device.
- After Zoom has been uninstalled, visit the official Zoom website and download the latest version of the app.
- Follow the installation instructions to reinstall Zoom.
Test Your Camera
Once Zoom is reinstalled, restart your computer and join a Zoom meeting to check if your camera works properly. This should fix any lingering issues, allowing you to participate in Zoom meetings, Zoom video conferences, and Zoom classes with ease!
One more thing
If you’re in search of a software company that embodies integrity and upholds honest business practices, your quest ends here at Ecomkeys.com. As a Microsoft Certified Partner, we prioritize the trust and satisfaction of our customers. Our commitment to delivering reliable software products is unwavering, and our dedication to your experience extends far beyond the point of sale. At Ecomkeys.com, we provide a comprehensive 360-degree support system that accompanies you throughout your software journey. Your trust is our foundation, and we’re here to ensure that every interaction with us is a positive and trustworthy one.