
If you’re encountering the “Live Kernel Event Code: 193” error on your Windows 10 system, you’re not alone. This can be a frustrating issue, but don’t worry – there are several methods available to help you fix it and prevent it from happening in the future.
In this guide, we’ll walk you through some of the common fixes for this error, as well as basic troubleshooting steps to help you resolve the issue and get your system back to normal.
Keep reading for the solutions that can help fix Live Kernel Event Code: 193 and prevent it from recurring.
What Is the Live Kernel Event Code: 193 Error on Windows?
The Live Kernel Event Code: 193 error is a stop error that can occur on Windows computers. This issue is often linked to a problem with the driver or kernel of the operating system.
When this error appears, users have reported that if the computer is left inactive for a few minutes, it may hang permanently. The screen will remain dark, similar to the Sleep mode, but the system will fail to wake up, no matter what actions are taken.
Many users discover a vague hardware error after checking the crash dump in the Event Viewer, which displays the following:
- Problem Event Name: LiveKernelEvent
- Code: 193
This message doesn’t pinpoint the exact hardware component causing the issue, making it challenging to troubleshoot. However, there are several potential culprits and other factors that may contribute to the Live Kernel Event Code: 193 error. Let’s dive into possible causes and solutions.
What Causes the Live Kernel Event Code: 193 Error?
The Live Kernel Event Code: 193 error can occur across various versions of Windows, including Windows 7, Windows 8.1, Windows 10, and even Windows 11. After thoroughly investigating this issue, it appears that several prevalent causes are typically responsible for triggering this error. Here’s a breakdown of the common causes:
- Outdated or Corrupted Intel Wi-Fi Driver
A dual-band wireless driver inconsistency is one of the most frequent reasons behind this error. Many users experiencing the LiveKernelEvent 193 error found that updating the Intel Wi-Fi driver to the latest version often resolved the issue. - Inconsistency in Common Hardware
This error might pop up immediately after connecting a new peripheral, particularly external disks. Users have reported this issue specifically after linking a new external disk to a Windows 11 PC. - Outdated Chipset Driver
If you’re encountering this error after an upgrade to Windows 11, it’s possible that an outdated chipset driver could be the culprit. Updating the chipset driver is a good first step in addressing this issue. - Corrupted System Files
In some cases, the LiveKernelEvent Code: 193 error is caused by system file corruption. If system files have become compromised, the stability of your operating system may be affected, leading to the appearance of this error. - Incompatibility with NordVPN
NordVPN users, especially those with the VPN client set to start automatically with Windows 11, have experienced the LiveKernelEvent 193 error. The issue occurs due to kernel sub-process incompatibilities with NordVPN, which can trigger unexpected system interruptions.
These are the most common causes of the LiveKernelEvent Code: 193 error. Now, let’s look at some methods you can use to resolve this issue.
How to Fix Live Kernel Event Code: 193?
If you’re encountering the Live Kernel Event Code: 193 error, there are several methods you can try to resolve it. Below is one of the first steps you should take:
Method 1: Run the Hardware and Devices Troubleshooter
The Hardware and Devices Troubleshooter is a built-in tool in Windows designed to identify and fix issues related to your hardware devices and drivers. Here’s how to use it:
- Open the Search Bar
Click on the magnifying glass icon in your taskbar or press Windows + S on your keyboard to open the search bar. - Launch the Control Panel
Type Control Panel into the search bar. When it appears in the search results, click on it to open the Control Panel.

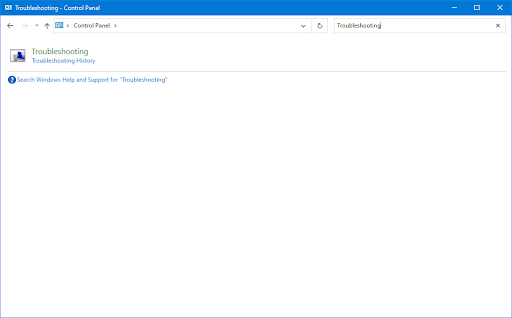
- Search for Troubleshoot
In the Control Panel, use the search bar at the top-right and type Troubleshoot. Click on the Troubleshooting option in the search results.
- View All Troubleshooters
On the left side of the Troubleshooting window, click on View all. This will display all available troubleshooters.
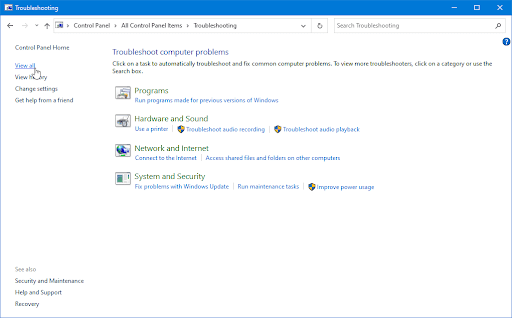
- Run the Hardware and Devices Troubleshooter
Scroll down and find the Hardware and Devices troubleshooter. Click on it, then wait for the troubleshooter to open in a separate window. - Begin the Troubleshooting Process
Click Next to start the analysis. The troubleshooter will scan your system for any hardware or driver-related issues. If it identifies a problem, it will attempt to fix it automatically. You can also view a full report once the troubleshooting process is complete.
Try this solution first to see if it helps fix the Live Kernel Event Code: 193 error. If it doesn’t resolve the issue, proceed with other methods provided in this guide.
Method 2: Run the System File Checker (SFC Scan)
To address the Live Kernel Event Code: 193 error, running a System File Checker (SFC) scan can help identify and fix corrupted system files. SFC is a built-in Windows tool that scans and repairs corrupted or missing system files, which can often be the cause of system errors.
Follow these steps to run the SFC scan:
- Open the Search Bar
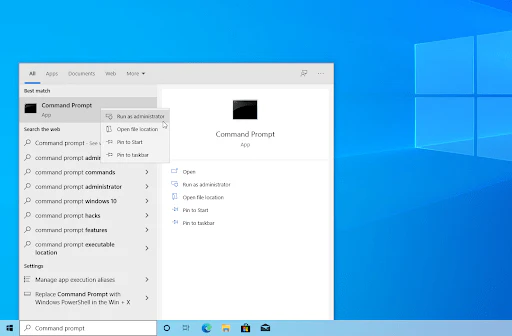
Click on the magnifying glass icon in your taskbar or press Windows + S on your keyboard to open the search bar. - Search for Command Prompt
Type Command Prompt in the search box. When it appears in the search results, right-click on it and select Run as Administrator. If you’re using a local account that doesn’t have admin permissions, you may need to grant administrative access.
- Allow Administrative Permissions
When prompted by the User Account Control (UAC), click Yes to allow the Command Prompt to run with administrative privileges. - Run the SFC Command
In the Command Prompt window, type the following command and press Enter:sfc /scannow
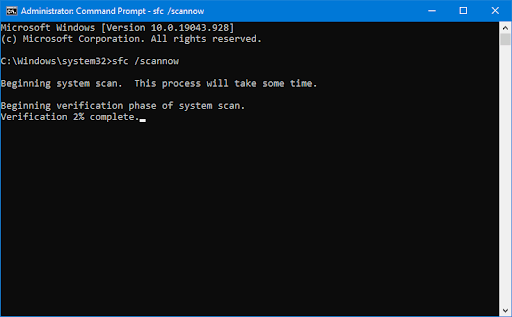
- Wait for the Scan to Complete
The System File Checker will start scanning your system for corrupted files. This process can take some time, so be patient. If the utility finds any discrepancies, it will attempt to restore the affected system files and fix errors related to them.
Once the scan is complete, restart your computer and check if the Live Kernel Event Code: 193 error is resolved. If not, you may need to try other troubleshooting steps outlined in this guide.
Method 3: Uninstall NordVPN (if Applicable)
If you have NordVPN installed on your computer, it may be causing the Live Kernel Event Code: 193 error. NordVPN has been known to cause system interrupts on certain systems, especially if it is configured to start automatically when your computer boots.
To resolve the issue, you can try uninstalling NordVPN by following these steps:
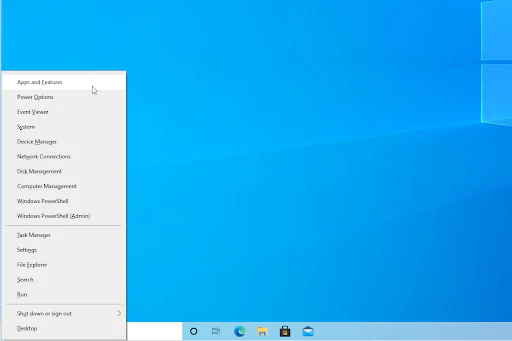
- Open the Apps and Features Menu
Press the Windows + X keys simultaneously to open the context menu, then select Apps and Features from the list.
- Locate NordVPN
In the Apps & Features window, scroll through the list of installed applications and find NordVPN. - Uninstall NordVPN
Click on NordVPN, then select Uninstall. You will be prompted to confirm your choice. - Confirm Uninstallation
Click Uninstall again in the confirmation window to remove NordVPN from your computer.
Once the uninstallation is complete, restart your computer and check if the Live Kernel Event Code: 193 error is resolved. If you continue to encounter issues, further troubleshooting steps may be required.
Method 4: Update the Intel Wi-Fi Driver (Windows 10)
If you are encountering Live Kernel Event Code: 193 frequently on Windows 10, an outdated Intel Wi-Fi driver could be the culprit. The issue can often be resolved by updating the Wi-Fi driver to the latest version.
If you’re using a dual-band wireless driver, such as the Intel Dual-Band Wireless-AC 3160, updating the driver may improve system stability and prevent further crashes.
To update the Intel Wi-Fi driver, follow these steps:
- Navigate to the Intel Driver Download Page
Open your web browser and go to the Intel Dual Band Wireless-AC driver download page.
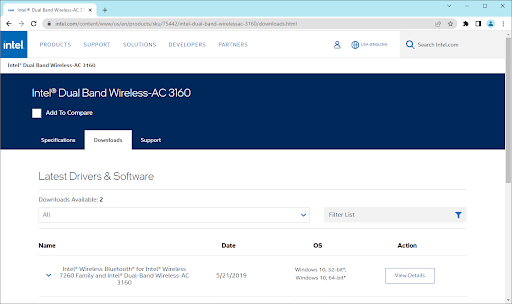
- Select the Correct Driver Version
On the download page, click on View details for the Intel Wireless 7260 Family and Intel Dual-Band Wireless-AC 3160 drivers.
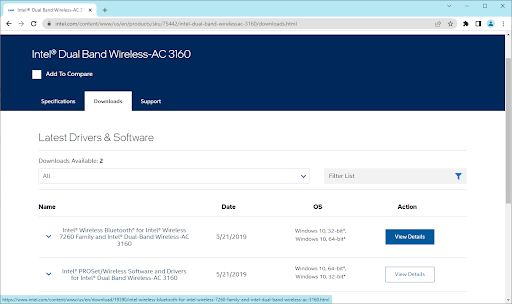
- Download the Driver
Select the appropriate version (32-bit or 64-bit) for your operating system and click Download.

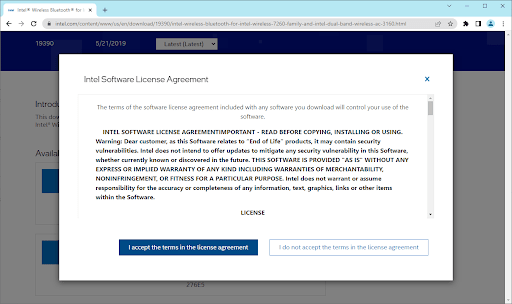
- Accept the License Agreement
On the next page, click I accept the terms in the licensing agreement and wait for the download to complete.
- Install the Driver
Once the driver is downloaded, open the file and follow the installation instructions. When prompted, click Yes to grant administrative permissions. - Restart Your Computer
After installation is complete, restart your computer and check if the Live Kernel Event Code: 193 error persists.
If this solution doesn’t resolve the issue or you’re not using Windows 10, don’t worry—there are more fixes available! Continue reading for additional troubleshooting steps to resolve the Live Kernel Event Code: 193 on Windows.
Method 5: Update Your Chipset Drivers
Outdated or damaged chipset drivers can cause system instability, particularly during resource-intensive operations, which might lead to the LiveKernelEvent 193 error.
This issue is more commonly reported on laptops and notebooks. If you’re facing this problem due to an incorrect or outdated chipset driver, updating the drivers should help resolve the issue.
Depending on whether you’re using AMD or Intel hardware, the process for updating your chipset drivers will differ. Below are guides for both scenarios:
How to Update AMD Chipset Driver
- Visit the AMD Driver Page
Open your browser and navigate to the AMD Drivers and Support page. - Search for Your Product
Scroll down to the Search for your product section. Select Chipsets from the left column, then choose the appropriate CPU socket from the middle column. Select your processor from the third column and click Submit.
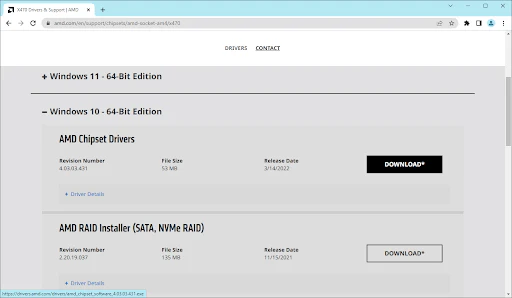
- Download the Latest Chipset Driver
You’ll be directed to a page with a list of compatible chipset drivers. Choose the OS architecture (32-bit or 64-bit) and click the Download button.
- Install the Driver
After downloading, double-click the installer and select Yes when prompted by the User Account Control. Follow the on-screen instructions to install the driver. - Restart Your Computer
Once the installation is complete, reboot your computer and check if the LiveKernelEvent 193 error has been resolved.
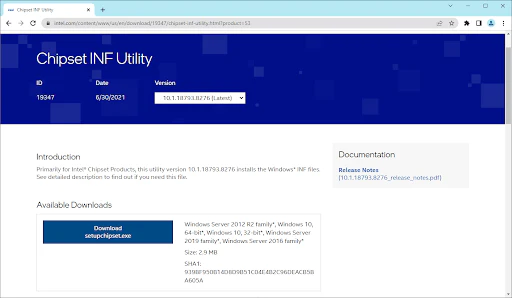
How to Update Intel Chipset Driver
- Visit the Intel Chipset INF Utility Download Page
Open your browser and navigate to the Intel Chipset INF Utility download page. - Download the Driver Setup
Click the Download setupchipset.exe button in the top-right corner of the screen.

- Agree to License Terms
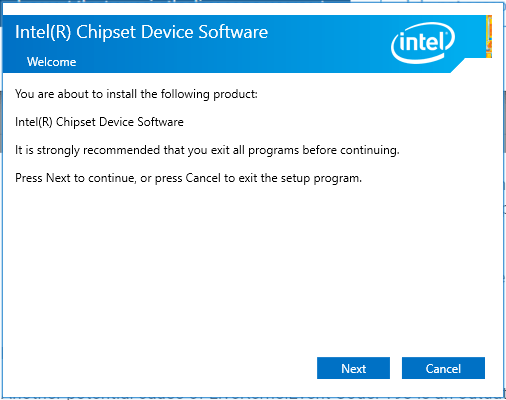
After the download page opens, click I accept the terms in the license agreement. - Install the Driver
The download will begin automatically. Afterward, open the setupchipset.exe file and follow the installation instructions. You might need to extract the contents of the updater software using an extraction tool (like 7Zip or WinRAR).
- Restart Your Computer
After the installation completes, restart your computer to check if the issue persists.
Updating your chipset drivers can often resolve system errors like LiveKernelEvent 193, ensuring better stability for your system.
Method 6: Update Your BIOS Drivers
An outdated BIOS can also be a potential cause of the LiveKernelEvent Code: 193 error. If your BIOS is outdated, you can fix the issue by updating your BIOS drivers to the latest version.
Here’s how you can proceed with updating your BIOS drivers:
- Visit the Manufacturer’s Website
Go to the website of your motherboard’s manufacturer (e.g., ASUS, MSI, Gigabyte). Look for a BIOS update application or BIOS upgrade utility on the Drivers Download page.- ASUS: E-Z Flash
- MSI: MFlash
- Gigabyte: @BIOS Live Update
- Read the Documentation
Before you start the BIOS update, make sure to read the official literature provided by the manufacturer. This step is very important because if the BIOS is updated improperly, it could brick your hardware (render it unusable), which will require a professional technician to fix. - Follow the Instructions
Follow the official update process and instructions given by your motherboard manufacturer to update your BIOS. Be sure to follow every step carefully to avoid any issues.
Method 7: Repair or Reinstall Windows
If none of the above methods have worked, there might be a more serious underlying issue with your Windows installation. In this case, you can try repairing or reinstalling Windows to fix the LiveKernelEvent Code: 193 error.
Here’s how you can repair or reinstall Windows:
- Open Settings
Click on the Start menu and select Settings (or use the Windows + I keyboard shortcut). - Navigate to Recovery
In the search bar, type “reset” and select Reset this PC from the search results, or go to Update & Security > Recovery. - Reset This PC
Click on the Get started button under Reset this PC and wait for Windows to begin the reset process. - Choose an Option
You’ll be given two options:- Keep my files: This option keeps your personal files but removes apps and settings.
- Remove everything: This option removes everything, including your personal files.
- Wait for the Process to Complete
Wait for Windows to complete the reset. If you choose the “Remove everything” option, your system will be fully wiped, and you can reinstall all the necessary programs and settings. - Fresh Installation of Windows
If you prefer a fresh Windows installation, you can follow detailed guides on how to install Windows 11, 10, 8.1, or 7 using a bootable USB. - Get Help
If you want to reinstall Windows but are unsure how, you can get help from a store like SoftwareKeep, where they can assist you in installing Windows for free. A fresh Windows OS installation is less prone to crashes, blue screen errors, and other issues.
TL;DR
The Live Kernel Event Code: 193 error on Windows is often caused by outdated drivers, corrupted system files, or incompatibility with programs like NordVPN. Here’s a quick breakdown of how to fix it:
- Run the Hardware and Devices Troubleshooter and the System File Checker (SFC) scan.
- Uninstall NordVPN (if applicable).
- Update Intel Wi-Fi drivers, chipset drivers, or BIOS drivers.
- If the issue persists, repair or reinstall Windows.
We hope this guide helped you resolve the Live Kernel Event Code: 193 error. If you have further questions or suggestions, feel free to leave a comment below. Thanks for reading!
One more thing
If you’re in search of a software company that embodies integrity and upholds honest business practices, your quest ends here at Ecomkeys.com. As a Microsoft Certified Partner, we prioritize the trust and satisfaction of our customers. Our commitment to delivering reliable software products is unwavering, and our dedication to your experience extends far beyond the point of sale. At Ecomkeys.com, we provide a comprehensive 360-degree support system that accompanies you throughout your software journey. Your trust is our foundation, and we’re here to ensure that every interaction with us is a positive and trustworthy one.