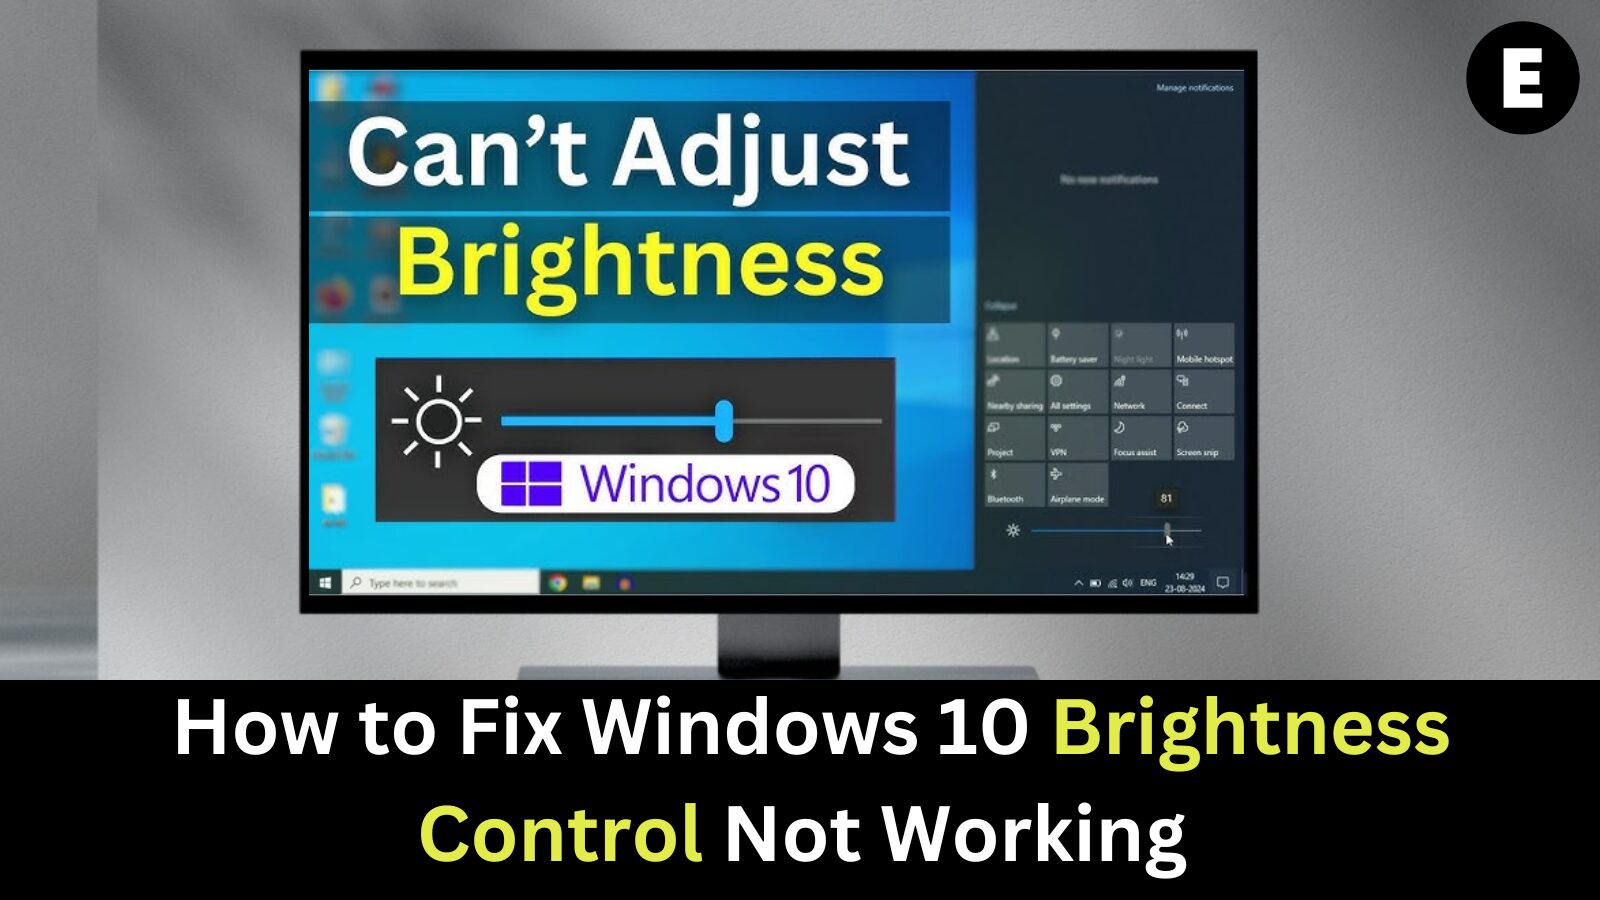
Adjusting screen brightness is a routine task for most Windows 10 users—whether you’re increasing brightness during the day for better visibility or dimming it at night to reduce eye strain. But what happens when your Windows 10 brightness control is not working? This frustrating issue can prevent you from making even the simplest changes to your display settings, affecting both comfort and productivity.
Fortunately, there are several proven solutions to resolve the screen brightness adjustment not working in Windows 10. In this guide, we provide step-by-step troubleshooting tips to help you regain control over your brightness settings. From updating display drivers to adjusting power settings, you’ll find practical, easy-to-follow fixes tailored for both beginners and advanced users.
Read on to learn how to fix brightness problems in Windows 10 and restore a more comfortable, customizable viewing experience.
Why Can’t I Adjust Brightness on My Windows 10 Laptop? Here’s Why It Matters
For desktop PC users, a brightness control issue might seem like a minor inconvenience. But for laptop users, it can have a serious impact—especially on battery performance and overall device efficiency. One of the most effective ways to conserve battery life is by reducing screen brightness. When Windows 10 brightness settings stop working, it can lead to excessive battery drain, particularly if your screen remains at maximum brightness with no way to dim it.
While desktop monitors often come with manual brightness controls, laptops rely heavily on Windows software to manage these settings. If you’re unable to adjust the brightness on a Windows 10 laptop, it’s not just an annoyance—it’s a potential drain on your system’s energy and health. That’s why it’s crucial to troubleshoot brightness issues on Windows 10 laptops promptly.
In the next sections, we’ll walk you through effective solutions to help you restore full control over your screen brightness and extend your battery life.
Fixed: Can’t Adjust Brightness on Windows 10? Here’s How to Solve It
Struggling with the brightness control not working in Windows 10? You’re not alone. Many users have encountered this frustrating issue, especially on laptops where screen brightness plays a critical role in battery life and comfort. The good news is that we’ve compiled the most effective methods to help you fix screen brightness issues on Windows 10—whether you’re using a desktop or a laptop.
Some fixes are specific to certain devices, so be sure to follow the method that best suits your system.
✅ Method 1: Update Your Display Adapter Drivers
One of the most common reasons why brightness adjustment is not working in Windows 10 is outdated or corrupted display drivers. Updating your drivers is the first step you should take, regardless of the device you’re using.
🔧 How to Update Display Drivers Manually
Follow these steps to identify and update your graphics driver manually:
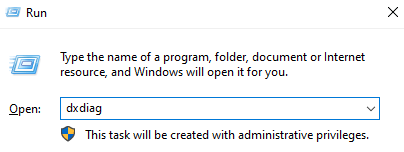
- Open the DirectX Diagnostic Tool:
- Press Windows + R to open the Run dialog.
- Type
dxdiagand click OK.
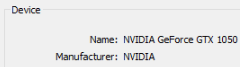
- Identify Your Graphics Card:
- Go to the Display tab.
- Under Device, note the name and manufacturer of your graphics card (e.g., Intel, NVIDIA, AMD).
- Download the Latest Driver:
- Visit your manufacturer’s official website:
- Search for your graphics card model and download the correct driver.
- Install the Driver:
- Double-click the downloaded file and follow the on-screen instructions.
⚠️ Important: Only download drivers from official websites to avoid malware or system damage. If you’re unsure which driver you need, search for your card model or contact the manufacturer’s support.
🔄 Method 2: Update Display Drivers Automatically
If you’re not comfortable manually updating drivers, Windows offers an automatic option through Device Manager:
- Press Windows + R, type
devmgmt.msc, and hit Enter to open Device Manager.

- Expand the Display adapters section.
- Right-click your graphics driver and select Update driver.
- Choose Search automatically for updated driver software and follow the prompts.
Alternatively, you can use third-party tools to automate the process. Some trusted, free options include:
These tools scan your system and help ensure that all drivers, including your display adapter, are up to date.
By updating your display adapter drivers—manually or automatically—you can often resolve the brightness control issue in Windows 10 and regain full functionality over your screen settings.
Stay tuned for more solutions if this method doesn’t fix the issue.
🔋Method 3: Adjust Brightness Using Power Options
Follow these steps to access and configure the correct brightness settings through the Control Panel:
- Open Power Options:
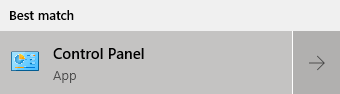
- Click the Search icon in your taskbar and type
Control Panel.Click on the top result.Change the view to Category, then navigate to Hardware and Sound > Power Options.
- Click the Search icon in your taskbar and type
- Modify Advanced Power Settings:
- Click Change plan settings next to your current power plan.
- Then click Change advanced power settings.
- In the new window, scroll down and expand the Display section.
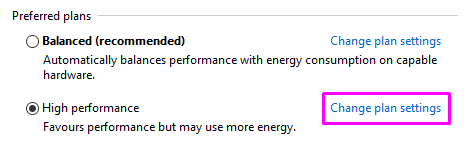
- Adjust the Following Settings:
- Display brightness
- Dimmed display brightness
- Enable adaptive brightness
- Make your desired adjustments, then click Apply and OK.
- Restart your laptop or PC to ensure the changes take effect.
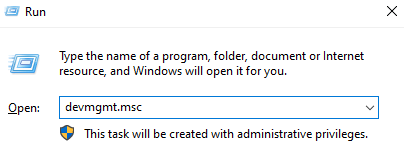
💡Method 4: Re-enable Your PnP Monitor
If your generic PnP monitor is disabled in Device Manager, your brightness control may stop working entirely. This can happen after Windows updates or driver changes.
Here’s how to re-enable it:
- Press Windows + R, type
devmgmt.msc, and hit Enter to open Device Manager.

- Expand the Monitors section.
- Right-click on Generic PnP Monitor and select Enable device.
- Restart your system and try adjusting the brightness again.
🧹Method 5: Delete Hidden Devices Under PnP Monitors
Sometimes, hidden or duplicate monitor devices interfere with brightness settings. You can remove them safely:
- Open Device Manager (press Windows + R, type
devmgmt.msc, press OK).
- In the menu bar, click View > Show hidden devices.
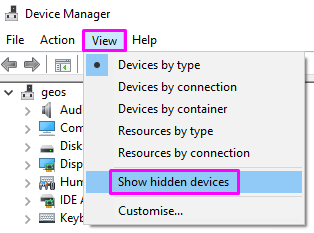
- Expand the Monitors section.
- Right-click any greyed-out (translucent) monitor devices and choose Uninstall device.
- After removing all hidden devices, restart your computer.
🔧Method 6: ATI Brightness Bug via Registry Editor
- Launch the Registry Editor:
- Press Windows + R to open the Run dialog.
- Type
RegEditand press Enter to open the Registry Editor.
- Navigate to the Following Registry Paths: You’ll need to access two specific registry keys. Use the left-side panel to expand each folder, following these paths:
- First Path:
HKEY_LOCAL_MACHINE \ SYSTEM \ ControlSet001 \ Control\Class \ {4d36e968-e325-11ce-bfc1-08002be10318} \ 0000 - Second Path:
HKEY_LOCAL_MACHINE \ SYSTEM \ CurrentControlSet \ Control \ Class \ {4d36e968-e325-11ce-bfc1-08002be10318} \ 0001
- First Path:
- Modify the Brightness Settings:
- In both paths, locate and double-click on the following entries:
MD_EnableBrightnesslf2KMD_EnableBrightnessInterface2
- Change the Value to 0 for each of them.
- In both paths, locate and double-click on the following entries:
- Apply and Restart:
- Once you’ve made the changes, close the Registry Editor.
- Restart your computer for the changes to take effect.
One more thing
If you’re in search of a software company that embodies integrity and upholds honest business practices, your quest ends here at Ecomkeys.com. As a Microsoft Certified Partner, we prioritize the trust and satisfaction of our customers. Our commitment to delivering reliable software products is unwavering, and our dedication to your experience extends far beyond the point of sale. At Ecomkeys.com, we provide a comprehensive 360-degree support system that accompanies you throughout your software journey. Your trust is our foundation, and we’re here to ensure that every interaction with us is a positive and trustworthy one.