Cortana, Microsoft’s built-in virtual assistant for Windows 10, was designed to streamline everyday tasks using AI-powered voice commands. While it can be a helpful tool for managing reminders, searching files, or launching apps, many users prefer not to use it—especially due to privacy concerns and performance issues.
One common problem users report is that Cortana won’t close in Windows 10, even after multiple attempts. This frustrating glitch causes the assistant to remain open on the screen, often obstructing the Start Menu, open windows, and other important elements of the user interface. As a result, it can significantly disrupt your workflow, making it difficult to access essential system functions or applications.
If you’re struggling with this issue, you’re not alone. In this guide, we’ll explore proven solutions to disable or close Cortana properly and restore smooth functionality to your Windows 10 device.
How to Fix Cortana Not Closing in Windows 10: Step-by-Step Guide
Is Cortana stuck open on your Windows 10 PC and refusing to close? You’re not alone. Many users have encountered this frustrating glitch where Cortana remains open, interferes with screen space, and blocks essential features like the Start menu. Fortunately, there are several effective solutions available to help you regain control of your desktop.
In this comprehensive troubleshooting guide, we’ll walk you through the most reliable methods to resolve the “Cortana won’t close” issue in Windows 10. These steps are designed to be user-friendly, but some may require administrative privileges. Make sure you’re using an account with admin access before proceeding.
💡 Tip: Bookmark this page or return to EcomKeys.com for more trusted Windows 10 troubleshooting tips, software fixes, and expert tech advice.
✅ Method 1: Use the Start Menu Troubleshooter
Windows 10 includes a number of built-in troubleshooting tools, and Microsoft offers additional downloadable solutions. One of the most useful tools in this case is the Start Menu Troubleshooter, which can sometimes fix Cortana-related problems.
Steps to Run the Start Menu Troubleshooter:
- Download the ” Start Menu Troubleshooter” from Microsoft’s official support page.
- Locate the downloaded file, usually named
startmenu.diagcab. If it’s in a compressed folder (ZIP), extract it using a tool like WinRAR or 7-Zip. - Right-click the file and select Run as administrator to launch the troubleshooter with elevated permissions.
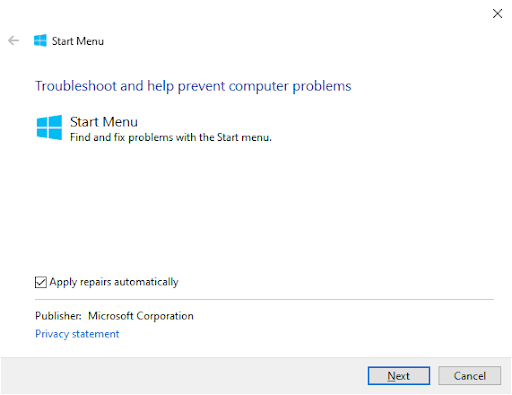
- When the troubleshooter window opens, click the Advanced option in the bottom-left corner.
- Ensure that “Apply repairs automatically” is checked and click Next.
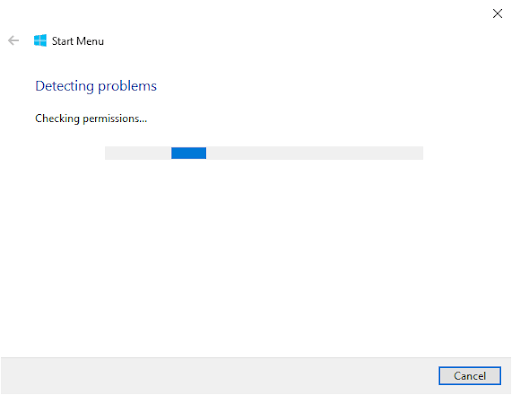
6. Wait for the tool to scan your system for issues. This may take a few minutes depending on your device and the complexity of the issue.
7. If there any issues are found, the tool will attempt to fix them automatically.
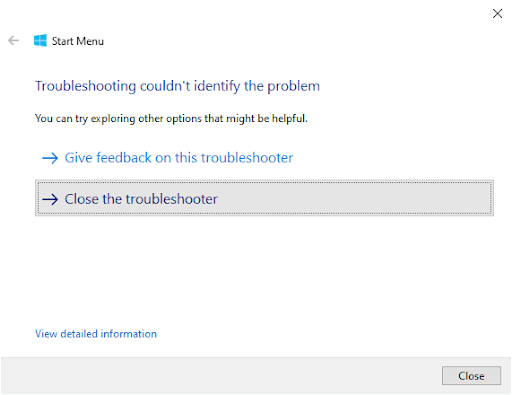
8. Once the scan is complete, click Close the troubleshooter.
9. Restart your computer to apply the changes.
After rebooting, check to see if Cortana now closes properly. If not, continue to the next method in our full troubleshooting guide.
Method 2: Install the Correct Speech Package for Your Language
Another possible reason Cortana won’t close in Windows 10 is a missing or incomplete speech package for your selected language. Cortana relies on language-specific voice data to function correctly. If these files are missing or not properly installed, it can cause unexpected glitches, including Cortana staying open or becoming unresponsive.
Follow the steps below to make sure your language’s speech package is properly installed:
How to Install a Language Speech Package in Windows 10:
- Click the Start menu “Windows icon” in your taskbar.
- Open Settings by clicking the gear icon, or press Windows + I on your keyboard for quicker access.
3. In the Settings window, select Time & Language.
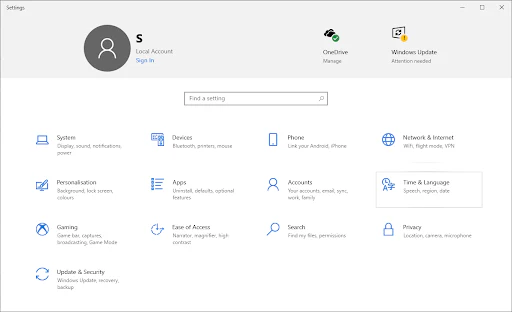
4. Navigate to the Speech tab from the left-hand menu.
5. Scroll down to the Installed voice packages section. Look for your preferred language (e.g., English (United States)).
6. If your language isn’t listed, click on Add voices.
7. In the new window, check the box next to your language, then click the Add button.
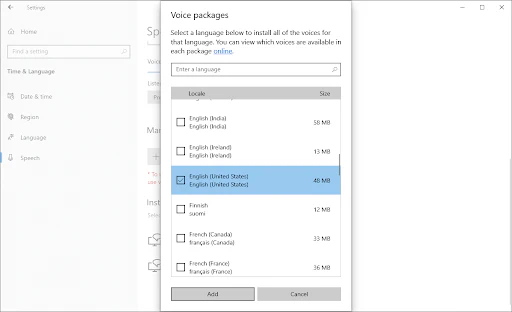
8. Wait for the speech package to finish downloading and installing. This may take a few minutes depending on your internet speed.
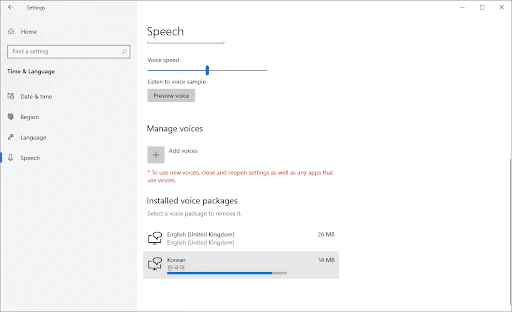
9. Once installed, restart your computer to apply the changes.
After rebooting, test Cortana to see if the issue has been fixed. With the correct speech files in place, Cortana should work more smoothly and respond correctly to system controls.
Method 3: Restart Cortana via Task Manager
If Cortana is unresponsive or won’t close properly, a quick and effective fix is to restart the Cortana process using Task Manager. This method allows you to force-stop the virtual assistant and relaunch it without making permanent changes to your system settings.
Here’s how to do it step-by-step:
How to Restart Cortana in Windows 10:
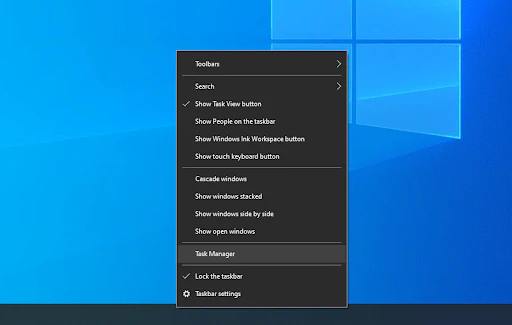
- Right-click on the taskbar (in any empty space).
- From the context menu, select Task Manager.
3. In the Task Manager window, make sure you’re on the Processes tab.
4. Scroll down to locate Cortana in the list of running apps or background processes.
5. Click on Cortana to select it, then click the End task button in the bottom-right corner of the window.
6. Once the process ends, restart your computer to allow Cortana to reload cleanly.
After rebooting, check if Cortana is functioning properly and closing as expected. This simple restart often resolves temporary glitches and clears out any background errors affecting the assistant’s performance.
Method 4: Restart Cortana Using Command Prompt
If Cortana still won’t close after using Task Manager, a more advanced approach involves using the Command Prompt to manually terminate the Cortana process. This method gives you more control and can be particularly effective if the virtual assistant is frozen or unresponsive in the background.
How to Force Close Cortana via Command Prompt:
- Press Windows + R on your keyboard to open the Run dialog box.
- Type
cmdand press Enter to launch the Command Prompt. - In the Command Prompt window, type the following command:
taskkill /f /im cortana.exe
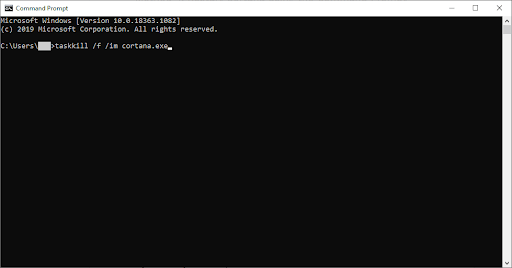
4. Press Enter to execute the command. This will forcefully terminate the Cortana process.
5. Once completed, restart your computer to reinitialize Cortana under normal operating conditions.
After rebooting, test to see if Cortana now functions correctly and closes without issues. This method is especially useful for power users and IT professionals looking to quickly resolve Cortana-related glitches in Windows 10.
Final Thoughts
Dealing with Cortana not closing in Windows 10 can be frustrating, especially when it interferes with your workflow or takes up valuable screen space. Thankfully, the solutions outlined above—from using the Start Menu Troubleshooter to advanced fixes via Command Prompt—offer reliable ways to resolve the issue.
Whether the problem stems from a missing speech package, a system glitch, or a stuck background process, one of these methods should help you restore full control over Cortana. Always make sure your Windows 10 system is up to date, and don’t hesitate to explore additional settings for privacy and performance optimization.
For more expert troubleshooting guides, Windows tips, and software solutions, bookmark our site and check back regularly. Your tech issues deserve fast, clear, and effective solutions—and that’s exactly what we aim to deliver.
One more thing
If you’re in search of a software company that embodies integrity and upholds honest business practices, your quest ends here at Ecomkeys.com. As a Microsoft Certified Partner, we prioritize the trust and satisfaction of our customers. Our commitment to delivering reliable software products is unwavering, and our dedication to your experience extends far beyond the point of sale. At Ecomkeys.com, we provide a comprehensive 360-degree support system that accompanies you throughout your software journey. Your trust is our foundation, and we’re here to ensure that every interaction with us is a positive and trustworthy one.