If you’re attempting to upgrade to Windows 11 and have run into the 0xC1900101 error, you’re definitely not alone. This common Windows installation error typically signals a driver conflict or hardware compatibility issue that prevents the upgrade from completing successfully. The 0xC1900101 Windows 11 error is often linked to outdated drivers, third-party antivirus software, or corrupted installation files—each of which can interfere with a smooth update process. Understanding this error code is important to resolving it effectively. In this comprehensive guide, we’ll break down what causes the Windows 11 upgrade error 0xC1900101, explain how it impacts your system, and provide step-by-step troubleshooting solutions to help you move forward. Keep reading to discover how to fix error 0xC1900101 and complete your Windows 11 installation with confidence.
Top Reasons Behind the 0xC1900101 Error on Windows 11
Many users experience the 0xC1900101 error when upgrading to Windows 11, and this error can appear in several forms, including codes like 0xC1900101 – 0x2000c, 0x20004, 0x20017, 0x40017, 0x30018, and 0x40021. This Windows 11 installation error typically points to driver conflicts, hardware issues, or corrupted installation media—all of which can interrupt the upgrade process.
A common culprit behind the 0xC1900101 error is outdated or incompatible drivers and software. If your system includes older hardware or third-party software that hasn’t been updated for Windows 11 compatibility, it could block the upgrade entirely. Ensuring that all drivers—especially for graphics, storage, and network adapters—are updated is essential.
Another frequent cause is corrupt or damaged installation media. If your installation files were downloaded from an unofficial source or the USB installation drive has errors, the setup may fail mid-process. Using Microsoft’s official Media Creation Tool can help eliminate this risk.
Lastly, internal hardware issues such as faulty RAM, failing hard drives, or system-level instability can trigger the 0xC1900101 error. Running diagnostics on your hardware can help identify and resolve underlying problems before attempting the upgrade again.
Understanding the specific cause of this error is the first step to a smooth Windows 11 upgrade. With the right troubleshooting steps, you can resolve 0xC1900101 and confidently move forward with installing the latest version of Windows.
Step-by-Step Guide to Fixing the 0xC1900101 Error on Windows 11
The 0xC1900101 error on Windows 11 can stem from several different issues, ranging from driver conflicts to hardware compatibility problems. Fortunately, there are multiple proven solutions that can help you resolve this frustrating error and successfully complete your Windows 11 installation. Whether it’s freeing up disk space, updating outdated drivers, or checking for system file corruption, applying the right troubleshooting steps can make all the difference. In the following sections, we’ll walk you through the most effective methods to fix the 0xC1900101 error and get your upgrade process back on track—quickly, safely, and with confidence.
1. Free Up Hard Drive Space to Fix the 0xC1900101 Error
One of the most common reasons for encountering the “0xC1900101″ error during a Windows 11 upgrade is insufficient disk space. This error often occurs when your system doesn’t have enough free storage to complete the installation process smoothly. According to official Microsoft Windows 11 system requirements, you need at least 64GB of available disk space to install and run the operating system effectively.
To free up space, start by uninstalling unused applications, deleting temporary files, and clearing your Recycle Bin. You can also use built-in tools like Disk Cleanup or Storage Sense to remove old Windows update files, system cache, and other junk data. Identifying and removing large, unnecessary files—such as outdated installers or duplicate media—can also quickly reclaim valuable space.
Once you’ve ensured that your hard drive meets the required storage threshold, attempt the upgrade again. In many cases, clearing up hard drive space resolves the 0xC1900101 installation error, allowing Windows 11 to install without further issues.
2. Update Your Drivers to Fix the 0xC1900101 Error on Windows 11
Outdated or incompatible drivers are one of the most common causes of the 0xC1900101 error when upgrading to Windows 11. Ensuring your drivers are up to date is a critical step in maintaining system stability and compatibility during major updates. Driver conflicts, especially with essential components like graphics, storage, or network adapters, can prevent the installation from completing successfully.
How to Update Drivers Using Windows Update
Microsoft makes it easy to keep your system drivers updated using the built-in Windows Update feature. Here’s how to do it:
- Click on the Start menu and select Settings, or press Win + I on your keyboard to open the Settings app.
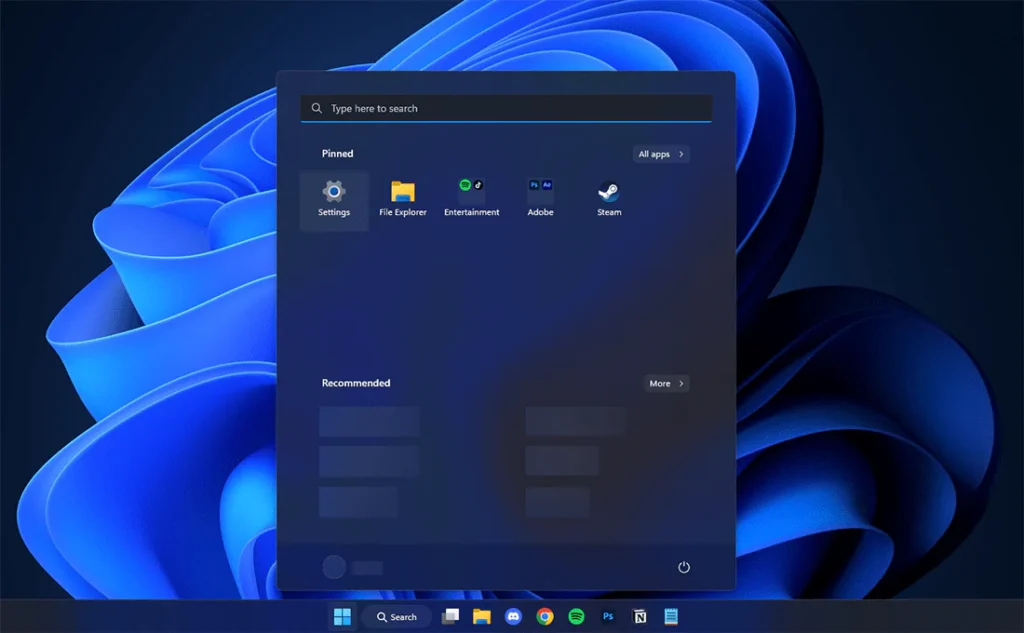
- Navigate to Windows Update from the sidebar.

- Click on Advanced Options.
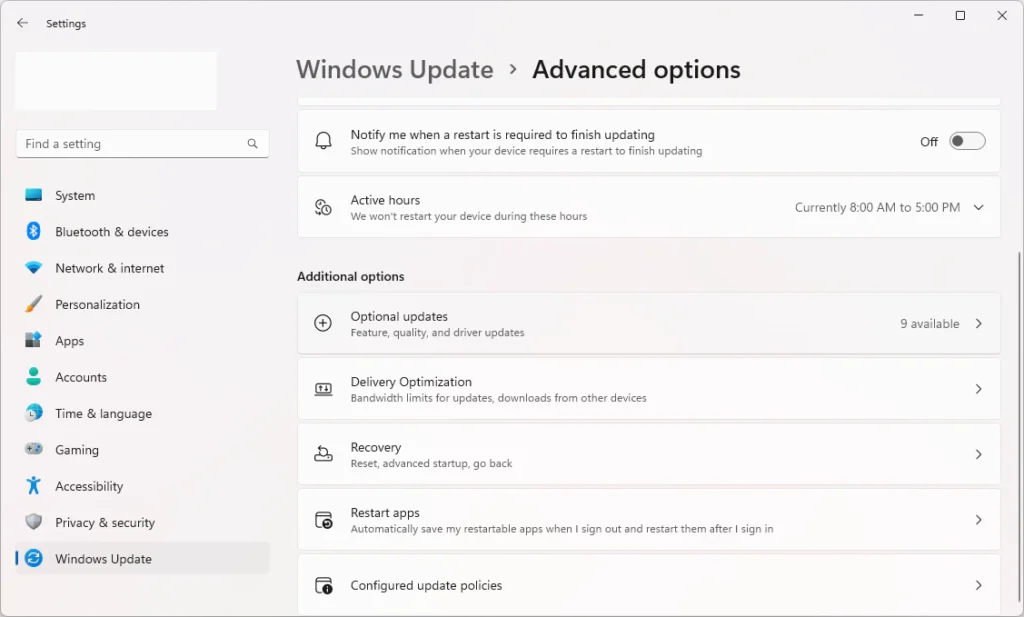
- Scroll down and select Optional Updates.
- Under the Driver Updates section, click the dropdown arrow to view all available updates.
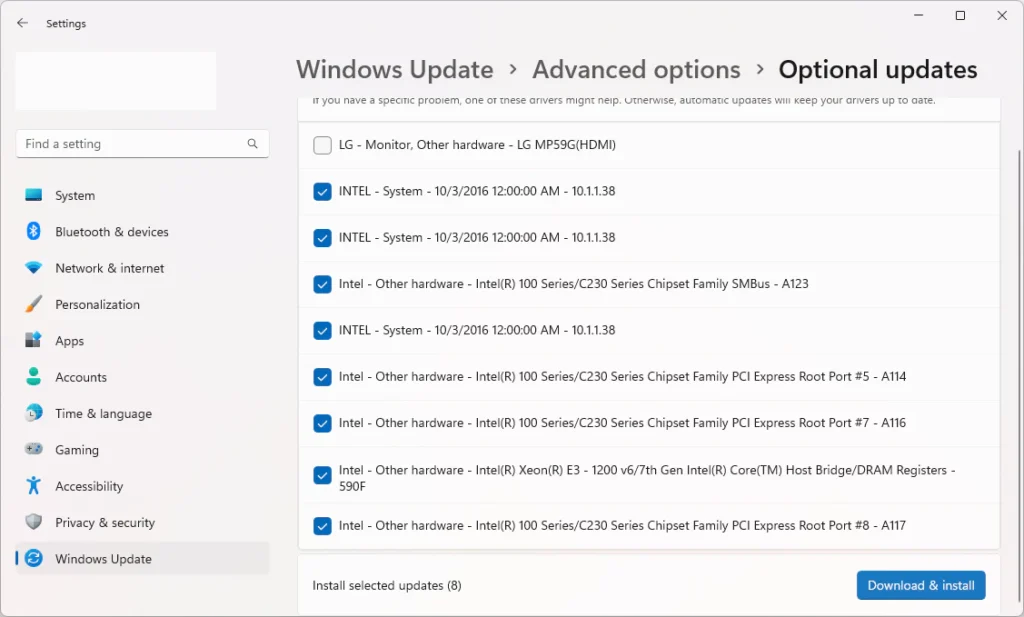
- Check all the drivers you want to update, then click Download & Install.
Once the updates are installed, Windows may prompt you to restart your computer. This helps ensure the new drivers are properly applied and may eliminate the 0xC1900101 error during your next attempt to install Windows 11.
How to Update Drivers Using Device Manager in Windows 11
Another reliable method to resolve the 0xC1900101 error on Windows 11 is by updating your drivers manually through Device Manager. This tool gives you direct control over each hardware component, making it easier to pinpoint outdated or incompatible drivers that may be blocking your Windows 11 upgrade.
Step-by-Step Guide to Updating Drivers with Device Manager:
After installation, you may be prompted to restart your computer to apply the changes.
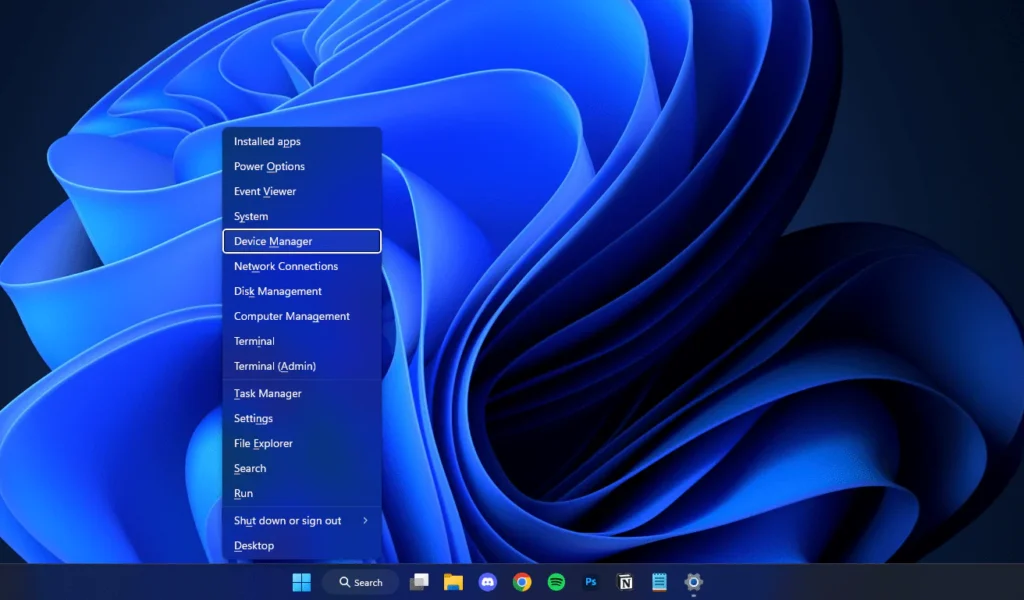
- Press Win + X on your keyboard, then select Device Manager from the list.
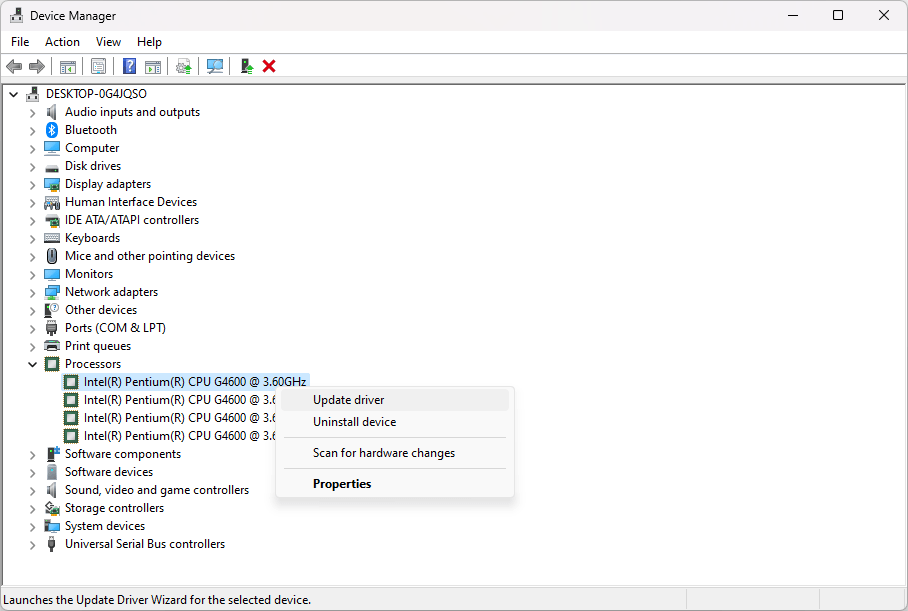
2. In the Device Manager window, find the component you want to update. It’s recommended to focus on critical hardware such as Disk drives, Display adapters, and Processors.
3. Right-click on the desired device and select Update driver.
4. Choose Search automatically for updated driver software. Windows will begin scanning for the most recent driver version compatible with your system.
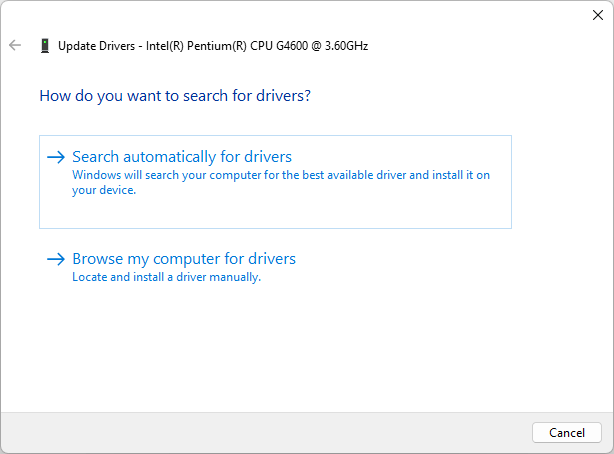
5. If a newer version is found, Windows will automatically download & install it.
3. How to Reinstall Drivers to Resolve the 0xC1900101 Error
If updating your drivers doesn’t resolve the issue, reinstalling them can often help fix any underlying driver problems that may be contributing to the 0xC1900101 error on Windows 11. Reinstalling drivers ensures that your system is using the latest, most compatible version, which can address issues that might have occurred during the previous installation.
- To begin, press the Windows + R keys to open the Run utility. In the Run dialog box, type “devmgmt.msc” without quotes and click OK. This will open the Device Manager in a separate window.
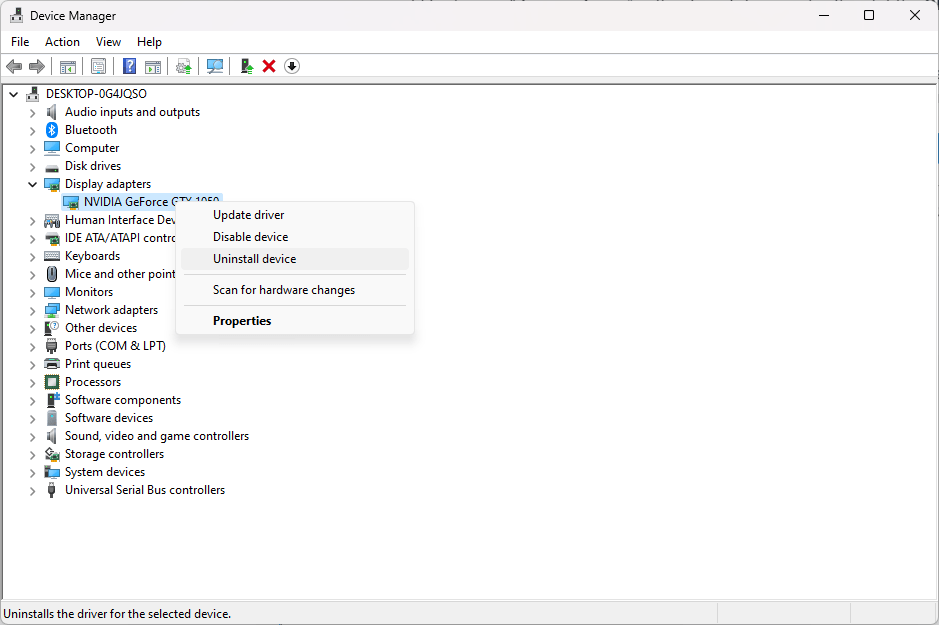
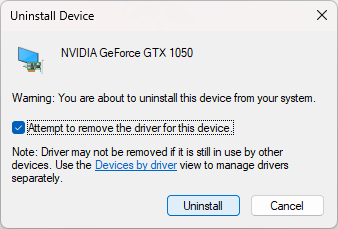
2. Next, locate the device category related to the problematic driver. Right-click on the device, then select “Uninstall device” from the context menu. A confirmation prompt will appear—click Uninstall to proceed. Afterward, allow Windows to remove the device from your system.
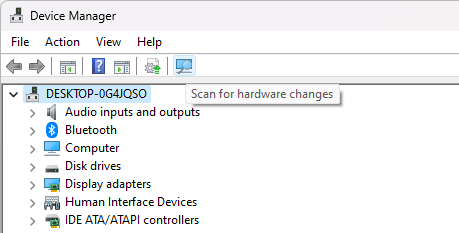
3. Once the device is uninstalled, go to the Device Manager menu and select “Action”, then choose “Scan for hardware changes”. This will prompt Windows to reinstall the necessary drivers automatically.
4. After the drivers are reinstalled, restart your computer then check if the 0xC1900101 error persists. If the error is resolved, your system should be ready for a smooth Windows 11 upgrade without further complications.
4 . Perform a System File Checker (SFC) Scan
The SFC scan is a built-in Windows tool that checks for and repairs any corrupt or missing system files. Running this scan can help resolve the 0xC1900101 error.
- Open the search bar in your taskbar by clicking on the magnifying glass icon. Press Windows + S on your keyboard as a shortcut.
- Type Command Prompt in the search box. When you see it in the results, right-click on it then choose Run as Administrator. If you’re using a local account that doesn’t have administrator permissions, then click here to learn how to grant admin access.

- When prompted by the User Account Control (UAC), click Yes to allow the app to launch with administrative permissions.
- Type in the following command, and press Enter to execute it: sfc /scannow
- Wait for the System File Checker to finish scanning your computer. In the case of a discrepancy, the utility will restore system files, and fix all errors related to them.


5 . Execute the DISM Command
Here’s how to use the DISM tool effectively:
- First, open the search bar by clicking the magnifying glass icon on your taskbar or use the Windows + S shortcut on your keyboard.
- Type Command Prompt into the search box. Once it appears in the search results, right-click it then select Run as Administrator.
- If prompted by the User Account Control (UAC), click Yes to allow administrative access.
- In the Command Prompt window, type the following command and press Enter:
DISM.exe /Online /Cleanup-image /Restorehealth
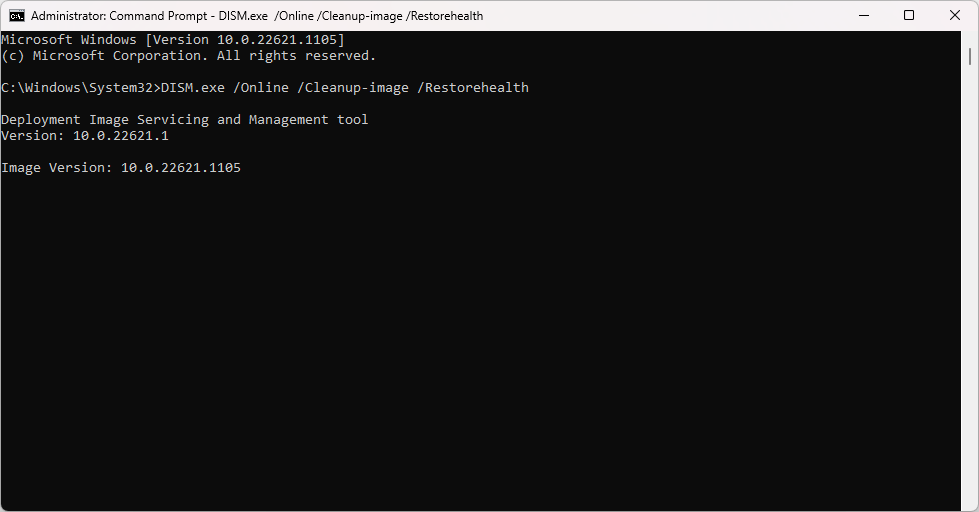
- Wait for the process to complete. The tool will automatically scan for and fix any issues with your system’s image.
- Once the scan finishes, close the Command Prompt and restart your computer. Check if the 0xC1900101 error has been resolved.
Using the DISM command can help repair corrupt system files and restore your PC to optimal health, improving the chances of a successful upgrade to Windows 11.
6. Update Windows 11 Using a Bootable USB Drive
If you’re encountering issues upgrading to Windows 11 through standard methods, using a bootable USB drive can be an effective alternative. By creating a bootable USB drive with the Windows 11 installation files, you can bypass common installation errors and upgrade your system seamlessly. To get started, simply download the latest version of Windows 11 from the official Microsoft website and follow the instructions to create bootable media.
Once your bootable USB is ready, insert it into your computer and restart your device. Ensure your system settings are properly configured to boot from the USB drive. Upon restarting, the Windows 11 upgrade wizard will guide you through a smooth and hassle-free installation process. This method can be a lifesaver if you’re facing issues with traditional upgrade paths, offering a reliable way to install the latest Windows version without complications.
7 . Remove Recently Installed Applications
If you’re encountering the 0xC1900101 error while upgrading to Windows 11, recently installed apps or programs could be the culprit. These applications may cause compatibility issues that prevent a smooth upgrade. To fix this, consider uninstalling the apps you’ve recently added. Here’s how to remove applications on Windows 11 and potentially resolve the error:
- Open Settings: Click on the Start menu and select Settings or use the Windows + I keyboard shortcut to open the settings directly.
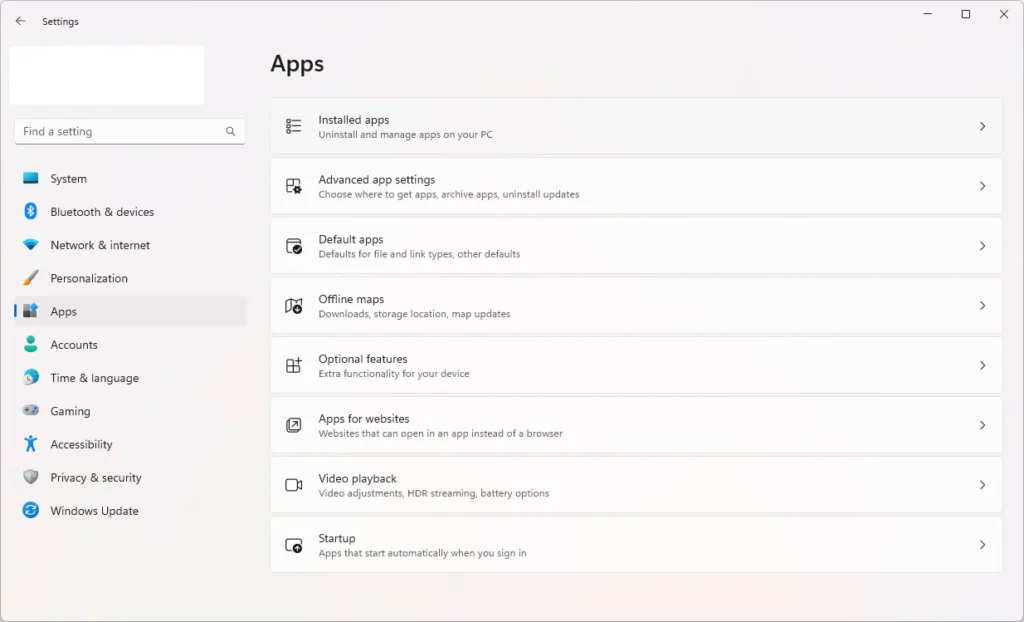
- Navigate to Installed Apps: In the left-hand menu, click on the Apps section, and select Installed Apps. This will display all the applications installed on your device.
- Filter and Sort Apps: To find recently installed apps, switch the filter to All drives and sort by Date Installed. This helps pinpoint any new software that might be causing conflicts during the upgrade process.
- Uninstall Problematic Apps: Click on the three dots next to the app’s name and select Uninstall. Follow the prompts to remove the application along with any leftover files.
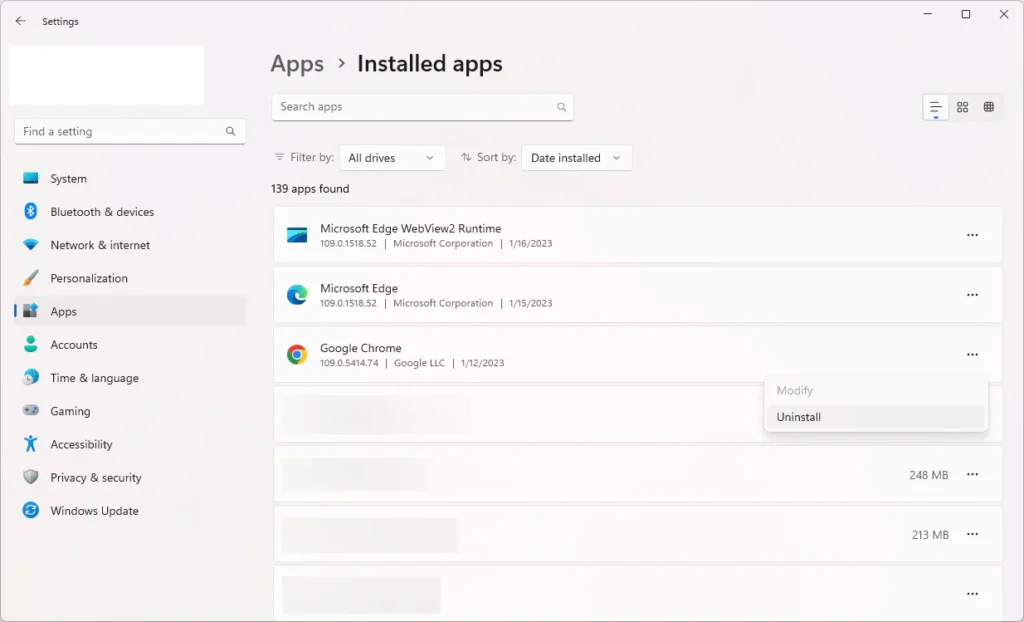
- Reboot Your Device: Once uninstallation is complete, restart your computer and attempt to upgrade to Windows 11 again.
Conclusion
If you’re encountering the 0xC1900101 error while trying to upgrade to Windows 11, don’t worry—there are multiple solutions that can help resolve this issue. Start by freeing up space on your hard drive, ensuring that you have the recommended amount of storage. Next, update or reinstall outdated drivers, run system scans like SFC and DISM, and remove any recently installed apps or programs that might be causing compatibility conflicts. These troubleshooting steps should help fix the error and allow you to successfully upgrade to Windows 11.
One more thing
If you’re in search of a software company that embodies integrity and upholds honest business practices, your quest ends here at Ecomkeys.com. As a Microsoft Certified Partner, we prioritize the trust and satisfaction of our customers. Our commitment to delivering reliable software products is unwavering, and our dedication to your experience extends far beyond the point of sale. At Ecomkeys.com, we provide a comprehensive 360-degree support system that accompanies you throughout your software journey. Your trust is our foundation, and we’re here to ensure that every interaction with us is a positive and trustworthy one.