
Google Chrome is one of the most popular web browsers, known for its speed, reliability, and sleek design. However, some Windows 10 users encounter issues when installing it. If you’re facing a “Google Chrome Installation Failed” error, follow the solutions below to fix it quickly.
Why Can’t You Install Google Chrome on Windows 10?
There are several possible reasons why your Google Chrome installation failed on Windows 10. Below are the most common causes:
- Unspecified Installation Errors – Generic Chrome installation errors can occur without a specific error code. These can often be fixed using our troubleshooting steps.
- Error Code 0xa043 – One of the most frequent Chrome installation errors. Follow our guide below to resolve this issue.
- Antivirus Interference – Some antivirus software may block Chrome’s installation, mistakenly flagging it as malicious. Try temporarily disabling your antivirus to see if it resolves the issue.
- Setup Wizard Won’t Open – If the Google Chrome installer won’t launch, the issue could be related to Registry conflicts or local app data corruption.
- Previous Chrome Installations – Residual files from a previous Google Chrome installation might be interfering with the new setup. Removing these files may solve the problem.
Even if your case is unique, our step-by-step guide below will help you resolve most Google Chrome installation issues. If the problem persists, consider reaching out to Google Chrome Support for further assistance.
How to Fix Google Chrome Installation Failed on Windows 10
If you’re struggling to install Google Chrome on Windows 10, follow these step-by-step troubleshooting methods to resolve the issue.
Method 1: Run the Installer as an Administrator
One common reason for Chrome installation failure is running the installer without administrator permissions. This can prevent the installation from accessing system files.
Steps to Fix It:
- Log in to an Administrator Account – Ensure that you have administrative rights on your PC. If you’re using a standard account, switch to an admin account or request assistance from the administrator.
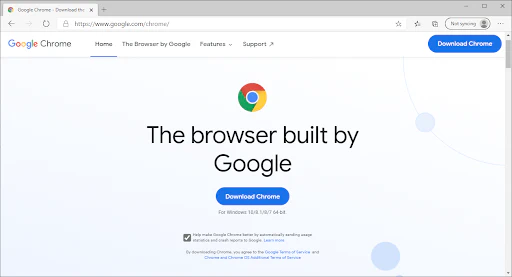
- Download Chrome from the Official Website – Use Microsoft Edge or another browser to go to the Google Chrome download page.
- ⚠ Important: Only download from the official source to avoid malware or scam software.
- Locate the Installer – Once the file is downloaded, navigate to your Downloads folder (or wherever you saved it).
- Run as Administrator – Right-click on the Chrome installer and select Run as Administrator.
- Confirm Installation – If prompted by the User Account Control (UAC), click Yes to allow changes.
- Wait for Installation to Complete – Follow the on-screen instructions and check if Google Chrome installs successfully.
If the installation still fails, proceed to the next troubleshooting method!
Method 2: Temporarily Disable Your Antivirus Software
Antivirus programs can sometimes interfere with software installations, including Google Chrome, by blocking certain processes or files. If you’re facing the Google Chrome Installation Failed error, try disabling your antivirus temporarily.
⚠ Warning: This method is not recommended for long-term use, as running your system without an antivirus can expose you to security threats. Proceed with caution and re-enable your antivirus after installing Chrome.
Steps to Disable Your Antivirus:
- Open Task Manager
- Right-click on an empty space in your taskbar and select Task Manager.
- If Task Manager opens in compact mode, click More details to expand it.
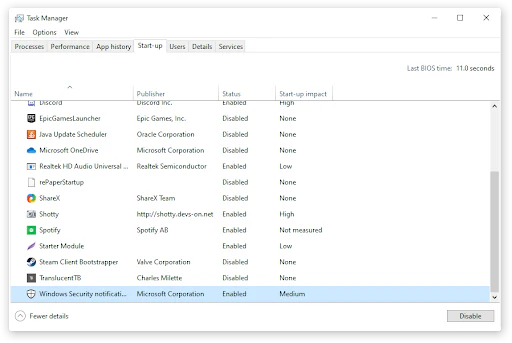
- Disable Antivirus from Startup
- Switch to the Startup tab.
- Locate your antivirus application from the list.
- Click on it once to select it.
- Click Disable (bottom-right corner).
- Restart Your Computer
- Reboot your PC to apply the changes.
- Try Installing Google Chrome Again
- Run the Chrome installer as an administrator and check if the installation completes successfully.
- Re-enable Your Antivirus
- If Chrome installs without issues, you can enable your antivirus again by following the same steps and clicking Enable instead of Disable.
If disabling your antivirus doesn’t fix the issue, proceed to the next troubleshooting method.
Method 3: Delete the Google and Google Update Directory Folder
If you previously had Google Chrome installed on your device, leftover files might be conflicting with the new installation. Removing these residual folders can help fix the Google Chrome Installation Failed error.
Steps to Delete Google and Google Update Folders:
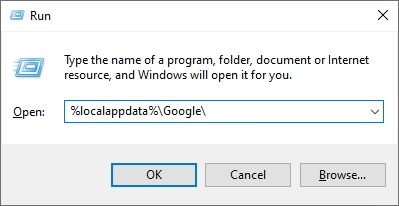
- Open the Run Dialog Box
- Press Windows + R on your keyboard.
- Type
%localappdata%\Google\and click OK.
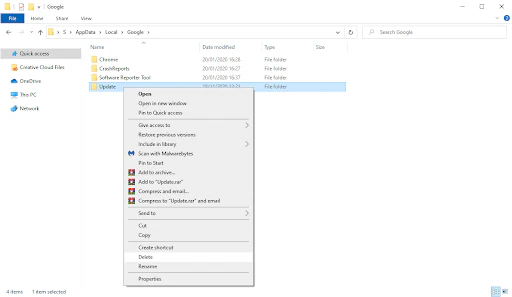
- Delete the Google Update Folder
- In the File Explorer window that opens, look for a folder named Update.
- If it exists, right-click on it and select Delete.
- You may need administrator permissions to complete this step.
- Check if the Installation Works
- Try installing Google Chrome again.
- If the error persists, proceed to the next step.
- Delete the Entire Google Folder
- Open the Run Dialog Box again (Windows + R).
- Type
%localappdata%and click OK. - Locate the Google folder.
- Right-click on it and select Delete.

- Try Installing Google Chrome Again
- Run the Chrome installer as an administrator and check if the installation succeeds.
If this method doesn’t resolve the issue, move on to the next troubleshooting step. 🚀
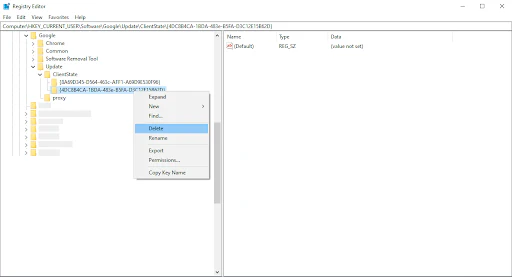
Method 4: Remove the Google Key from Your Registry
Making small modifications to your Windows Registry can help resolve the Google Chrome Installation Failed error. However, editing the registry incorrectly can cause system issues. Ensure you back up your registry before proceeding.
Steps to Remove the Google Registry Key:
- Open the Registry Editor
- Press Windows + R to open the Run dialog box.
- Type
regeditand click OK. - If prompted by User Account Control (UAC), click Yes.
- Navigate to the Following Key
- In the Registry Editor, expand the folders by clicking the arrow icons.
- Go to:
HKEY_CURRENT_USER\Software\Google\Update\ClientState - Find the folder named
{4DC8B4CA-1BDA-483e-B5FA-D3C12E15B62D}.
- Delete the Folder
- Right-click on
{4DC8B4CA-1BDA-483e-B5FA-D3C12E15B62D}and select Delete. - Click Yes to confirm.
- Right-click on
- Check if Chrome Installs
- Try running the Google Chrome installer.
- If the installation still fails, proceed to the next step.
- Delete Additional Registry Keys
- In the Registry Editor, locate and delete the following keys:
HKEY_CURRENT_USER\Software\GoogleHKEY_LOCAL_MACHINE\Software\GoogleHKEY_LOCAL_MACHINE\Software\Wow6432Node\Google- To delete a key, right-click on it and select Delete, then confirm.

- Restart Your Computer
- Reboot your system to apply the registry changes.
- Try Installing Google Chrome Again
- Run the Chrome installer and see if the issue is resolved.
If this method doesn’t fix the issue, you may need to check for Windows updates or install Chrome in Safe Mode. 🚀
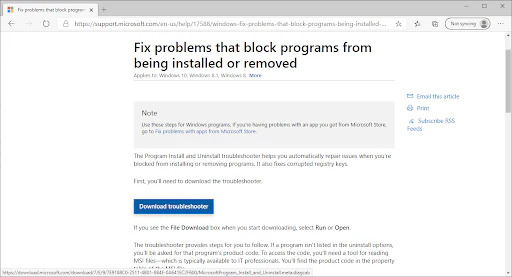
Method 5: Run the Program Install and Uninstall Troubleshooter
Microsoft provides an official troubleshooter to fix issues related to installing or uninstalling programs on Windows 10. This tool may help you resolve the Google Chrome Installation Failed error.
Steps to Run the Program Install and Uninstall Troubleshooter:
- Download the Troubleshooter
- Go to the Microsoft support website and download the Program Install and Uninstall Troubleshooter.
- Make sure you download it from the official Microsoft website for security reasons.
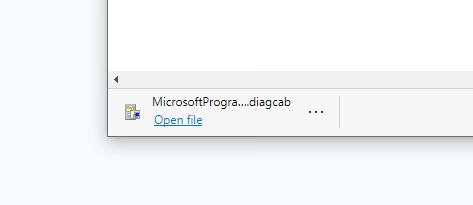
- Launch the Troubleshooter
- After the download is complete, click on the file to launch it.
- You might be prompted to provide administrator permissions to proceed. Click Yes when prompted.
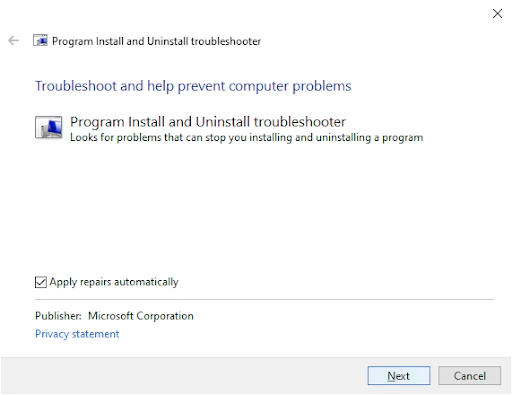
- Start the Troubleshooting Process
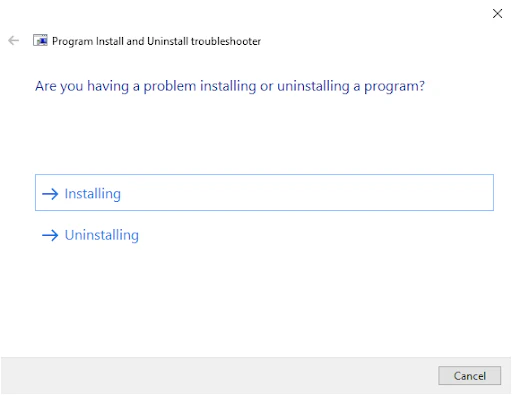
- Once the troubleshooter window opens, click on Next to begin the process.
- Choose Installation Issues
- When asked what the issue is, select Installing from the two options (Installing or Uninstalling).
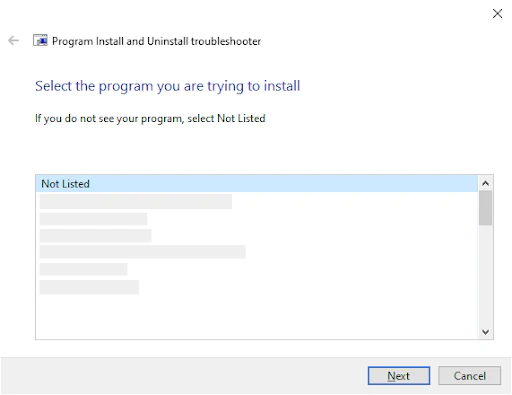
- Select Google Chrome
- If Google Chrome appears in the list of installed programs, select it.
- If it is not listed, choose the “Not Listed” option.
- Follow the Instructions
- If any issues are found, the troubleshooter will provide steps to resolve them.
- Follow the on-screen instructions to fix the issue.
- Retry the Installation
- After the troubleshooter applies the fix, try installing Google Chrome again to see if the issue is resolved.
If this method doesn’t work, you may need to try other troubleshooting steps or contact Microsoft Support for further assistance.
Method 6: Ensure the Background Intelligent Transfer Service is Running
The Background Intelligent Transfer Service (BITS) is crucial for installing certain applications, including Google Chrome. If this service is disabled, it can prevent the installation process. Here’s how to check and enable it if needed:
Steps to Enable the Background Intelligent Transfer Service:
- Open the Run Dialog
- Press Windows + R on your keyboard to open the Run utility.
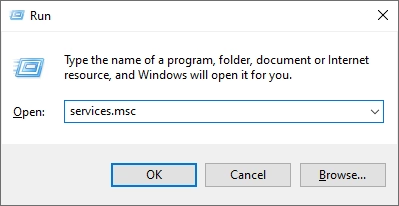
- Access Services
- Type services.msc into the Run box and hit OK. This will open the Services window.
- Locate BITS
- In the Services window, scroll down and find Background Intelligent Transfer Service (BITS) in the list of services.
- Open Properties
- Right-click on Background Intelligent Transfer Service and select Properties from the context menu.
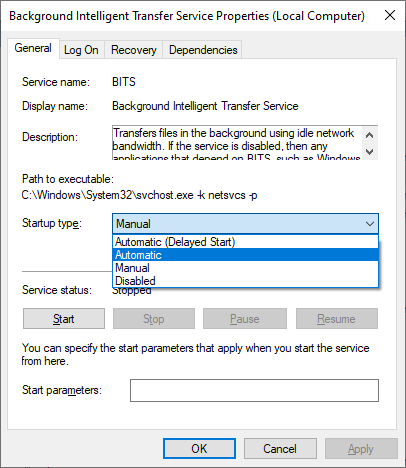
- Set Startup Type to Automatic
- In the Properties window, find the Startup type drop-down menu and set it to Automatic. This ensures that BITS will run automatically whenever your system starts up.
- Start the Service (if needed)
- If the service is currently disabled, click the Start button to enable it. Then click OK to save the changes.
- Exit and Retry Installation
- Close the Services window and attempt to install Google Chrome again to check if the issue has been resolved.
Enabling BITS should allow the installation of Google Chrome to proceed without any issues related to this service.
Method 7: Download the Beta or Canary Version of Chrome
If the stable version of Google Chrome isn’t installing properly on your system, you can try installing the Beta or Canary versions. These versions often contain newer features and bug fixes that might bypass the installation issues you’re facing.
Steps to Download and Install the Beta or Canary Version:
- Visit the Google Chrome Beta or Canary Page:
- Beta Version: Google Chrome Beta Download
- Canary Version: Google Chrome Canary Download
- Download the Installer:
- Click the download button for the version you want (Beta or Canary) and follow the instructions to download the installer.
- Run the Installer:
- Once downloaded, open the installer and proceed with the installation as you would with the stable version of Chrome.
- Test Installation:
- After installation, open Chrome and check if it runs smoothly.
Important Notes:
- Beta and Canary versions are not as stable as the regular version of Chrome, as they contain experimental features that may still have bugs. Be cautious and aware that you might encounter instability or unexpected behavior while using them.
- These versions can be a good alternative if the standard version of Chrome is not installing, as they often contain fixes for known issues.
By using the Beta or Canary versions, you might be able to bypass the installation errors preventing the stable version from installing.
One more thing
If you’re in search of a software company that embodies integrity and upholds honest business practices, your quest ends here at Ecomkeys.com. As a Microsoft Certified Partner, we prioritize the trust and satisfaction of our customers. Our commitment to delivering reliable software products is unwavering, and our dedication to your experience extends far beyond the point of sale. At Ecomkeys.com, we provide a comprehensive 360-degree support system that accompanies you throughout your software journey. Your trust is our foundation, and we’re here to ensure that every interaction with us is a positive and trustworthy one.