Windows Resource Protection (WRP) is a built-in Windows tool that safeguards critical system files and settings. If you see the error message “Windows Resource Protection could not perform the requested operation,” it indicates an issue with WRP configuration.
In this guide, we’ll explore five proven methods to fix this error and restore your system’s stability.
⚠️ Important: This process involves advanced troubleshooting, so follow the steps carefully. Let’s dive in! ⬇️
What is Windows Resource Protection (WRP)? 🛡️
Windows Resource Protection (WRP) is a built-in security feature in Windows that safeguards critical system files from unauthorized changes, corruption, or deletion. It ensures the integrity of essential Windows components by using file permission controls and monitoring any modifications.
🔹 If WRP detects an unauthorized change, it automatically restores the original file from a secure backup.
🔹 This helps prevent system crashes, file corruption, and performance issues caused by missing or altered system files.
🔹 WRP also acts as a defense against malware and ransomware, preventing harmful modifications that could compromise system stability.
Although WRP isn’t foolproof, it plays a crucial role in maintaining a secure and stable Windows environment.
What Causes the “Windows Resource Protection Could Not Perform the Requested Operation” Error? ❌
The “Windows Resource Protection could not perform the requested operation” error typically occurs due to corrupt system files in Windows. Several factors can trigger this issue, including:
🔹 Virus or Malware Infection – Malicious software can alter or damage critical system files.
🔹 Hardware Failure – Faulty hard drives or RAM issues can cause system instability.
🔹 Improper Shutdowns – Sudden power loss or forced shutdowns can lead to file corruption.
🔹 Corrupt or Damaged System Files – Essential Windows files may become unreadable or missing.
🔹 Incorrect File Permissions – Misconfigured security settings can prevent Windows from making necessary file changes.
🔹 Registry Issues – Errors in the Windows Registry can interfere with system processes.
🔹 Corrupted User Profile – A damaged user account can restrict access to critical system functions.
How to Fix It? 🔧
The best solution depends on what caused the error. Common troubleshooting steps include:
✅ Scanning for viruses and malware
✅ Running chkdsk to check for disk errors
✅ Performing System File Checker (SFC) and DISM scans
✅ Resetting file permissions
✅ Creating a new user profile
✅ Reinstalling Windows (if necessary)
Let’s explore the most effective solutions to resolve this issue! 🚀
How to Fix “Windows Resource Protection Could Not Perform the Requested Operation” 🚀
The “Windows Resource Protection could not perform the requested operation” error is a common issue in Windows 10 and Windows 11. It usually occurs due to:
✅ Corrupt system files
✅ Incorrect permissions
✅ Malware infections
Fix 1: Run the System File Checker (SFC Scan) 🛠️
The System File Checker (SFC) tool scans for and repairs corrupted system files. Here’s how to run it:
- 1️⃣ Open the Search Bar – Click the magnifying glass in the taskbar or press Windows + S.
- 2️⃣ Search for Command Prompt – Type “Command Prompt”, then right-click it and choose Run as Administrator.
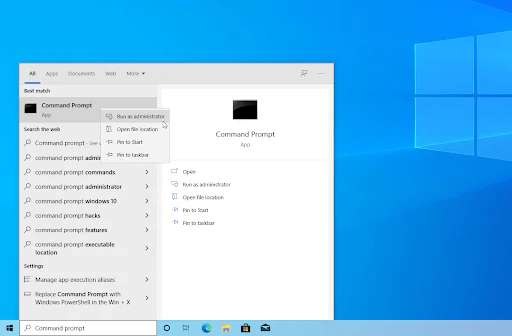
- 3️⃣ Approve UAC Prompt – If prompted by User Account Control (UAC), click Yes.
- 4️⃣ Run the SFC Command – Type the following command and press Enter: sfc /scannow
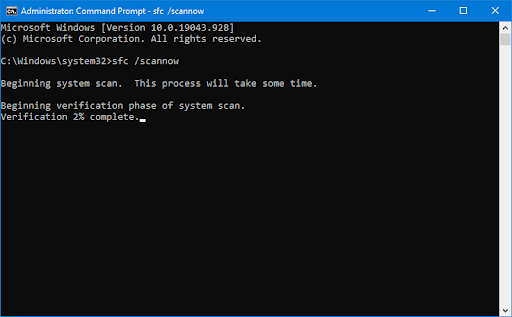
- 5️⃣ Wait for the Scan – The tool will scan and automatically repair any corrupted system files
Alternative Solution: Use EaseUS Partition Master
For a faster and automated fix, you can use EaseUS Partition Master. The Check File System feature scans and fixes system file errors in just a few clicks!
If the SFC scan doesn’t work, move on to the next fix: Run the DISM Tool (Deployment Image Servicing and Management). 🔄
Fix 2: Use the “chkdsk” Command to Repair Disk Errors 🖥️
The “chkdsk” (Check Disk) utility scans your hard drive for errors, including:
✅ Corrupt files
✅ Bad sectors
✅ File system issues
How to Run “chkdsk” to Fix the Error:
- 1️⃣ Open the Search Bar – Click the magnifying glass in the taskbar or press Windows + S.
- 2️⃣ Search for Command Prompt – Type “Command Prompt”, then right-click it and choose Run as Administrator.
- 3️⃣ Approve UAC Prompt – Click Yes to allow the app to run with admin privileges.
- 4️⃣ Run the chkdsk Command – Type the following and press Enter: chkdsk C: /r
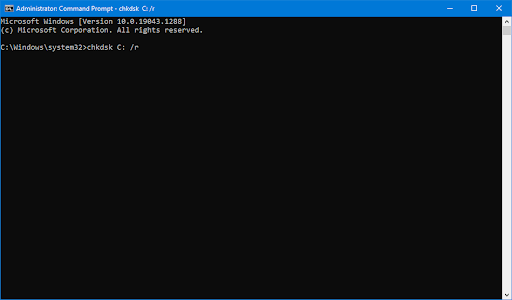
- 5️⃣ Wait for the Scan to Complete – This process can take some time. If errors are found, Windows will attempt to fix them automatically.
Once finished, restart your computer and check if the “Windows Resource Protection could not perform the requested operation” error is resolved! ✅
Fix 3: Start the Windows Modules Installer Service 🔧
If the Windows Modules Installer service is disabled, it can prevent SFC (System File Checker) scans from running properly. This service is essential for checking and installing Windows updates.
How to Enable the Windows Modules Installer Service:
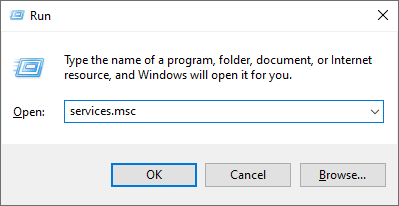
- 1️⃣ Press
Windows + Rto open the Run dialog box. - 2️⃣ Type
services.mscand click OK to open the Services window.
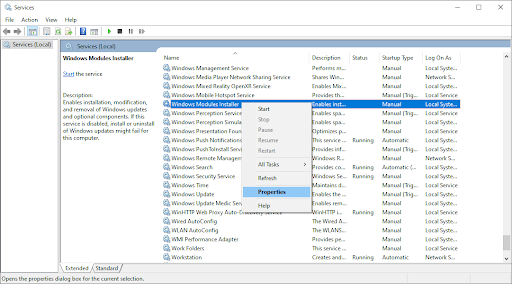
- 3️⃣ Scroll down and find the Windows Modules Installer service.
- 4️⃣ Right-click it and select Properties.
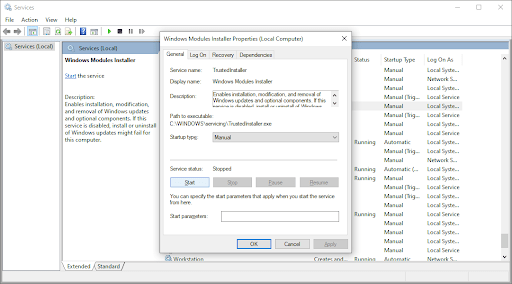
- 5️⃣ Set “Startup Type” to
Manualfrom the dropdown menu. - 6️⃣ If the service isn’t running, click “Start”.
- 7️⃣ Click Apply > OK to save the changes.
- 8️⃣ Restart your computer and check if the SFC scan now works properly! ✅
If you still see the “Windows Resource Protection could not perform the requested operation” error, proceed to the next solution. 🚀
Fix 4: Run Automatic Repair From Advanced Startup 🚀
If the “Windows Resource Protection could not perform the requested operation” error persists, you can try running Automatic Repair using the Windows Recovery Environment (WinRE).
Steps to Run Automatic Repair:
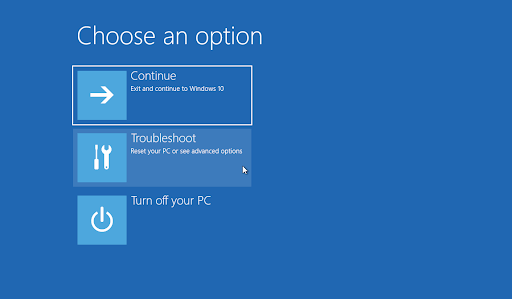
- 1️⃣ Restart your PC and repeatedly press F8 during boot (some devices require Fn + F8).
If this doesn’t work, turn your PC on and off three times until WinRE starts.
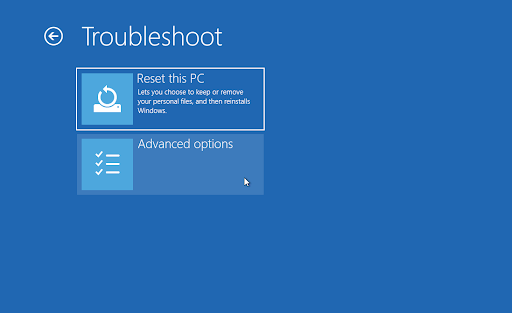
- 2️⃣ In the Recovery menu, select Troubleshoot.
- 3️⃣ Click Advanced options > Startup Repair.
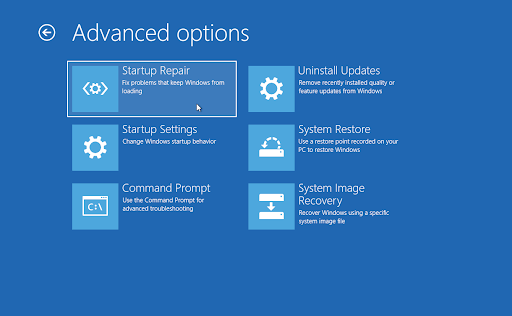
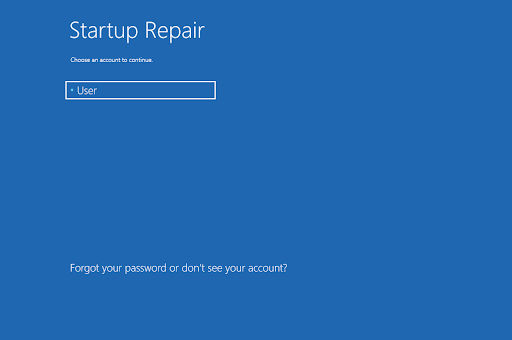
- 4️⃣ Your PC will restart automatically and launch Startup Repair.
- 5️⃣ Select your local user account and enter your password (leave blank if none).
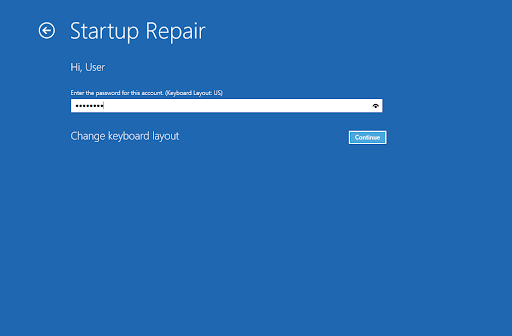
- 6️⃣ Windows will scan your system and attempt to repair any detected issues.
🛠️ If the repair is successful, restart your PC and try running SFC or DISM again. If the issue persists, proceed to the next method. 🔄
Method 5: Reset or Refresh Windows 🔄
If the “Windows Resource Protection could not perform the requested operation” error persists after trying all previous solutions, you may need to reset Windows. This will restore your computer to factory default settings, resolving any software-related issues.
⚠️ Important:
- Back up your personal files before proceeding.
- Any installed apps will be removed, requiring reinstallation later.
Steps to Reset Windows
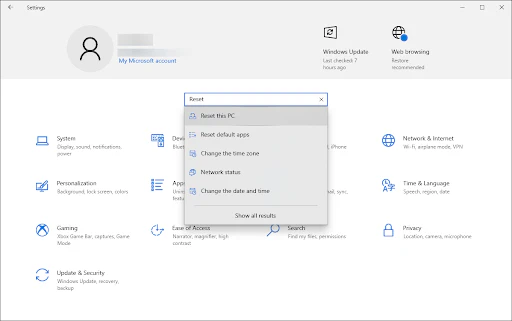
- 1️⃣ Open Settings by clicking the Start menu or pressing Windows + I.
- 2️⃣ In the search bar, type “Reset”, then select Reset this PC.
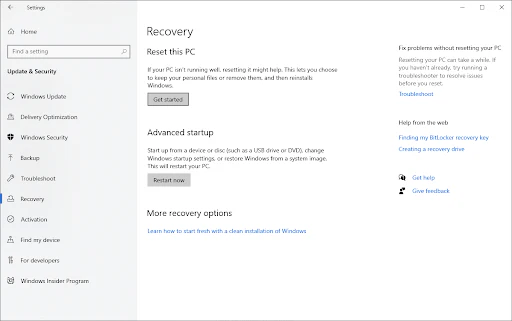
Alternatively, go to Update & Security > Recovery.
- 3️⃣ Click Get started under the Reset this PC section.
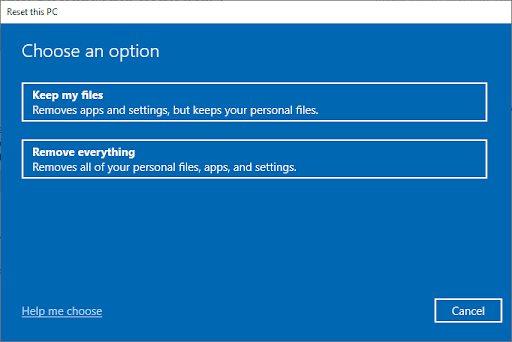
- 4️⃣ Choose one of the two options:
- Keep my files → Removes apps & settings but keeps personal files.
- Remove everything → Wipes everything, including personal files.
- Keep my files → Removes apps & settings but keeps personal files.
- 5️⃣ Follow the on-screen instructions and wait for Windows to complete the reset.
🔹 Need a fresh installation? Check out our Windows installation guide for detailed steps on reinstalling Windows from a bootable USB!
👉 If you purchased Windows from EcomKeys, we provide free installation assistance to ensure a smooth setup! 🎯
Conclusion ✅
If you’re facing the “Windows Resource Protection could not perform the requested operation” error, don’t worry! There are multiple ways to fix it:
🔹 Start by running the System File Checker (SFC) and DISM tool to repair corrupted files.
🔹 If the issue persists, try checking your disk (chkdsk), enabling the Windows Modules Installer, or running Startup Repair.
🔹 As a last resort, you may need to reset or refresh Windows to restore system stability.
For more helpful troubleshooting tips and software guides, check out our other blog articles! Thanks for reading, and we hope this guide helped you resolve your issue! 🚀🔧
One more thing
If you’re in search of a software company that embodies integrity and upholds honest business practices, your quest ends here at Ecomkeys.com. As a Microsoft Certified Partner, we prioritize the trust and satisfaction of our customers. Our commitment to delivering reliable software products is unwavering, and our dedication to your experience extends far beyond the point of sale. At Ecomkeys.com, we provide a comprehensive 360-degree support system that accompanies you throughout your software journey. Your trust is our foundation, and we’re here to ensure that every interaction with us is a positive and trustworthy one.