Are you trying to run the System File Checker (SFC /SCANNOW) but encountering the dreaded “Windows Resource Protection could not start the repair service” error message? Don’t worry—you’ll find the solution here!
The System File Checker (SFC) is a powerful built-in Windows tool trusted by millions to repair missing or corrupted system files. It automatically scans, detects, and fixes issues affecting your computer’s stability. But what happens when the very tool meant to fix your system runs into an error itself?
Many users have reported that when they attempt to execute the “sfc /scannow” command, they get an error instead:
✅ “Windows Resource Protection could not start the repair service.”
Fortunately, there are several effective solutions to fix this error and successfully run the System File Checker (SFC) on your Windows PC. Keep reading to learn how to resolve this issue and restore your system’s functionality!
Why Is the SFC Scan Not Working?
The System File Checker (SFC) scan may fail to run due to issues with the TrustedInstaller service, also known as the Windows Modules Installer. This essential service allows Windows to install, modify, and remove system applications while also protecting critical system files from unauthorized changes.
Since TrustedInstaller has full control over Windows Resource Protection (WRP) files and registry keys, the SFC scan depends on it to function correctly. When you run the “sfc /scannow” command, the TrustedInstaller service is supposed to start on-demand. However, if this service is disabled or malfunctioning, the SFC scan won’t be able to restore missing or corrupted WRP files.
This issue is most commonly reported on Windows 7, but it can also occur on Windows 8 and the latest Windows 10. Fortunately, there are solutions available to restore the SFC scan functionality and repair your system files effectively. Keep reading to find out how!
How to Fix “SFC /SCANNOW” Not Working – Windows Resource Protection Could Not Start the Repair Service
If you’re unable to run the System File Checker (SFC) scan to repair corrupted or missing system files, don’t worry. There are multiple solutions to fix the “Windows Resource Protection could not start the repair service” error and get your system working again.
Method 1: Start the Windows Modules Installer (TrustedInstaller Service)
The Windows Modules Installer (TrustedInstaller) is essential for running the SFC scan. If this service is disabled, the SFC tool won’t function properly. You can manually start and configure it to ensure it runs when needed.
Follow these steps to enable and start the TrustedInstaller service:
- 1️⃣ Press
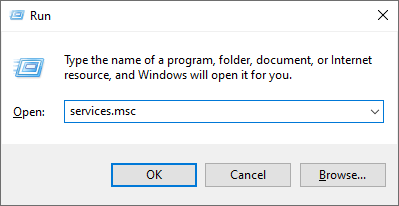
Windows + Ron your keyboard to open the Run utility. - 2️⃣ Type
services.mscand click OK to launch the Services window. (It may take a few seconds to load.)
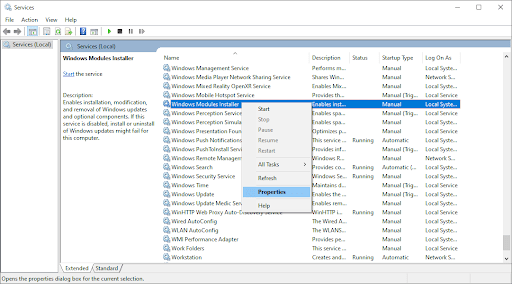
- 3️⃣ Find Windows Modules Installer in the list.
- 4️⃣ Right-click on it and select Properties.
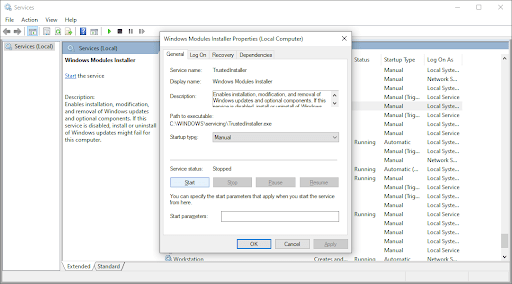
- 5️⃣ Set the Startup type to Manual.
- 6️⃣ If the service isn’t running, click the Start button.
- 7️⃣ Click Apply, then OK to save the changes.
Now, close the Services window and try running the “sfc /scannow” command again. If the scan still doesn’t work, proceed to the next solution.
Method 2: Use Command Prompt to Enable TrustedInstaller
If you’re unable to start the Windows Modules Installer (TrustedInstaller) through the Services Manager, you can achieve the same result using the Command Prompt. This method requires administrator privileges to modify system settings.
Follow these steps to enable TrustedInstaller using Command Prompt:
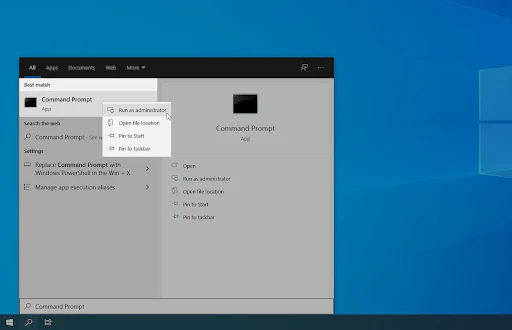
- 1️⃣ Open the Windows Search Bar by clicking on the magnifying glass icon in the taskbar or pressing
Windows + S. - 2️⃣ Type
cmdor Command Prompt in the search bar. - 3️⃣ Right-click on Command Prompt and select Run as Administrator.

- 4️⃣ Click Yes when prompted by User Account Control (UAC) to grant admin permissions.
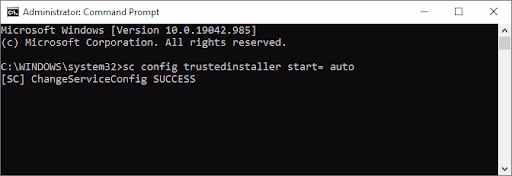
- 5️⃣ In the Command Prompt window, type the following command and press Enter:
sc config trustedinstaller start= autoIf successful, you should see a SUCCESS message confirming the change.
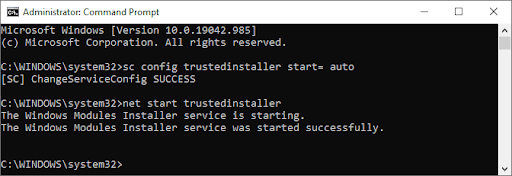
- 6️⃣ Next, type the following command and press Enter:
net start trustedinstallerThis will manually start the Windows Modules Installer service.
- 7️⃣ Now, try running the “sfc /scannow” command again to check if the issue is resolved.
If the scan still doesn’t work, proceed to the next method for further troubleshooting.
Method 3: Run System File Checker in Safe Mode
If background applications or services are interfering with the System File Checker (SFC scan), running it in Safe Mode can help. Safe Mode starts Windows with only the essential system components, eliminating potential conflicts.
Follow these steps to boot into Safe Mode and run SFC:
- 1️⃣ Press
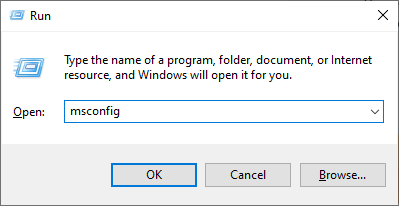
Windows + Rto open the Run utility. - 2️⃣ Type
msconfigand press Enter to launch the System Configuration window.
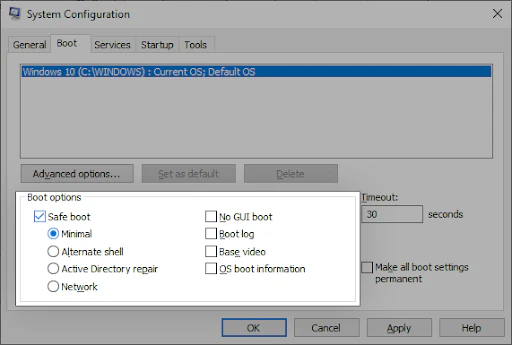
- 3️⃣ Switch to the Boot tab and under Boot options, check the Safe boot box.
- 4️⃣ Make sure the Minimal option is selected, then click OK.
- 5️⃣ Restart your computer—it will boot into Safe Mode automatically.
- 6️⃣ Once your system is in Safe Mode, open Command Prompt as an administrator (refer to Method 2).
- 7️⃣ Run the following command:
sfc /scannow- 8️⃣ Wait for the scan to complete and check if the issue is resolved.
If the SFC scan still doesn’t work, try another solution from the list!
Method 4: Run the DISM Command to Fix System Issues
If the System File Checker (SFC scan) isn’t working, you can try using the Deployment Image Servicing and Management (DISM) tool. This command repairs the Windows system image, which may resolve the “Windows Resource Protection could not start the repair service” error.
Follow these steps to run the DISM command:
- 1️⃣ Open the Windows Search Bar by clicking on the magnifying glass icon or pressing
Windows + S. - 2️⃣ Type
cmdor Command Prompt in the search bar. - 3️⃣ Right-click on Command Prompt and select Run as Administrator.
- 4️⃣ Click Yes if prompted by User Account Control (UAC).
- 5️⃣ Type the following command and press Enter:
DISM /Online /Cleanup-Image /RestoreHealth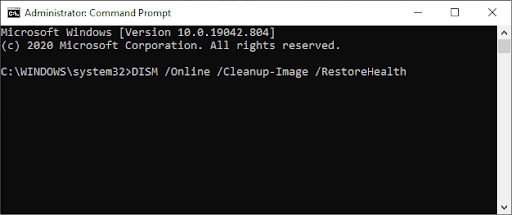
- 6️⃣ Wait for the scan to complete—this process may take several minutes.
- 7️⃣ Restart your computer once the scan is finished.
- 8️⃣ After rebooting, try running the “sfc /scannow” command again to check if the issue is resolved.
One more thing
If you’re in search of a software company that embodies integrity and upholds honest business practices, your quest ends here at Ecomkeys.com. As a Microsoft Certified Partner, we prioritize the trust and satisfaction of our customers. Our commitment to delivering reliable software products is unwavering, and our dedication to your experience extends far beyond the point of sale. At Ecomkeys.com, we provide a comprehensive 360-degree support system that accompanies you throughout your software journey. Your trust is our foundation, and we’re here to ensure that every interaction with us is a positive and trustworthy one.