Keeping your Windows 10 system updated is essential not only for accessing the latest features but also for strengthening your device’s security. Microsoft regularly rolls out updates to fix known vulnerabilities, enhance system performance, and provide critical patches that protect users from evolving cyber threats.
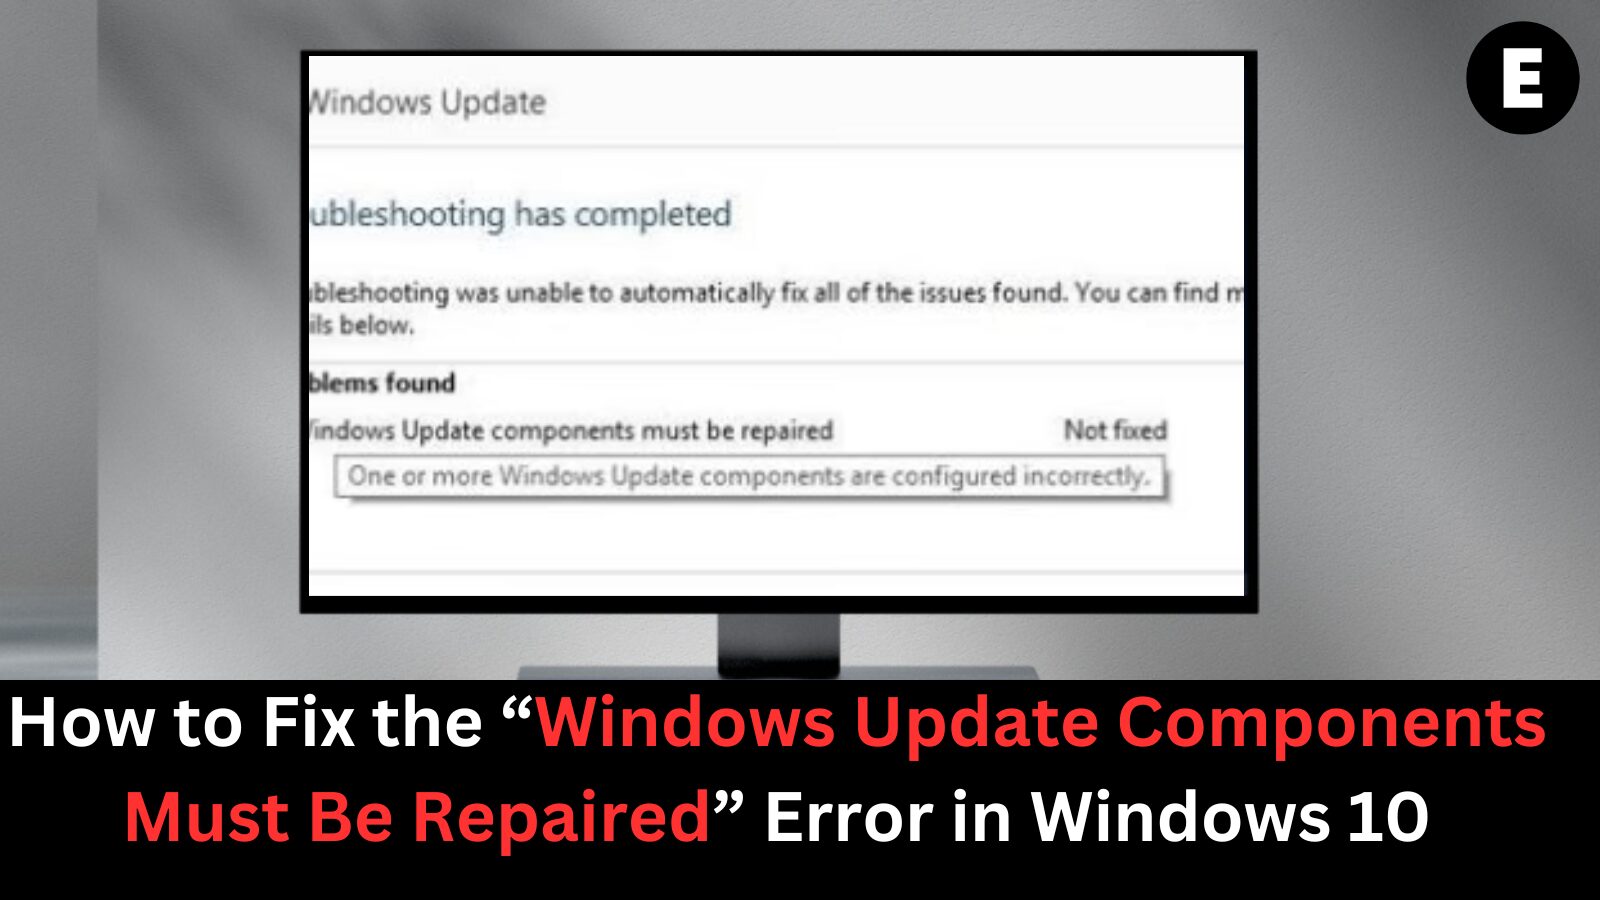
However, many users encounter issues during the update process. One particularly frustrating problem is the “Windows Update components must be repaired” error, which often appears after running the built-in Windows Update Troubleshooter. Despite its intended purpose of resolving update-related problems, the troubleshooter sometimes fails to fix the core issue—leaving users stuck and unsure of what to do next.
If you’re facing this error, don’t worry. In this guide, we’ll walk you through clear and effective steps to fix Windows Update components and restore normal functionality. Whether you’re a beginner or a tech-savvy user, these solutions are easy to follow and will help you get your system back on track quickly.
Stay tuned as we guide you through proven methods to resolve this issue and successfully update Windows 10 without interruptions.
What Causes the “Windows Update Components Must Be Repaired” Error?
Encountering the “Windows Update components must be repaired” error in Windows 10 can be frustrating, especially when you’re simply trying to keep your system up to date. Although Microsoft hasn’t identified a single cause, community feedback and expert insights point to several common triggers behind this issue.
- Corrupted or Damaged Windows Update Components
The most frequent cause is corruption within the Windows Update components themselves. This can happen due to abrupt shutdowns, malware infections, or failed updates. When these essential files become damaged, the system may be unable to proceed with updates, triggering the error. - Operating System Validation Failure
For updates to install properly, Windows must verify the legitimacy of your operating system. If your system can’t complete this validation—due to activation issues or licensing conflicts—the troubleshooter may flag the error instead of resolving it. - Insufficient Disk Space
Another common issue is low storage space. Windows 10 requires adequate free space to download and install updates. If your drive is full or nearing capacity, you may receive this error as the update process stalls. - Incorrect Date and Time Settings
Surprisingly, even incorrect date and time settings can interfere with the update process. If your device’s clock is significantly off, it may disrupt secure server communications required for Windows Update to function properly. - Conflicts with Third-Party Antivirus Software
Some third-party antivirus applications interfere with system processes, including Windows Update. Aggressive security settings or background monitoring can block necessary update files or network activity, leading to this error.
Understanding the root causes of the “Windows Update components must be repaired” error is the first step to solving it. In the following sections, we’ll guide you through actionable steps to reset update components, free up space, and resolve software conflicts—so you can get your system updated without hassle.
Fixing the “Windows Update Components Must Be Repaired” Error
If you’re seeing the “Windows Update components must be repaired” error after running the Update Troubleshooter, don’t worry—there are several proven solutions to help you get back on track. Below is a step-by-step guide designed to fix this issue and restore proper functionality to your Windows Update service.
Solution 1: Boot Windows 10 in Safe Mode
Booting your system into Safe Mode is a great way to determine if a third-party application or background process is interfering with Windows Update. In Safe Mode, Windows only loads essential drivers and services, helping isolate potential causes of the error.
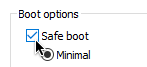
Here’s how to boot into Safe Mode in Windows 10:
- Press Windows + R on your keyboard to open the Run dialog box.
2. Type msconfig and press Enter. This opens the System Configuration window.

3. Navigate to the Boot tab at the top.

4. Under Boot options, check the box for Safe boot, and leave it on Minimal.
5. Click OK and restart your computer.
Your system will now start in Safe Mode. Once you’re in Safe Mode, try running Windows Update again to see if the error persists. If the update process succeeds, it’s likely that a third-party app or service was causing the issue.
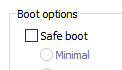
To return to normal mode:
- Repeat steps 1 and 2 to open msconfig again.
- Go to the Boot tab and uncheck Safe boot.
- Click OK and restart your PC normally.
Solution 2: Manually Reset Windows Update Components in Windows 10
If booting into Safe Mode didn’t solve the “Windows Update components must be repaired” error, your next step should be to manually reset the Windows Update components. This process clears out corrupted update data and refreshes key services that are responsible for downloading and installing updates.
Follow these detailed steps carefully:
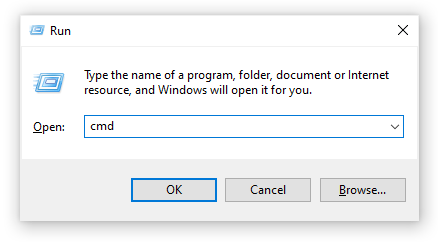
Step 1: Open Command Prompt as Administrator
- Press Windows + R to open the Run dialog box.
- Type cmd, then press Ctrl + Shift + Enter to launch Command Prompt with administrator rights.
Step 2: Stop Windows Update Services
You need to stop several services before resetting the update components. In the Command Prompt, type each of the following commands one by one, then press Enter after each:
net stop bits
net stop wuauserv
net stop appidsvc
net stop cryptsvc
These commands stop the Background Intelligent Transfer Service (BITS), Windows Update, and related services.
Step 3: Delete Corrupted Download Cache Files
Next, remove potentially corrupted cache files that can cause update errors:
Del "%ALLUSERSPROFILE%\Application Data\Microsoft\Network\Downloader\qmgr*.dat"
Step 4: Rename Update Storage Folders
This step creates backups of Windows update folders, allowing Windows to create fresh versions:
Ren %systemroot%\SoftwareDistribution SoftwareDistribution.bak
Ren %systemroot%\system32\catroot2 catroot2.bak
Step 5: Reset BITS & Windows Update Permissions
Now, reset the security descriptors for the Windows Update and BITS services:
sc.exe sdset bits D:(A;;CCLCSWRPWPDTLOCRRC;;;SY)(A;;CCDCLCSWRPWPDTLOCRSDRCWDWO;;;BA)(A;;CCLCSWLOCRRC;;;AU)(A;;CCLCSWRPWPDTLOCRRC;;;PU)
sc.exe sdset wuauserv D:(A;;CCLCSWRPWPDTLOCRRC;;;SY)(A;;CCDCLCSWRPWPDTLOCRSDRCWDWO;;;BA)(A;;CCLCSWLOCRRC;;;AU)(A;;CCLCSWRPWPDTLOCRRC;;;PU)
Step 6: Re-register Key Update Files
Now move into the System32 directory:
cd /d %windir%\system32
You’ll now need to re-register a list of essential Windows Update DLL files. Input the following commands one at a time, and press Enter each time :
regsvr32.exe atl.dll
regsvr32.exe urlmon.dll
regsvr32.exe mshtml.dll
regsvr32.exe shdocvw.dll
regsvr32.exe browseui.dll
regsvr32.exe jscript.dll
regsvr32.exe vbscript.dll
regsvr32.exe scrrun.dll
regsvr32.exe msxml.dll
regsvr32.exe msxml3.dll
regsvr32.exe msxml6.dll
regsvr32.exe actxprxy.dll
regsvr32.exe softpub.dll
regsvr32.exe wintrust.dll
regsvr32.exe dssenh.dll
regsvr32.exe rsaenh.dll
regsvr32.exe gpkcsp.dll
regsvr32.exe sccbase.dll
regsvr32.exe slbcsp.dll
regsvr32.exe cryptdlg.dll
regsvr32.exe oleaut32.dll
regsvr32.exe ole32.dll
regsvr32.exe shell32.dll
regsvr32.exe initpki.dll
regsvr32.exe wuapi.dll
regsvr32.exe wuaueng.dll
regsvr32.exe wuaueng1.dll
regsvr32.exe wucltui.dll
regsvr32.exe wups.dll
regsvr32.exe wups2.dll
regsvr32.exe wuweb.dll
regsvr32.exe qmgr.dll
regsvr32.exe qmgrprxy.dll
regsvr32.exe wucltux.dll
regsvr32.exe muweb.dll
regsvr32.exe wuwebv.dll
Step 7: Restart the Services
Once everything has been reset, restart the Windows Update services using these commands:
net start bits
net start wuauserv
net start appidsvc
net start cryptsvc
Step 8: Reboot Your Computer
Finally, restart your PC to apply the changes. After rebooting, run Windows Update again to check if the issue is resolved.
Solution 3: Run a System File Checker (SFC) Scan
One of the most effective ways to fix the “Windows Update components must be repaired” error is by running a System File Checker (SFC) scan. This built-in Windows tool scans for and repairs corrupted or missing system files, which could be the root cause of the issue.
Follow the steps below to run the SFC scan on your Windows 10 system:
Step 1: Launch Command Prompt as Administrator
- Press Windows + R on your keyboard to open the Run dialog.
- Type cmd and press Ctrl + Shift + Enter to open Command Prompt with administrative privileges.
- If prompted by User Account Control, click Yes.
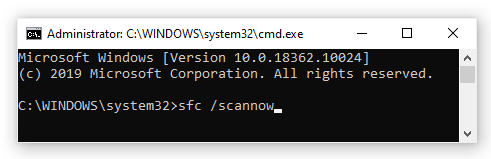
Step 2: Run the SFC Command
In the Command Prompt window, type the following command then hit Enter:
sfc /scannowThis will initiate a full system scan, checking for any corrupt or missing files in your Windows installation.
Step 3: Wait for the Scan to Complete
- The scanning process may take several minutes to finish.
- If the System File Checker finds any issues, it will attempt to fix them automatically.
- Do not close the window while the scanning is in progress.
Step 4: Review the Results
Once the scan is completed, you’ll see a message with one of the following outcomes:
- Windows Resource Protection did not find any integrity violations. (No issues detected)
- Windows Resource Protection found corrupt files and successfully repaired them.
- Windows Resource Protection found corrupt files but was unable to fix some of them.
If repairs were made, restart your PC and check whether the Windows Update error still occurs.
Solution 4: Repair Windows with the DISM Command
If the System File Checker (SFC) didn’t resolve the problem, you can take it a step further by using DISM (Deployment Imaging Service and Management Tool). This powerful command-line utility repairs issues with the Windows system image, which could be behind the “Windows Update components must be repaired” error.
Here’s how to run it:
Step 1: Open Command Prompt as Administrator
- Press Windows + R to open the Run dialog.
- Type cmd, then press Ctrl + Shift + Enter to launch Command Prompt with admin rights.
- Click Yes if prompted by the User Account Control.
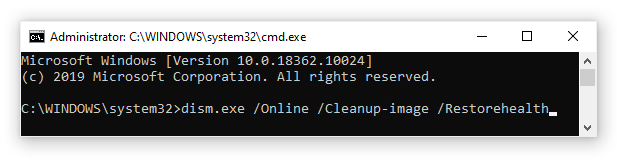
Step 2: Run the DISM RestoreHealth Command
Once Command Prompt is open, enter the following command and press Enter:
dism.exe /Online /Cleanup-image /RestorehealthThis command instructs Windows to scan for corruption in the system image and restore any damaged or missing files.
Step 3: Let the Process Complete
- The scan can take 10 to 30 minutes, depending on your system’s performance and configuration.
- Do not interrupt the process once it begins. Let DISM complete its job.
Step 4: Restart Your Computer
Once the DISM scan finishes successfully, restart your PC. After rebooting, try running Windows Update again to see if the issue is resolved.
Method 5: Free Up Space on Your System Drive (C:)
One often-overlooked cause of the “Windows Update components must be repaired” error is insufficient disk space on your system drive. Windows Update needs enough free space to download, install, and extract files. If your C: drive is low on space, updates can fail or get stuck.
Follow these steps to free up space and give your updates room to work:
Step 1: Use Windows Disk Cleanup
- Press Windows + S and type Disk Cleanup.
- Right-click on Disk Cleanup, then choose Run as administrator.
- Select C: drive (or your system drive), then click OK.
- Check the boxes next to the files you want to remove (e.g., Temporary files, Recycle Bin, Thumbnails).
- Click OK and confirm with Delete Files.
Step 2: Delete Unnecessary Programs or Files
- Go to Settings > Apps > Installed apps.
- Sort by size and remove programs you no longer use.
- Move large personal files (videos, photos, etc.) to an external drive or cloud storage.
Step 3: Empty the Recycle Bin
- Right-click on the Recycle Bin icon on your desktop.
- Select Empty Recycle Bin to permanently remove deleted files.
Step 4: Use Storage Sense
- Open Settings > System > Storage.
- Turn on Storage Sense to automatically free up space by deleting temporary files and old content from your Downloads folder.
Step 5: Restart and Try Updating Again
Once you’ve cleared up enough space, restart your PC and run Windows Update again. This should eliminate any space-related issues preventing your updates from installing.
Method 6: Set the Time Automatically
Incorrect date and time settings can interfere with Windows Update services and may result in the “Windows Update components must be repaired” error. Here’s how to set the time automatically:
Steps to Set Time Automatically in Windows 10:
- Press Windows + I to open the Settings app.

2. Go to Time & Language.

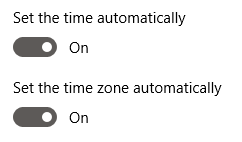
3. Under the Date & Time tab, toggle Set time automatically and Set time zone automatically to On.
4. Next, switch to the Region tab.

5. Make sure the correct country is selected under the Country or region dropdown menu.
Once done, restart your computer and try running Windows Update again.
Method 7: Temporarily Disable Your Antivirus Software
In some cases, third-party antivirus software can interfere with Windows Update components, blocking updates and causing the error to appear.
Steps to Temporarily Disable Antivirus:
- Locate the antivirus icon in your system tray (bottom-right corner of the screen).
- Right-click on it and look for options such as Disable protection, Turn off antivirus, or Pause protection.
- Choose the option to temporarily disable the antivirus (e.g., for 15 minutes or until restart).
- Once disabled, re-run Windows Update and check if the issue is resolved.
💡 Note: If you’re unsure how to disable your antivirus software, search “[Your antivirus name] disable temporarily” or check the official support page.
After updating, don’t forget to re-enable your antivirus protection to keep your system safe.
Final Thoughts
The “Windows Update components must be repaired” error in Windows 10 can be frustrating, but thankfully, it’s not impossible to fix. Whether the issue stems from corrupted system files, a lack of available disk space, incorrect settings, or third-party software interference—there’s a solution for each scenario.
By methodically working through the solutions we’ve outlined—from Safe Mode and resetting Windows Update components to running SFC/DISM scans and disabling your antivirus—you should be able to resolve the problem and get your system back on track.
Remember to always keep your system updated, maintain regular backups, and make sure your PC has sufficient storage and accurate settings to avoid similar issues in the future.
Still facing issues? Drop your questions in the comments—we’re here to help!
One more thing
If you’re in search of a software company that embodies integrity and upholds honest business practices, your quest ends here at Ecomkeys.com. As a Microsoft Certified Partner, we prioritize the trust and satisfaction of our customers. Our commitment to delivering reliable software products is unwavering, and our dedication to your experience extends far beyond the point of sale. At Ecomkeys.com, we provide a comprehensive 360-degree support system that accompanies you throughout your software journey. Your trust is our foundation, and we’re here to ensure that every interaction with us is a positive and trustworthy one.